Nas4free is available to download free of cost, however, now it known as XigmaNAS, thus we can get it from its official website.
Just like most of the Free NAS operating systems which are available free of cost to everyone, the Nas4free is too. We can download and install it on our old and new server or personal computer for creating a DIY NAS box. It is based on FreeBSD and after setup, we can access it through various network standard protocols FTP, SMB, NFS (network file system), TFTP, and AFP, SSH; running on any available operating systems such as Windows, macOS, Linux, FreeBSD and Android.
Other functions of the NAS operating system are:
Monitoring via SNMP and for hard disk drives and solid-state drives (SSDs) via SMART (Self-Monitoring, Analysis and Reporting Technology), automatic reports and alarm messages via email; Disk encryption with support for cryptographic hardware acceleration, 802.1q VLAN tagging; Wake On LAN (WOL), CARP (Common Address Redundancy Protocol), HAST (Highly Available Storage); iTunes / DAAP server, Simple Network Management Protocol (SNMP), syslog.
See Best available open-source NAS operating system.
The installation of the NAS4free is not very difficult and will show here a tutorial on it.
XigmaNAS Live CD: Download the NAS4Free ISO image here
It is particularly suitable for self-made NAS servers and offers the same range of functions as premium NAS server boxes such as Synology, Asustor, QNAP, WD Mycloud etc. However, the key difference between the open-source NAS server programs and the one which is proprietary available in premium network-attached storage boxes is the add-ons and ease of usage. Well, that doesn’t mean the open-source one is not up to the mark. Being free they are great.
Nas4free is available to download at Sourceforge, an opensource project hosting website, in the ISO file format, however, its official portal is XigmaNAS (Link).
Know more about XigmaNAS
As I told above in 2018, the XigmaNAS had updated the name of this free operating system. It is based on FreeBSD and was created from popular FreeNAS code (developed between 2005 and 2011). However, the FreeNAS project was acquired by the iXsystems in 2011 which sells and supports computing and storage products and services. Therefore, to develop NAs4free further, it needs the code of FreeNAS that was donated by Former founder of the FreeNAS project, Olivier Cochard-Labbé to this open-source NAS software developer team.
It is meant to support a wide range of old and new hardware architectures including virtual machine platforms such as VirtualBox, VMware, Hyper-V and more…
Furthermore, we can install it on any supported hardware as a full installation or as an embedded one. It is possible to boot it from a USB disk or CD. The size of its ISO file is just around 600MB. Because of a low size and less memory consumption, we can use a Pen drive or Memory card to install Nas4Free as an embedded system. This will not only consume less RAM but also free your system drives to use them for only one purpose that is storing data.
Let’s see the process of creating a bootable drive.
Create Nas4free / XigmaNAS bootable USB drive
As we know it is FreeBSD based thus, there are quite a good number of software available to create a Nas4free or XigmaNAS bootable drive.
If you are on Windows 10/7, use a simple portable tool known as Rufus. Whereas those are on Linux they can go for etcher or Unetbootin
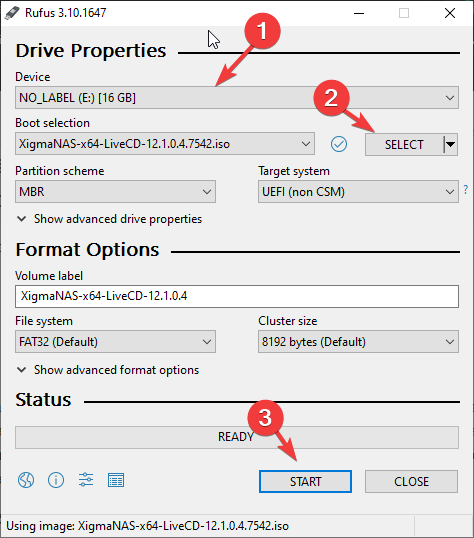
Here, I am using a Windows platform with Rufus to show you this process. I hope you would already have this Rufus or Unetbootin on your system along with downloaded NAS4Free/XigmaNAS ISO. Run any of them.
- Choose the attached USB drive that you want to create bootable.
- Click on the SELECT.
- File Explorer will open and select the download XigmaNAS-x64-LiveCD.ISO
- Hit the START button to initiate the process.
- Accept the warning “destroy the exiting the data of Pen drive by formatting it”.
- Wait for a few minutes, the NAS4Free bootable USB drive will be ready.
NAS4Free system hardware requirements
Due to its low system requirements, we can install it on a wide range of old and new hardware. Here is the minimum system requirement needed by this FreeBSD network attache storage system to be installed.
- At least 512MB of RAM
- A bootable CD-ROM Drive or USB drive with its ISO.
- One or more Hard Drives attached to the system for data storage
- For Embedded installation, we can use 2GB bootable USB drive while for Full setup get 4GB. But if you are planning to have Full Platform setup, it is recommended to select one of internal hard drive, so that in future there would not be any problem in additional software setup.
- For Virtualization setup, one can use VMware, KVM/QEMU, VirtualBox, Hyper-V or any other platforms.
Note – If you are planning it install on Hard drive remove the bootable USB you used for installation once it that completed.
Installation steps for VirtualBox or PC/Server
If we opt to perform a full installation, that will happen on a hard disk of the storage system. One of the biggest advantages of that is, we can install additional software packages later. Furthermore, the NAS would be able to use memory completely, available on the system.
Here are the steps to install XigmaNAS, the process would be the same for Virtualbox and bare-metal machine, however, the creation of a machine is the additional step in Virtualization.
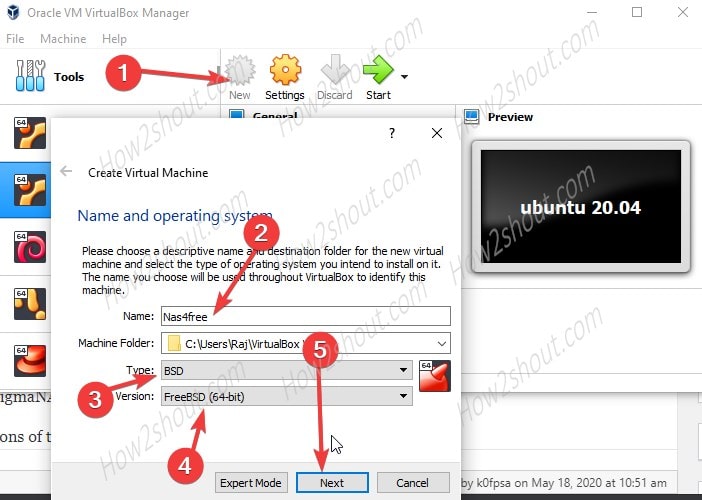
Step 1: Create a Virtual Machine for NAS4free
So, if you don’t want to use VirtualBox then you can directly follow Step 2.
Step 1: I hope you have downloaded the NAS4Free ISO file using the above-given link in this tutorial. Now, simply to create a VM for that run Virtual Box and click on the New button.
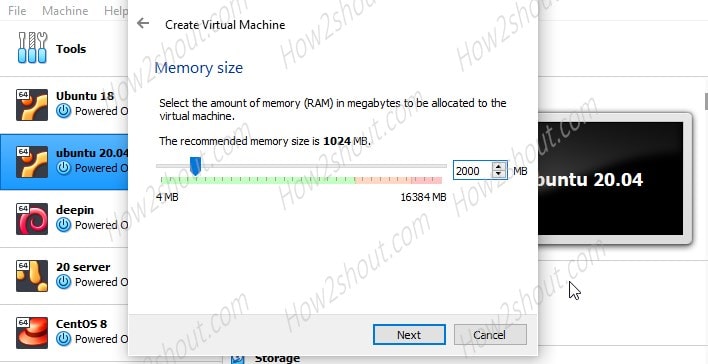
Step 2: The minimum RAM it needs 512MB, however, for best performance, I am here giving it 2GB.
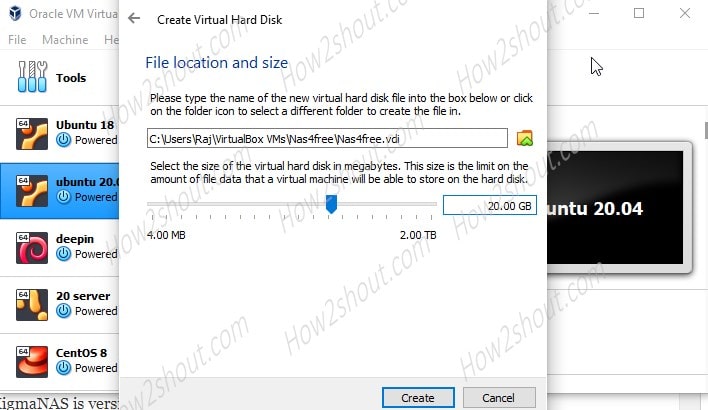
Step 3: Create Virtual Disk for the full installation of the XigmaNAS system.
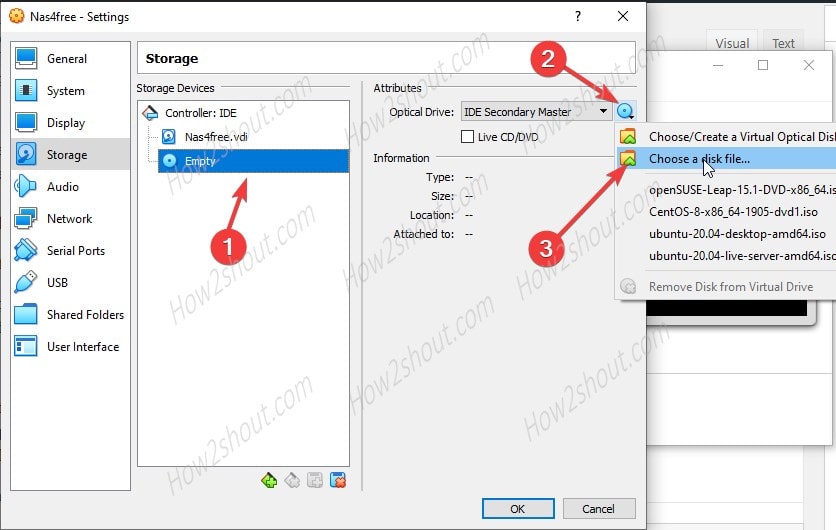
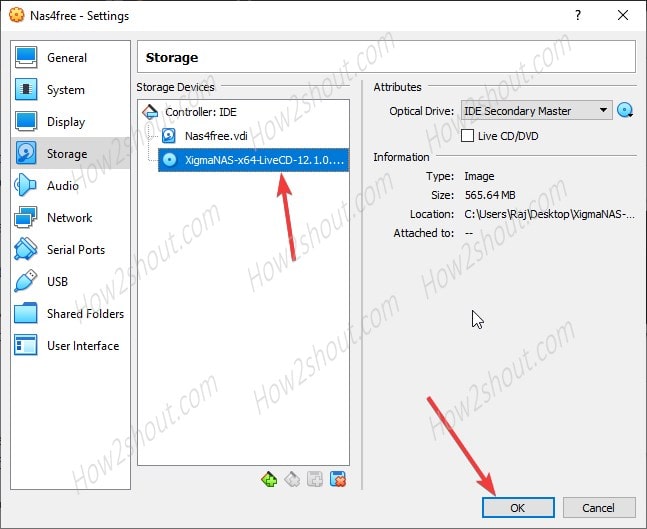
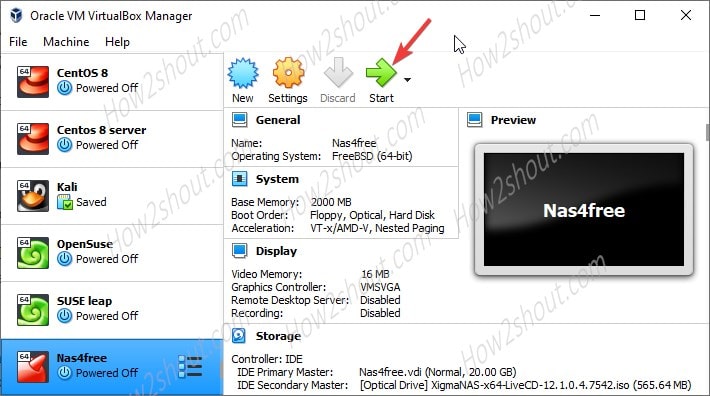
Step 4: Now, select the created VM and then select storage option from the right side. After that, select the empty DVD disc icon-> again on the one given under the Attributes-> click on Choose a disk file…
A file explorer will open and select the XigmaNAS ISO files and click on the OK.
Step 5: Select Bridge network from the Network settings of VirtualBox…
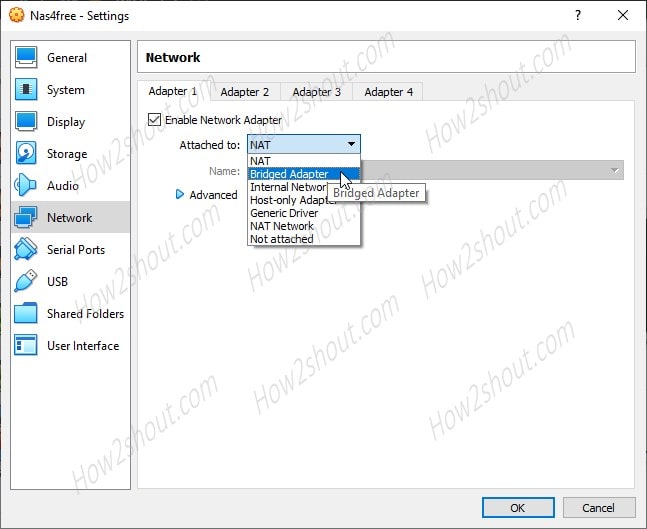
Finally, Start the Virtual Machine.
The steps from here will be the same for VirtualBox and PC. Thus, if you are using PC or Sever, then simply plug-in the bootable USB you have created at the beginning of this tutorial.
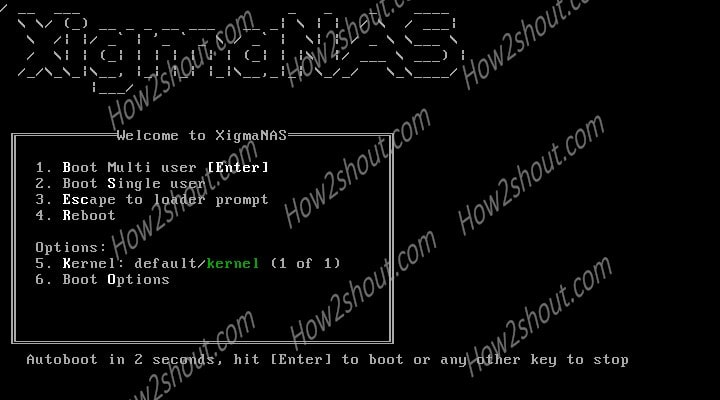
One the system get booted you will see the boot screen with various options, simply press the Enter button.
Step 3: Install or Upgrade from Live CD/Live USB
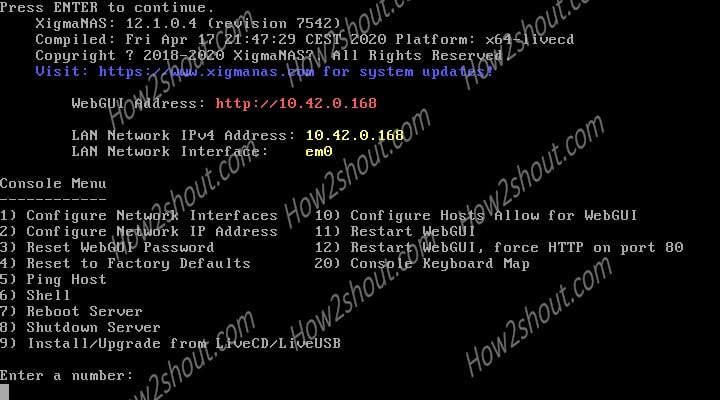
Once the system booted with the Live image, you will get various options. To install NAS4Free, select the 9th option given on your screen i.e Install or upgrade one. Just press the 9 numeric key on your Keyboard and follow the setup wizard.
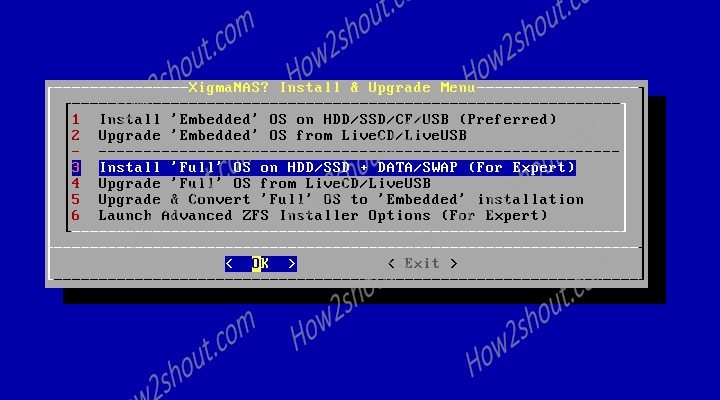
Step 4: Select Embedded or Full NAS platform install
Now, if you want to install it on Embedded installation on the same USB drive which you are using to install it, then select the 1st one. However, here we want the full installation of Nas4Free on our PC or VirtualBox VM’s hard drive. Thus, we are selecting the same.
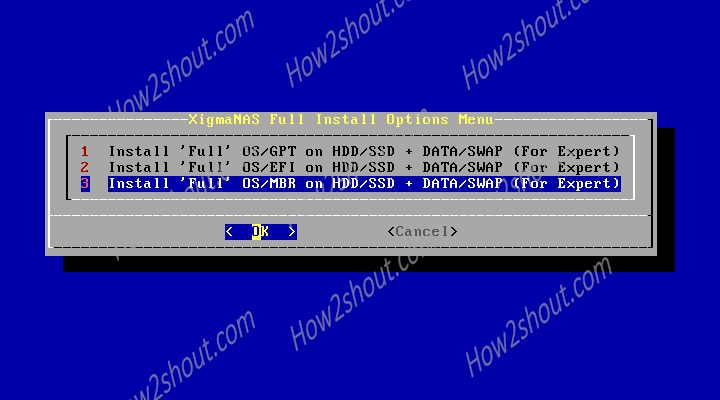
Step 5: Select the Filesystem
You can select the file system as per your HDD/SDD or requirements. Here I am going for MBR.
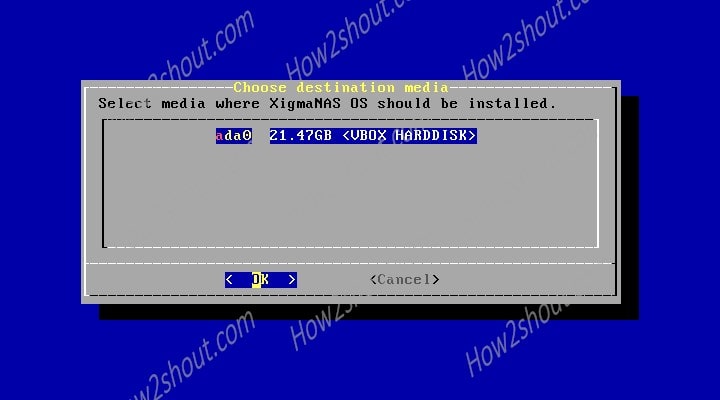
Step 6: Choose Destination media.
In this step, the wizard will give you the available drive where you can install the NAS base system. Thus, select that.
Step 7: XigmaNAS Full Installation
The setup will automatically, create all the partitions, it needs to set up the files.

Step 8: Reboot
The installation will take a minute or two. Thus, once that done. Remove the USB Drive (if you are installing the NAS OS on system hard drive) or the attached ISO from VirtualBox. And select the Restart or Reboot option.
The default for login to Console Menu is username= root and password= xigmanas
Step 9: Visit the Web GUI
The Ip address that you need to access the web interface of Nas4free will appear on your Console menu.
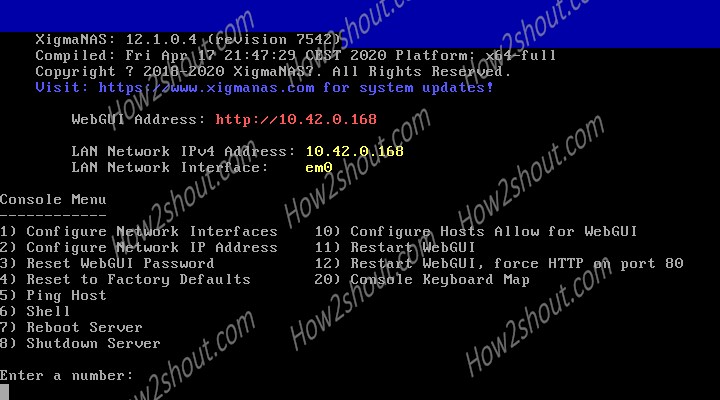
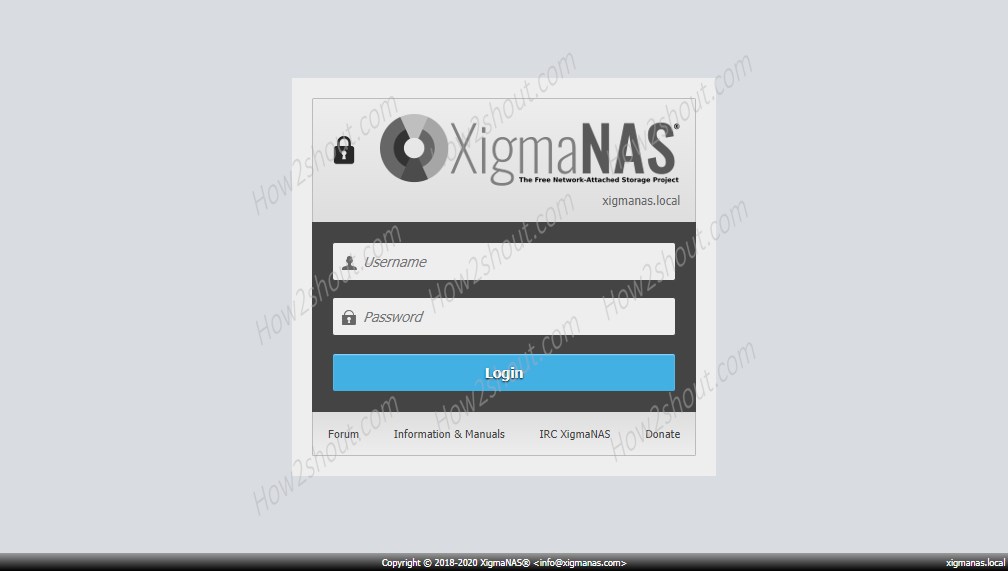
Type that in your browser and you will get the login screen.
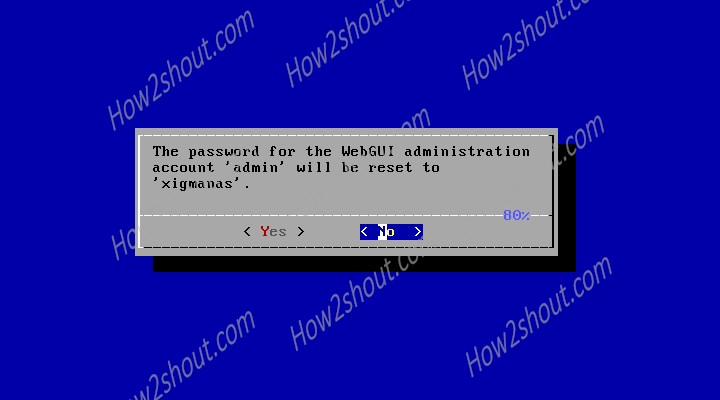
Reset XigmaNAS GUI password (optional)
By default, the web interface of the XigmaNAS uses username=admin and Password= xigmanas. If you have set something else then you can reset to default. Using the 3rd option given on Console Menu.
Select Yes.
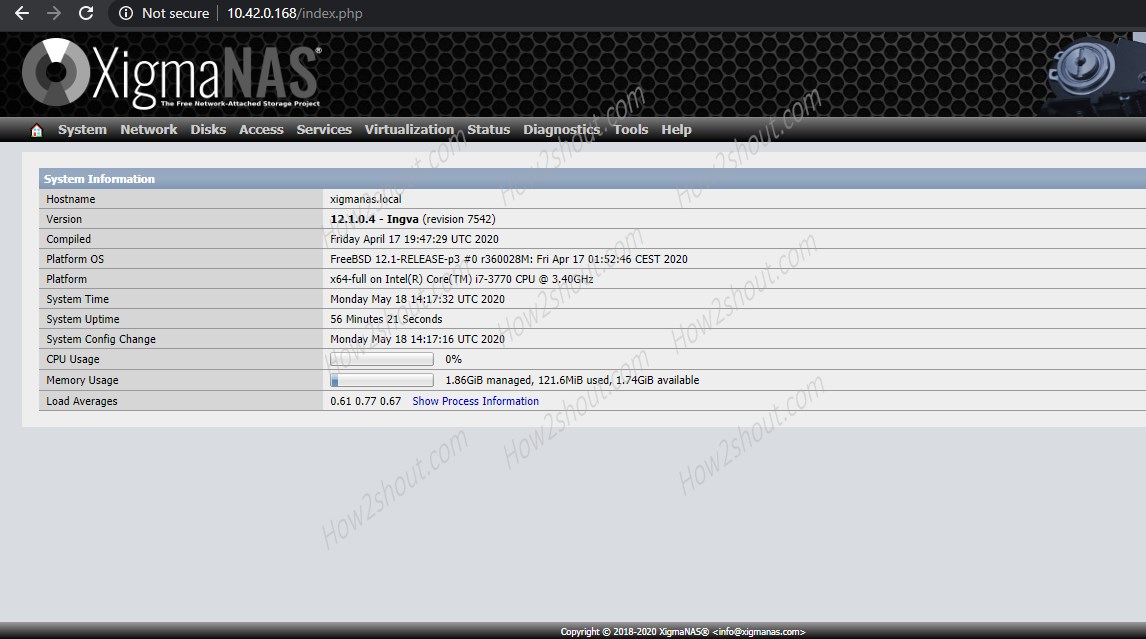
Step 10: Web interface to manage drives and other settings
So, finally, the web management interface is in front of you can start managing disk and other items.
Ending Notes:
Once you download NAS4free also known as XigmaNAS, the setup is very easy and smooth. It allows the sharing of hard disk space via a network with systems equipped with different operating systems such as Linux, Microsoft Windows or macOS. Numerous hardware architectures such as Intel, AMD or ARM processors are supported for the NAS. Compatible file systems include ZFS v5000, UFS, ext2, ext3, FAT or NTFS.
Software RAID is possible in level 0, level 1 and level 5. Services that can be implemented with XigmaNAS are FTP, SMB, NFS, TFTP, AFP, rsync, Unison, iSCSI, UPnP, BitTorrent and many more. All configurations are made via the graphical web interface.
If you are facing any problem, let’s know, the comment section is all yours.
Other Articles: