balenaEtcher also known as Etcher is a program to copy ISO files to USB sticks and SD cards to create bootable drives for various OS. It is a cross-platform tool that is available to download and install for Windows 7 or 10, macOS, and Linux (due to AppImage, it supports all most all mainstream Linux distros such as Ubuntu, CentOS, RHEL, and more).
The interface of the tool is very easy to understand and any inexperienced user who hasn’t used bootable USB drive creator earlier can also operate it. The language it uses is English.
balenaEtcher Ubuntu 20.04 Installation – Create bootable USB sticks and SD cards
The balenaEtcher installation is quick and easy. After the setup, the program can be run either from the Applications or using the command line interface, directly. The steps given here were carried out on the latest Ubuntu 20.04 LTS focal fossa, however, the users can use them on earlier versions such as Ubuntu 19.10/19.04, 18.10/18.04, 17.04/16.04 including Linux Mint, Zorin OS, Debian and Elementary OS.
Step 1: Open Command Terminal
Running the command terminal is very simple on Ubuntu, either uses the keyboard shortcut that is CTRL+ALT+T or visit the Application launcher and search Terminal.
Step 2: Add Etcher repository on Debian or Ubuntu
Here we are not using AppImage because the official repository of the balenaEtcher is available to add to our Debian-based Linux systems. Just copy and paste the below command:
curl -1sLf \
   'https://dl.cloudsmith.io/public/balena/etcher/setup.deb.sh' \
   | sudo -E bash
Step 3: Run the system update command
Well, everything we need to get the Etcher USB stick bootable tool is in its place, now, run the system update command so, that it could flush the APT cache and rebuild it again to recognize the added repo.
sudo apt update
Step 4: Install balenaEtcher on Ubuntu 20.04
Finally, run the command that will download and install the packages, we need to run this software
sudo apt install balena-etcher-electron
Step 5: How to use it on a system to create a bootable drive
As we know it is a cross-platform tool thus whatever steps we are going to show here will be common for all operating systems.
We can create a bootable USB stick in just a few steps:
- To flash a disk image, first, connect the pen drive to your system.
- Run balenaEtcher program.
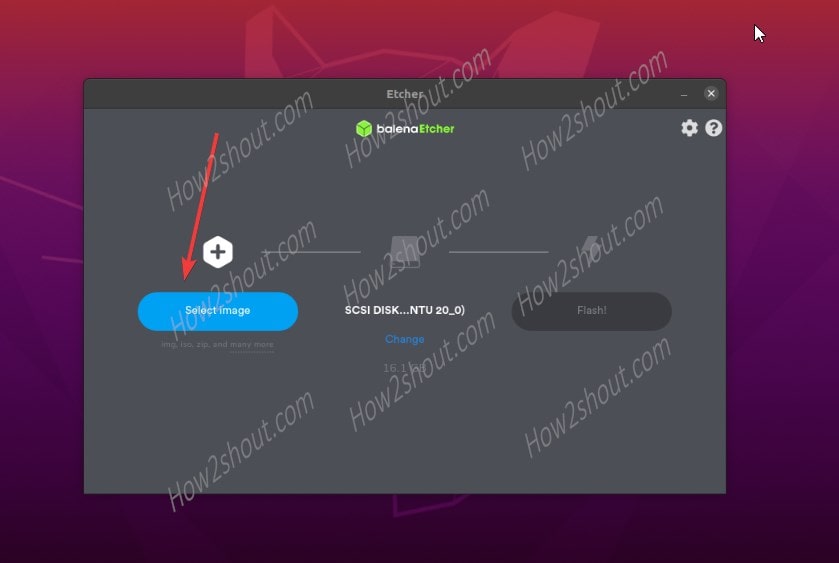
- Select the desired image file, which can be in IMG or ISO formats or as a compressed ZIP file.
- Now, select the USB stick, the external hard drive, or the memory card connected to your system. If you have only one connected device, the program will automatically select that. The internal hard drives installed on the system will now show on the Etcher software, hence, it prevents you from accidentally selecting the wrong drive and deleting it during the copying process.
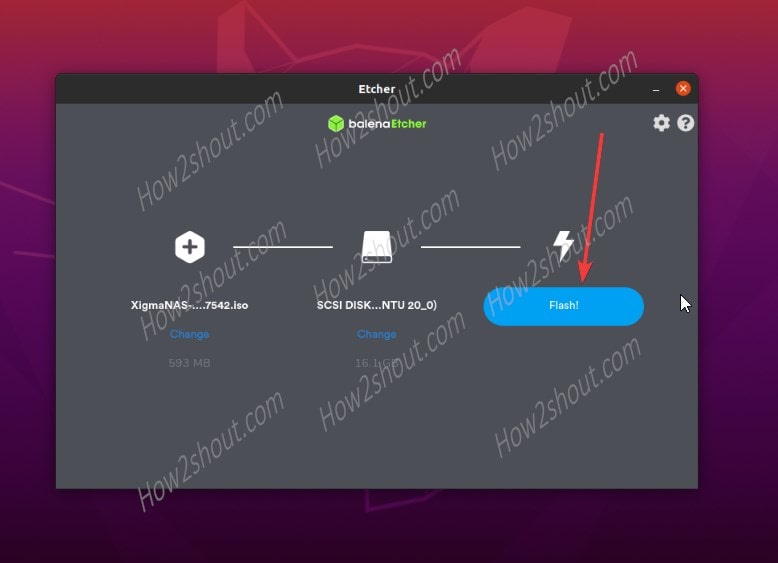
- In the third step, you start the flash process by clicking on the Flash button.
- BalenaEtcher then checks the copied data for errors and issues a message if necessary. In this way, you can be sure that the image has been transferred to the data carrier without errors.
Uninstall balenaEtcher from Ubuntu
In the future, if you don’t want to have this software anymore on your system then simply remove it using the below-given commands:
Remove the application:
sudo apt-get remove balena-etcher-electron
Delete Etcher Repository:
sudo rm /etc/apt/sources.list.d/balena-etcher.list
Refresh the APT cache:
sudo apt-get update
Other Articles:
- Install WoeUSB on Ubuntu 20.04 LTS
- Install Unetbootien on Ubuntu
- How to install XAMPP on Ubuntu 20.04 LTS


hi, many thanks, after try several ”how-to” and fail because they are outdated or not so clear, finally an updated and very useful manual !!