We already have created a tutorial in which we have shown the process of downloading and installing NAS4Freee or XigmaNAS on VirtualBox as well as PC. If you already have set up this Free NAS server on your system then next step would be the setting up of hard drives and creating a user to access the same. Thus, here are the steps for doing that.
How to setup Nas4Free Hard drives or Raid to access the content:
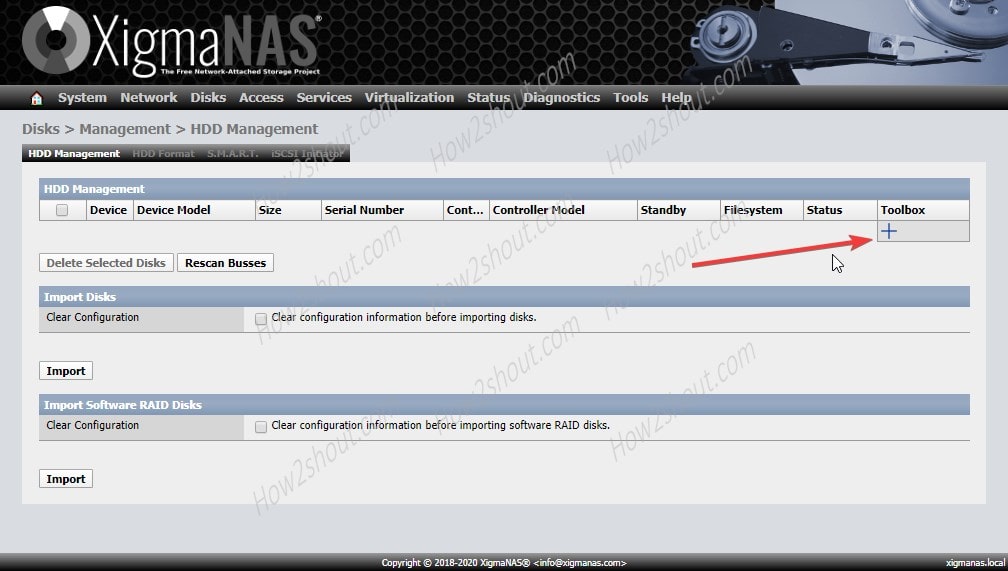
Step 1: Set up the hard drives. Click on Drives -> Management and then on “+” icon given under HDD Management “ToolBox” – afterwards the hard drives and the USB stick will be displayed.
Step 2: Select the one which you want to import. In the configuration menu, you can select the value “10 minutes” next to “Hard disk standby time” which is Auto by default, this is the time after which the hard disk automatically gets switched off.
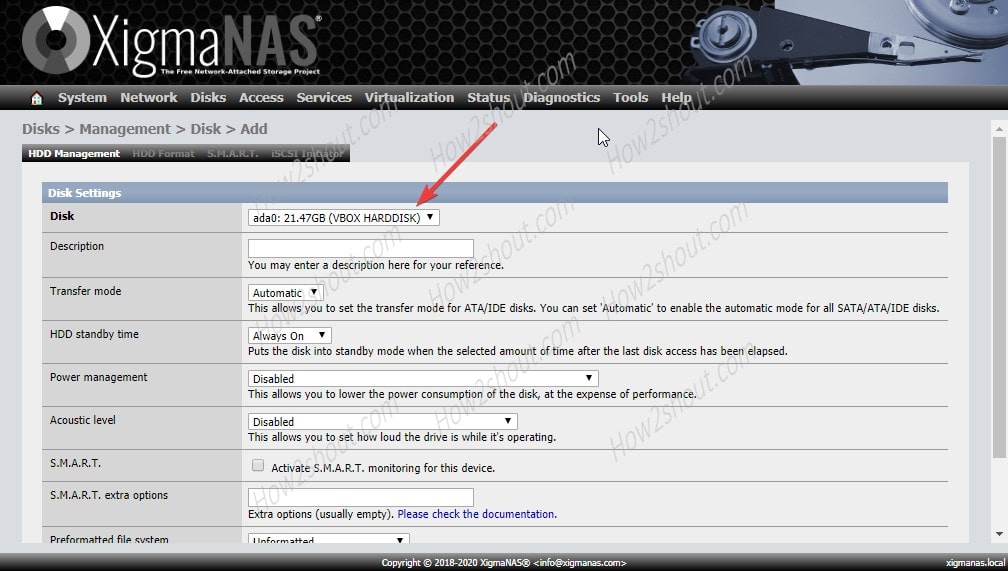
Step 3: Now activate “Activate SMART for this device” and click “Save“.
Step 4: Select a preformatted option. If you have multiple hard drives and want to enable the Raid, select the Software RAID, Otherwise, simply the filesystem you want to use for the NAS drives.
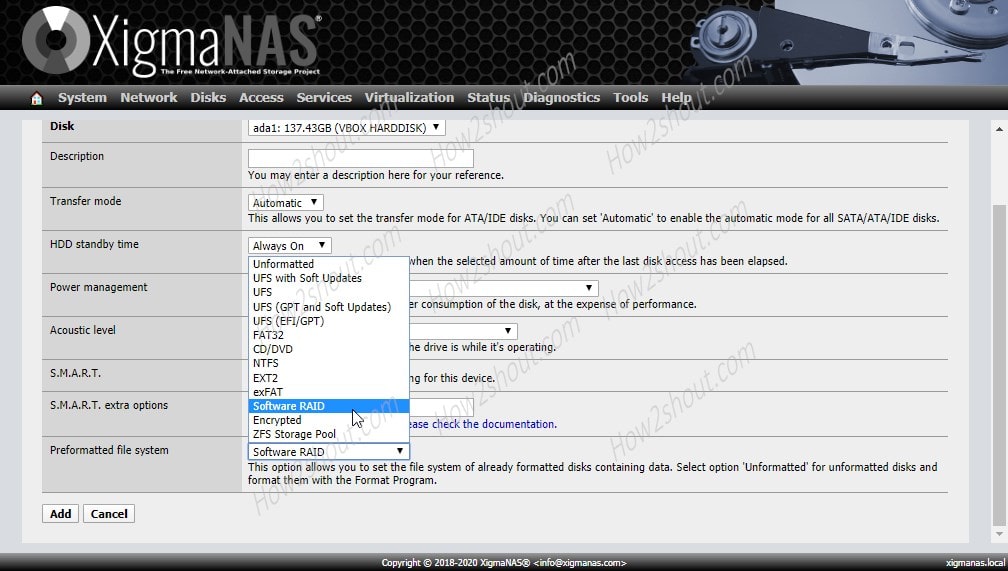
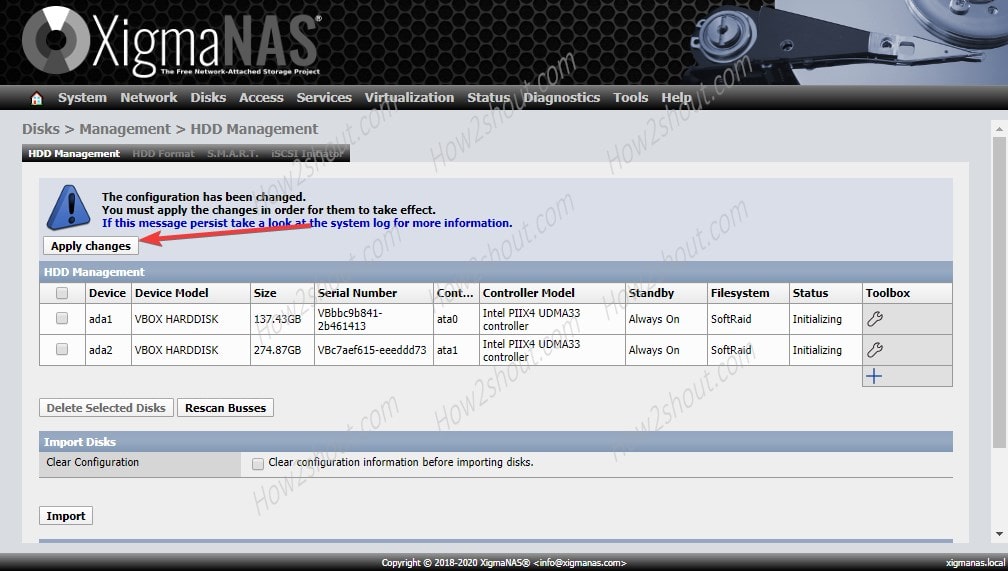
Step 5: Click on the Add button and back in the main menu, save the configuration by clicking on “Apply changes“. Configure the other connected hard drives in the same way.
Step 6: Next to create a RAID, again click on the Disks menu and select the Software Raid option.
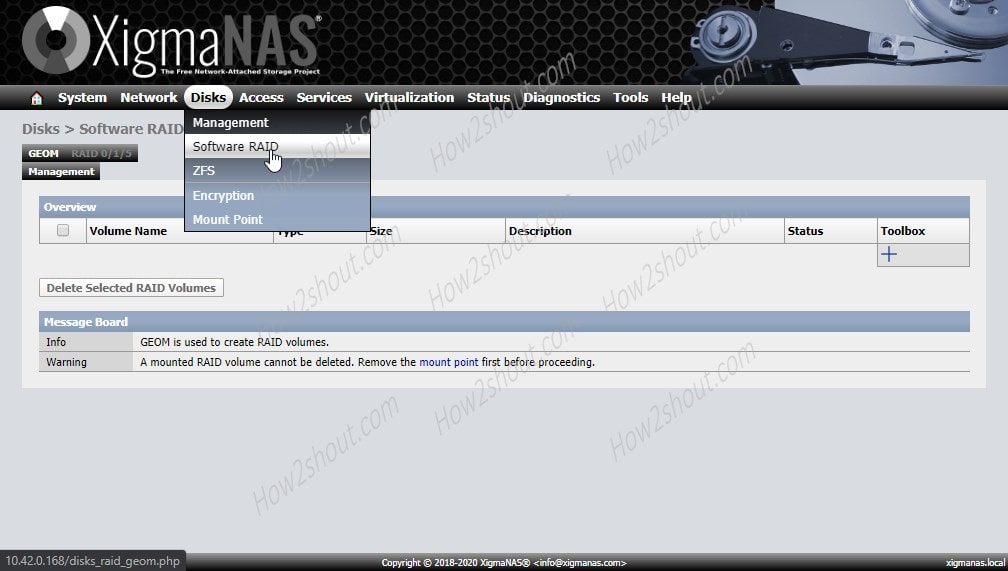
Step 7: Now, click on the “+’ icon to create a Raid disk configuration. Give Some name to it and select the “Create and Initialize RAID” option. After that select the drives you want to use in the RAID, here I have two drives, thus I am selecting the “RAID 1”.

Step 8: One the main window of HDD Management, the setup will ask you for applying the “Raid Configuration“, click on the “Apply Changes“. This will create RAID a XigmaNAS.
Step 9: Create a User
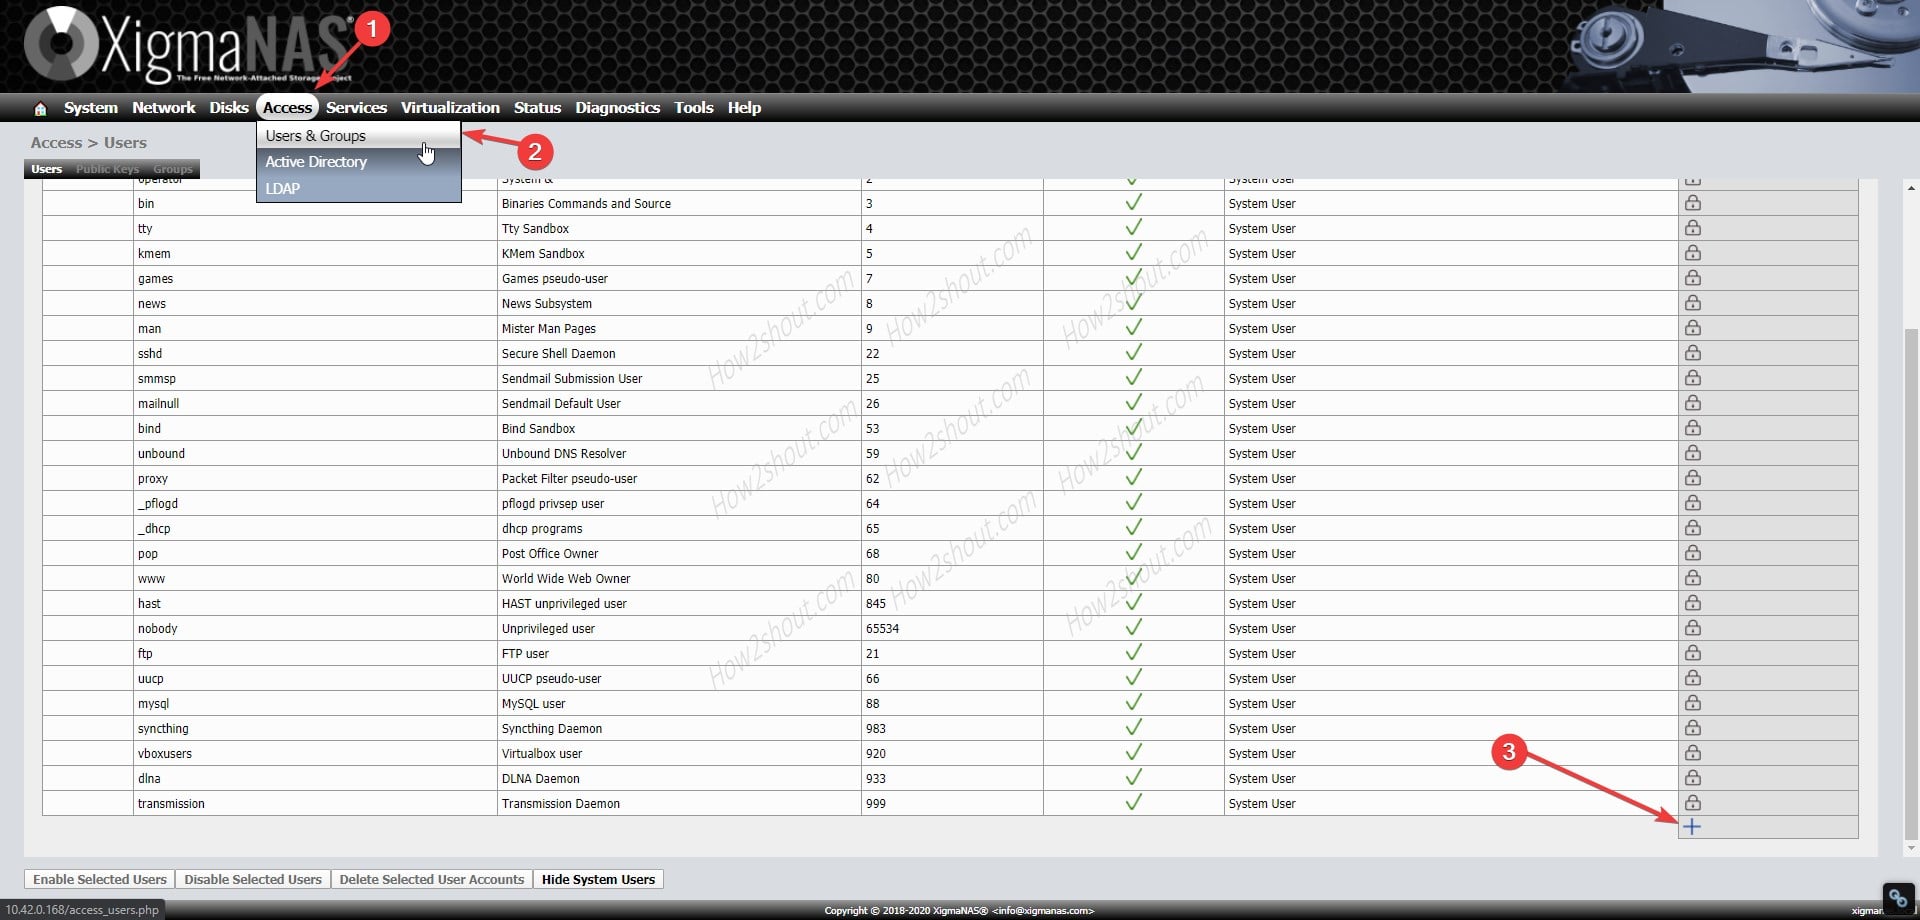
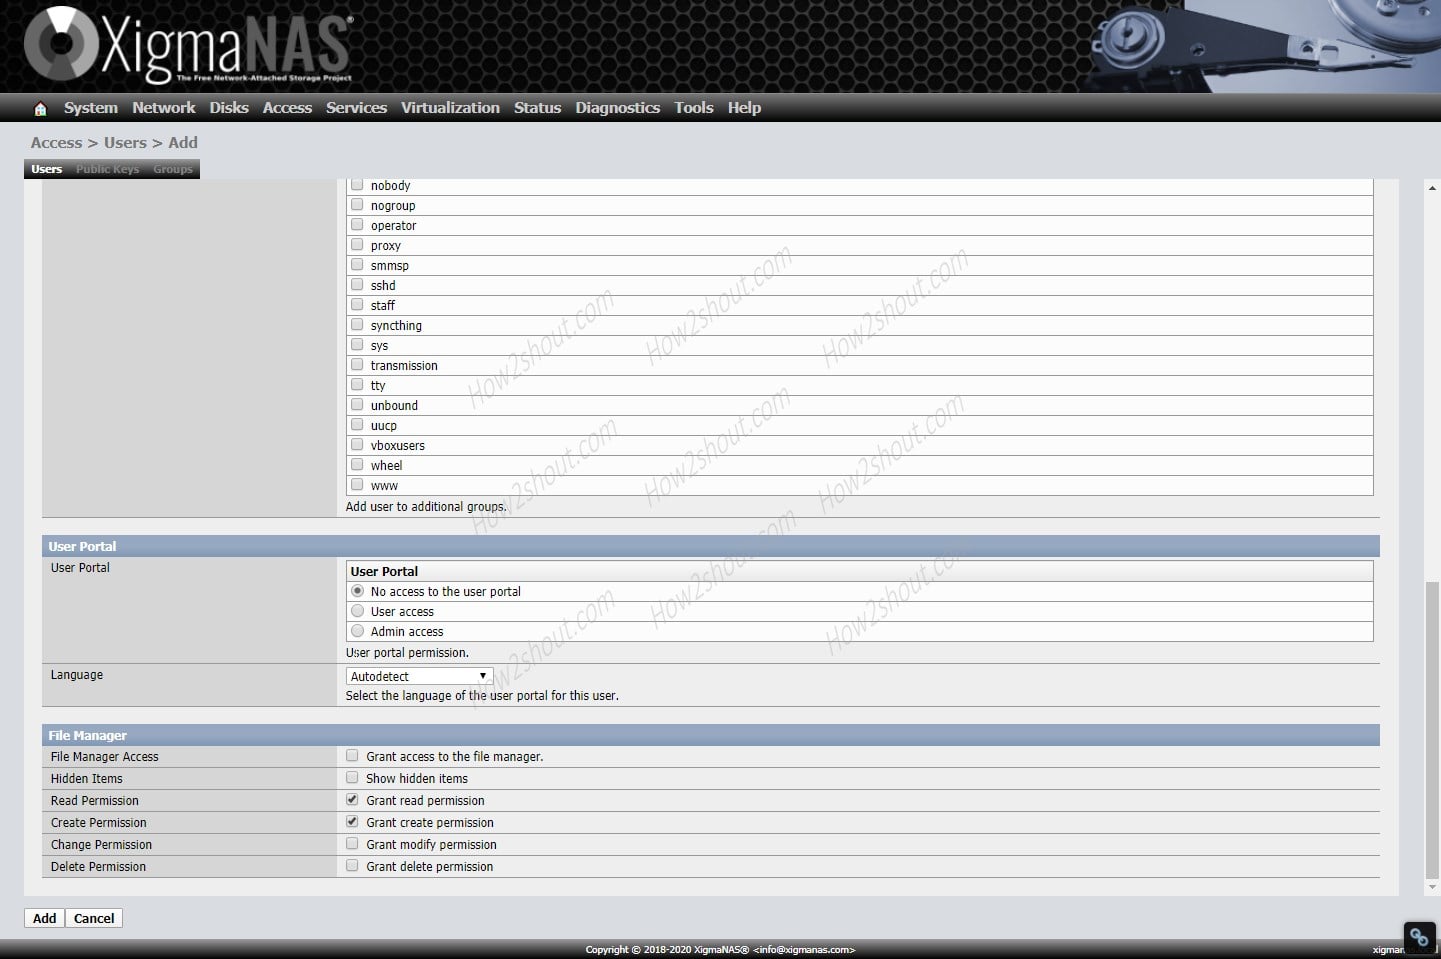
If you to give limited access to your NAS drives content, then you can create a new user. Click on the Access-> Users & Groups and then scroll down and again click on the plus sign given on the right bottom side.
Complete the lines “Name“, “Full Name” and “Password“. This we will use to log in and access drives on the network. Next to “Shell” choose the setting “sh”, if you also have access to the command line of NAS4Free.
For “Primary group” select “admin” and select for Global group select the one you want, for example, to give admin permissions select that or “guest” “ftp”, “sshd”, “transmission” and “wheel”, whatever.
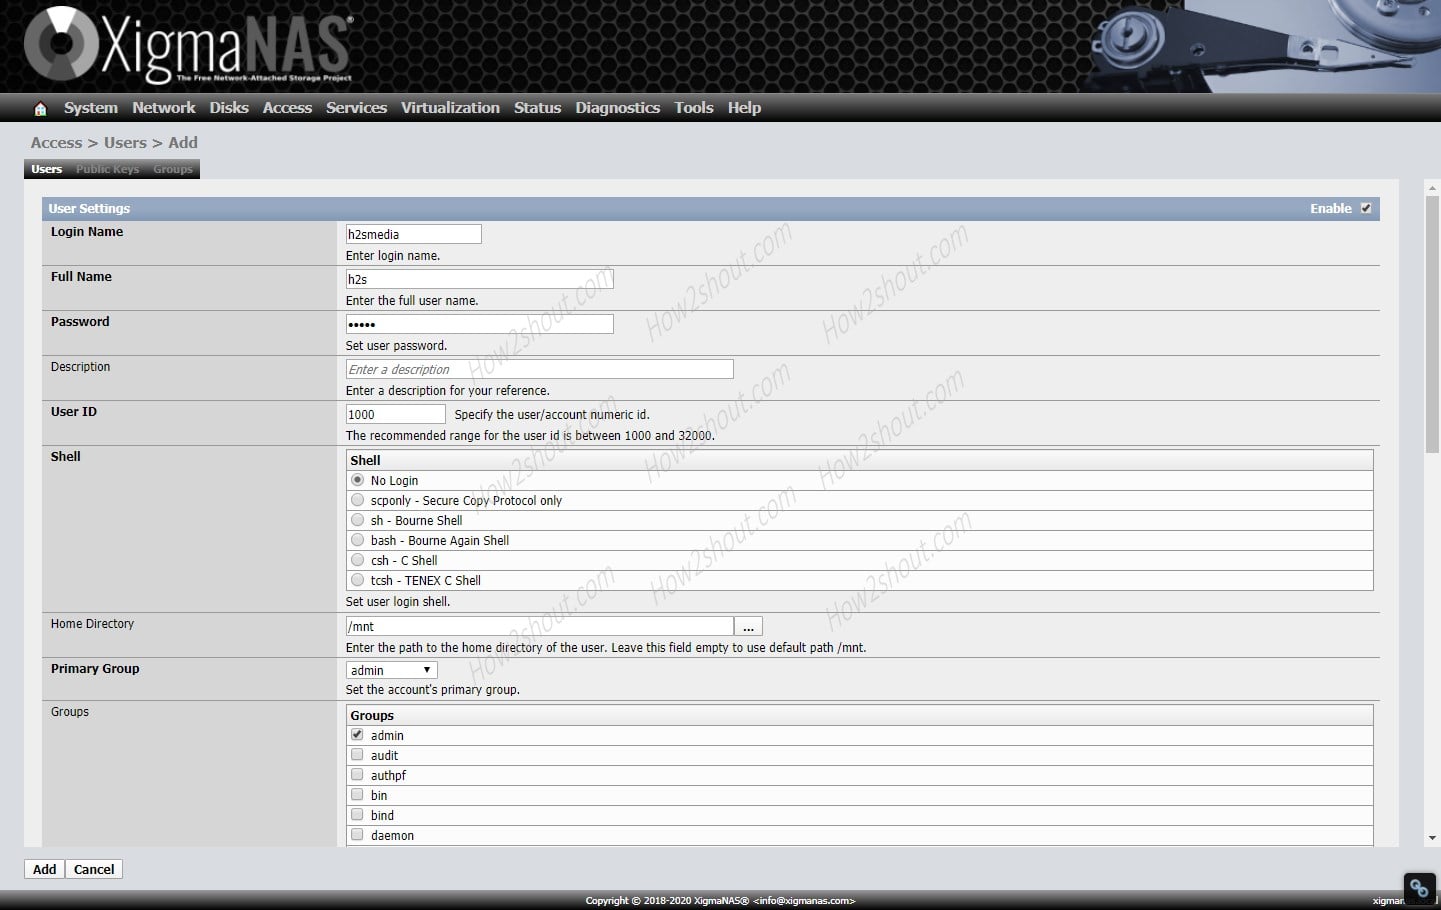
If you want to give NAs4free portal access then given that otherwise leave the default action i.e “No“.
Select Filemanager access. Here we are giving only read and write access to the drives.
Apply the settings with “Add” and “Apply changes“.
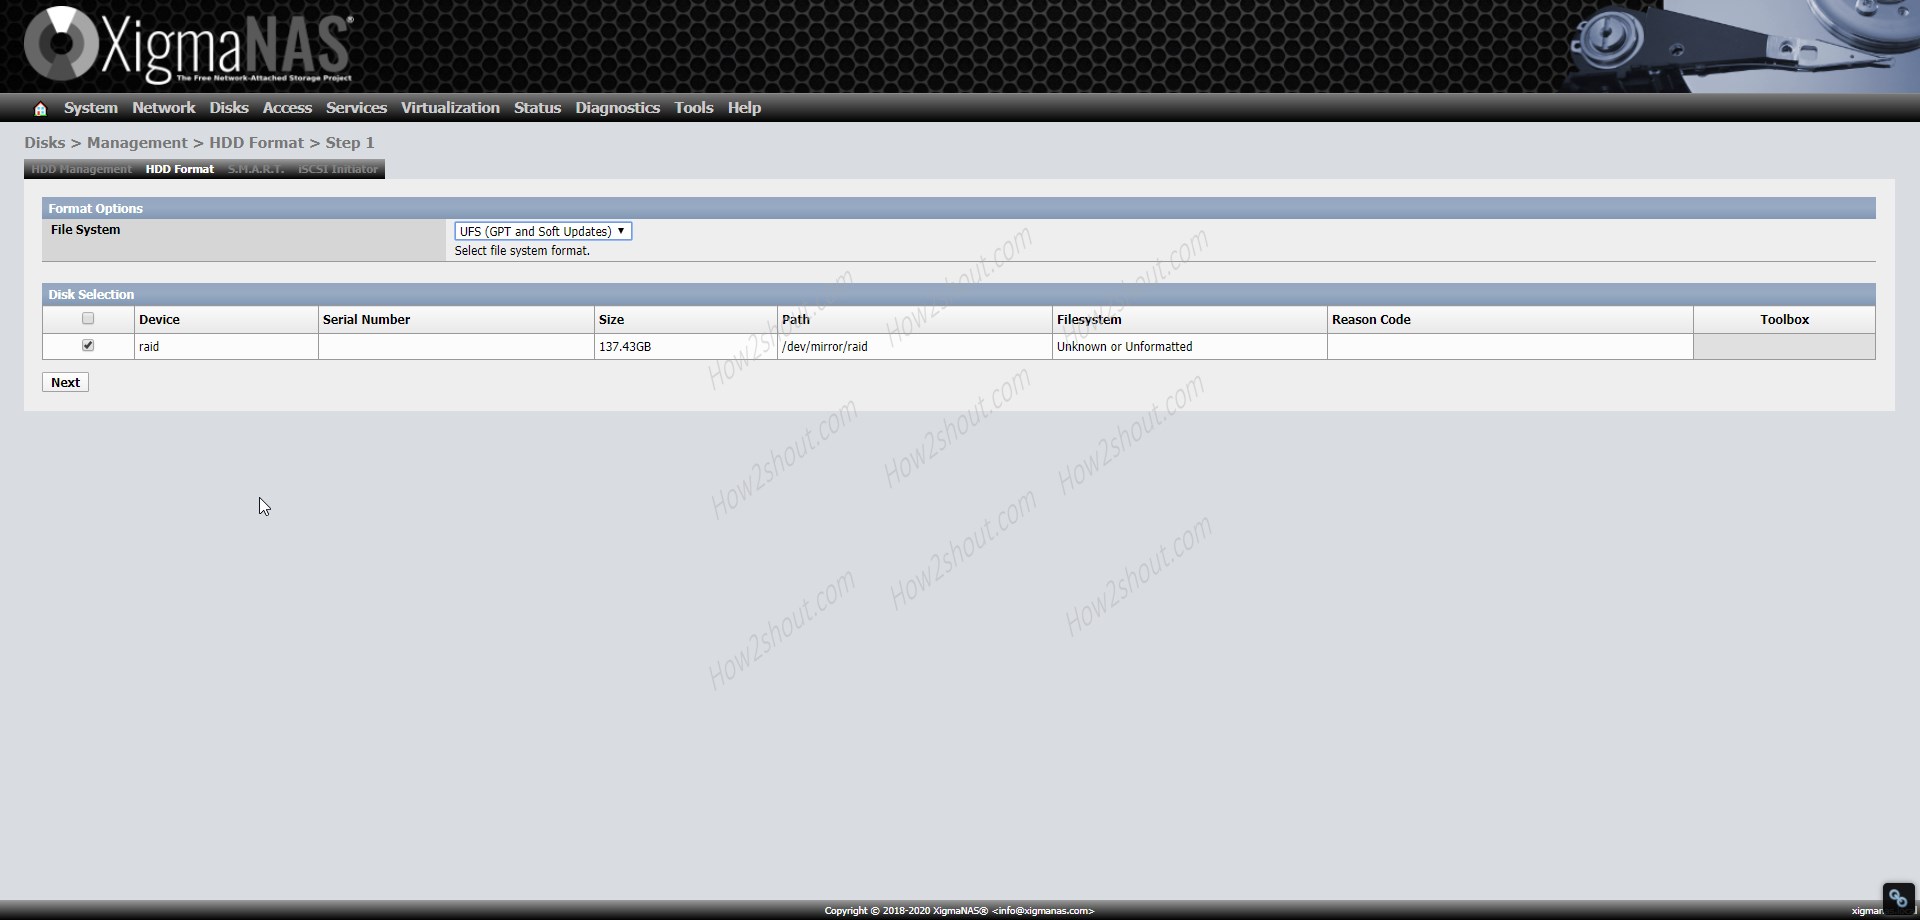
Step 10: Go to Disk-> Management, click on HDD Format, select UFS (GPT and Soft Updates) as a File system, select the raid drive and format it.
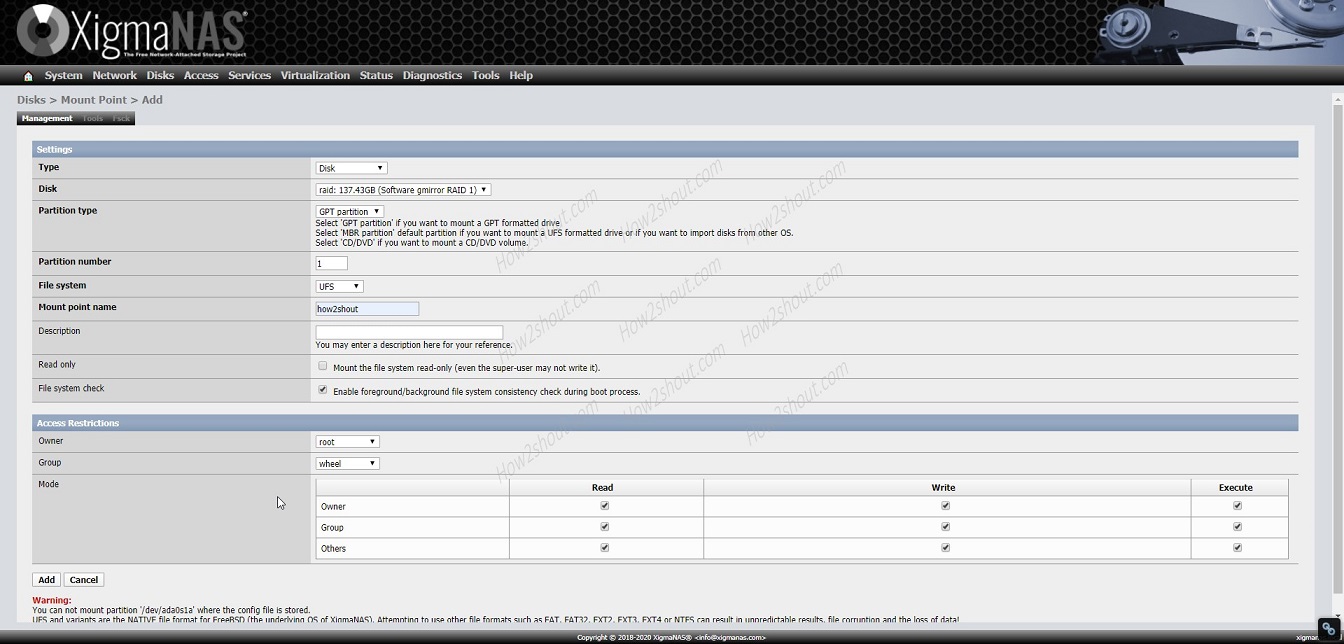
Step 11: Mount Hard Drive: Go to Drives-> Select Mount Point from the Menu. Click on the ‘+’ icon.
- Let the Type=Disk
- Select the first hard disk in the menu next to “Disk”.
- Now the RAID must be formatted and mounted so that you can access it later. Select partition type GPT and under “File system” select “UFS“. Leave Partition to 1.
- Give a name to your Mount point, whatever you want.
- Select the user that you want to be the owner of the drive.
- Group and permission you want to give.
- Click on the ADD and Apply the Changes.
Now the Raid has been created and mounted successfully. From here you can mount or use it for storing your data.
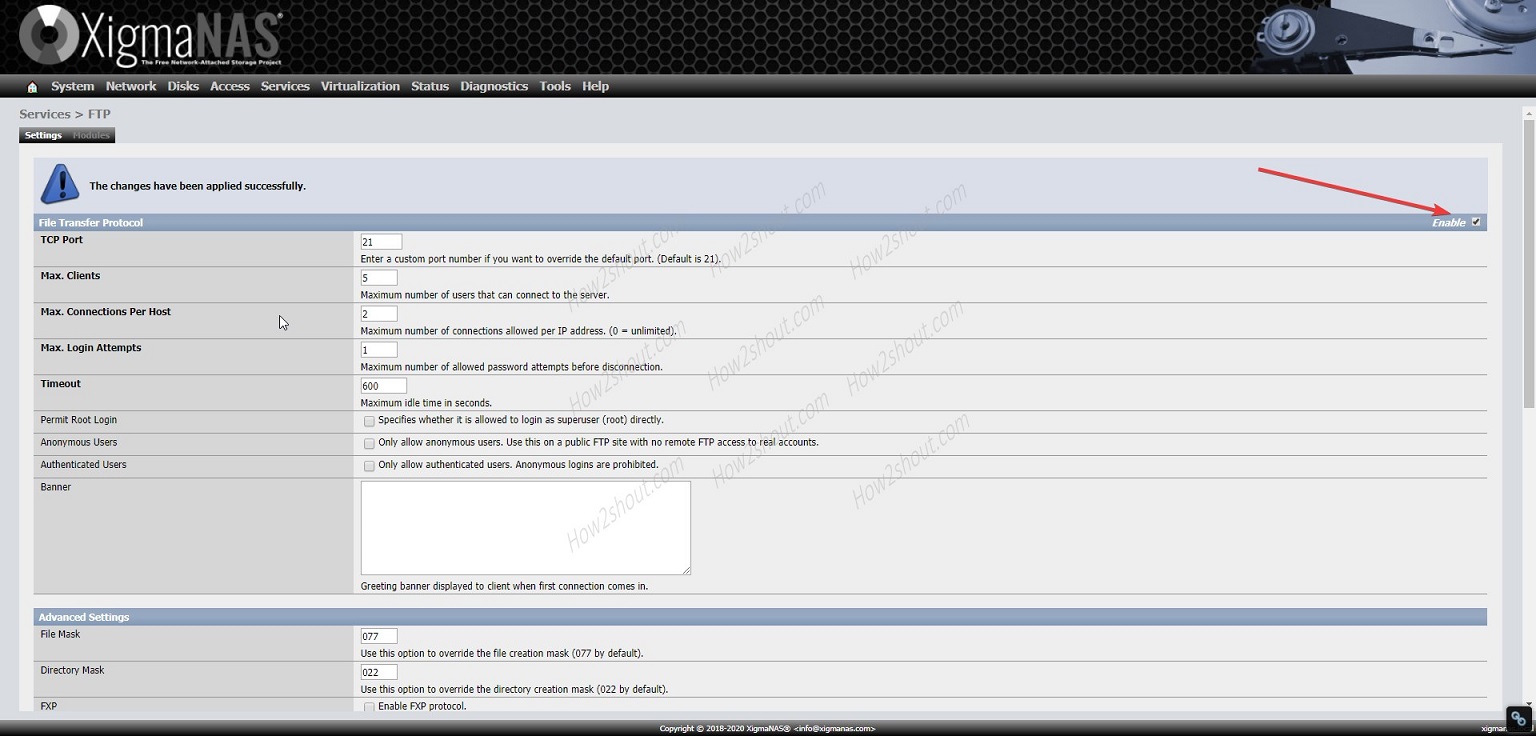
Access the drive from Windows OS: For Example, let’s say you want to access you mounted drive using a simple protocol, FTP. Thus, to use that first we have to activate it. Go to Services, Select F TP and click on the Enable box given on the right side top corner.
Note, by default anyone can access the server via FTP, once enabled. Thus, from the same page, you can restrict the access of anonymous users and allow the registered one only.
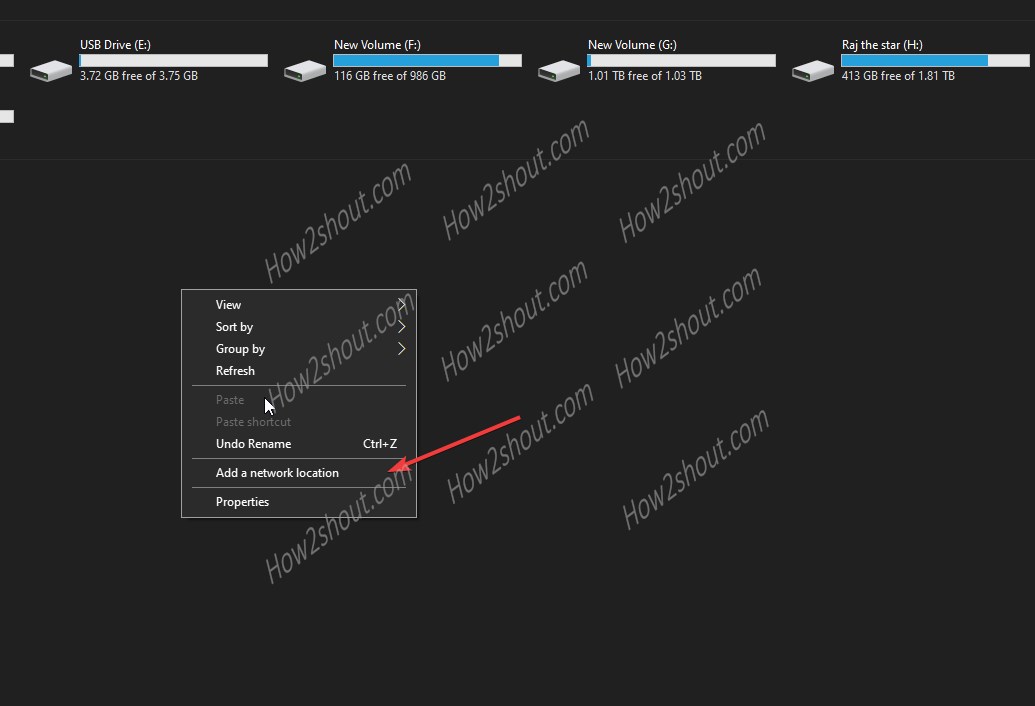
Now, go to Windows 10/8/7, open My Computer, right-click anywhere on the blank space and select “Add a network location” option.
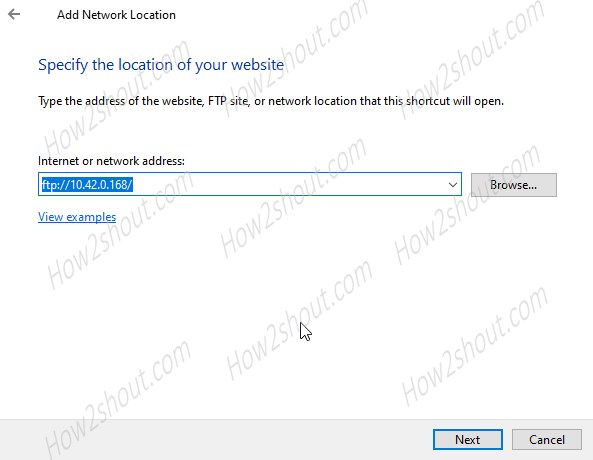
A window will open, follow the wizard. When it asks to a network address, enter
ftp://nas-ipaddress/
Replace the nas-ipaddress with the address of you instal XigmaNAS, like in our case it ftp://10.42.0.168/.
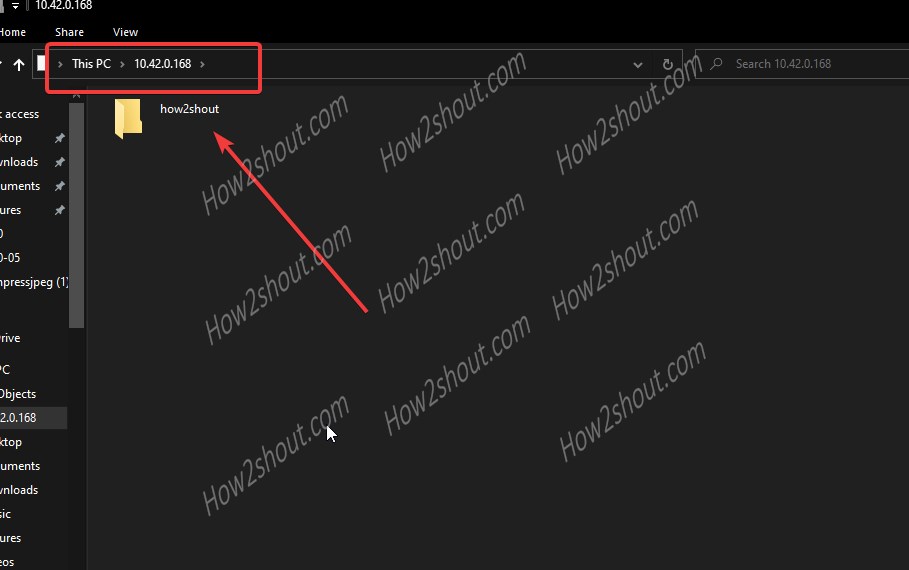
If you have set only registered users can access the files via FTP, then enter the username and password of your NAS server. And if not, then it will automatically pop-up a window with a folder and a name that you have used to mount the hard drives in XigmaNAS server.
If you stuck somewhere or have any question let us know…