KDE Plasma GUI Desktop installation on Kali Linux will allow users to easily change their Desktop environment from the default XFCE if they don’t like it…
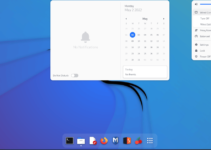
Kali Linux is an open-source Debian-based security Linux distro that comes with various tools to perform hacking and penetration testing. Although the developers have made the XFCE interface very simple and easy to use, yet if someone is not comfortable with that then he or she free to change the Kali Linux desktop environment with some other available options such as KDE, GNOME, Cinnamon, Budgie, and more… However, here we will talk only about the KDE Plasma, developed and maintained by the huge community of KDE (K Desktop Environment) that also provides a large number of free and open-source software.
KDE Plasma Desktop installation on Kali Linux
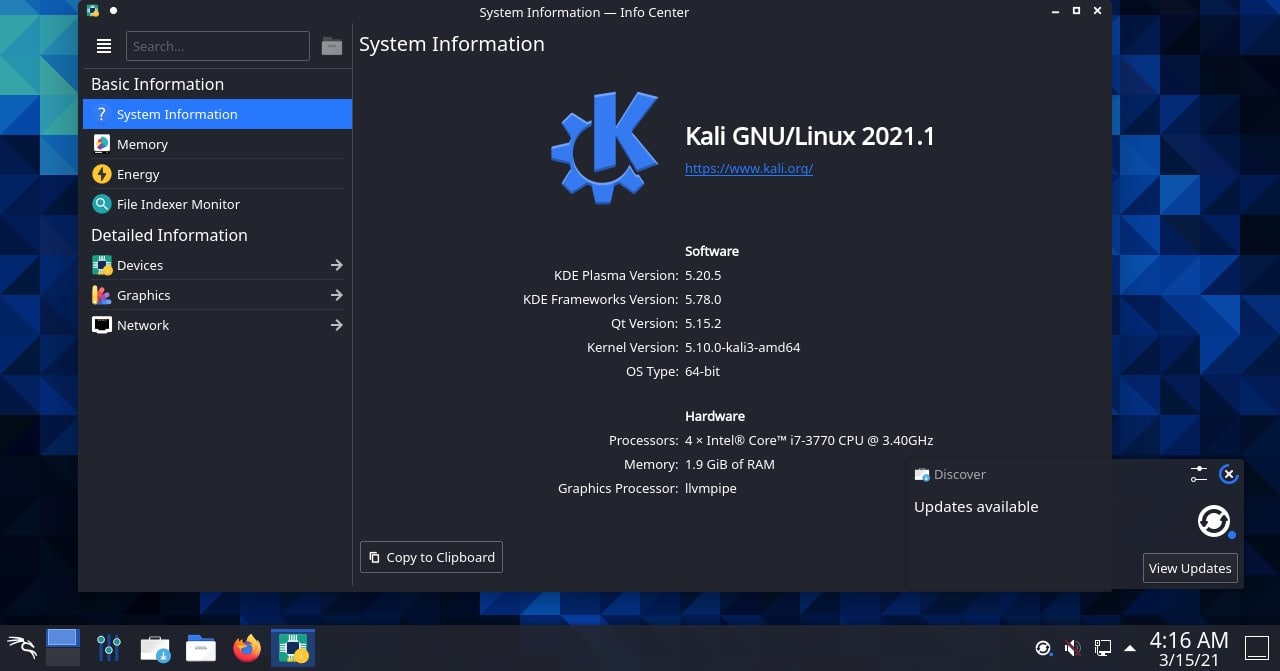
Here we are using Kali Linux 2021, but you can use the below-given steps for older versions as well…
Step 1: Run System Update
Open command terminal, the shortcut key for the same is Ctrl+Alt+T. And then run the system update command to rebuild the repository cache and update existing packages.
sudo apt update
Step 2: Install KDE desktop for Kali Linux
Now, let’s run the main command of this tutorial that will download and install KDE Plasma Desktop packages to install on Kali Linux.
sudo apt install kali-desktop-kde
Allow the installation by press Y and hitting Enter key. The process will download around 500 MB of packages and requires around 2 GB of free space on your Kali Linux.
Step 3: Select Display Manager
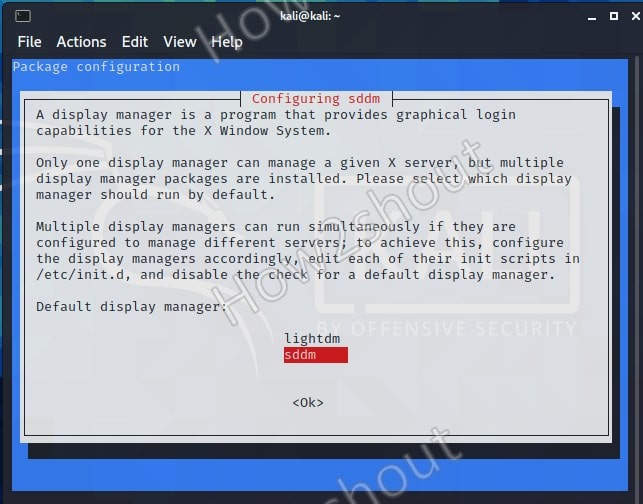
When the installation step will ask you to select the display manager to configure it for your current Dekstop environment, you will have two options Lightdm and SDDM, select the second one, and hit the Enter key.
Step 4: Change Kali Desktop environment
Update x-session-manager
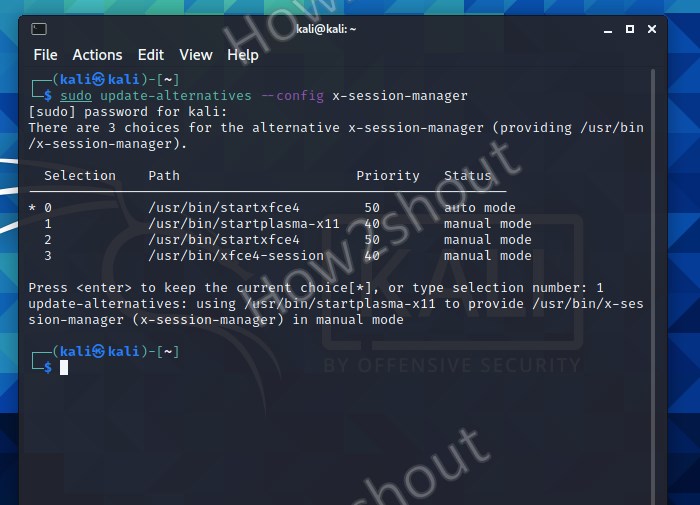
To ensure the system could recognize the changes perfectly and we would have the KDE after restarting the system; Update the default x-session-manager for your Kali Linux.
sudo update-alternatives --config x-session-manager
You will see all the available desktop environments along with their priority, by default the Xfce4 will be selected to use as X-session whenever we boot our Kali Linux. Thus, to change the Desktop environment to KDE on Kali, simply enter the number assigned for the Plasma-X11.
For example, here the selection number is 1 to start Plasma, thus we enter the same and hit the Enter key.
Step 5: Restart your Kali KDE system
Once the installation is completed restart your system and this time you will have the KDE plasma log-in screen on your Kali Linux.
Step 6: Uninstall XFCE or KDE (optional)
Now, you have two desktop environments on your Kali Linux, if you want to remove any of them then can follow the below commands:
Remember, don’t run both the commands otherwise you will be left with the command-line interface on your Kali Linux.
To remove XFCE
sudo apt purge --autoremove kali-desktop-xfce
To remove KDE
sudo apt purge --autoremove kali-desktop-kde
After running any of the above-given commands, restart your VM, desktop, or laptop.
In this way, we can have the KDE plasma Desktop on our Kali Linux PC, Laptop, or virtual machine. If you have any questions related to it or want to have some other graphical users interface then let us know…
