Docker community edition is open-source software available to install on almost all popular operating systems. We can easily install various container-based software to perform various common and server-side tasks. However, to use docker, we first have to install it and here we will show how to do that in Rocky Linux.
Apart from the Community edition, Docker is available for Enterprise as well. Althouth the community edition has all the functions required to operate containers and can be used on servers and on development and test machines. If you can do without enterprise support and some management functions, then you can go for the Open-source.
Whereas, the Enterprise Edition is intended for productive use in companies. It has to be licensed, but differs only marginally in terms of functionality: First, Enterprise customers receive support from Docker. In addition, the “Docker Trusted Registry” allows only selected images to be released within a company. With the “Universal Control Plane,” there is a web interface for managing the container infrastructure.
Docker CE Installation on Rocky Linux 8
Steps to install Docker on Rocky Linux will be the same for RHEL, CentSO & Alma Linux 8, thus if you are using any of them, you can follow this tutorial.
1. Add Docker repo on Rocky Linux
Docker packages to install are not available in the default repo of Rocky Linux, thus we need the one provided by the official developers.
sudo dnf config-manager --add-repo=https://download.docker.com/linux/centos/docker-ce.repo
2. Update to rebuild repo cache
Although, the system will automatically recognize the added repo and its packages, however, still run the update command to rebuild the cache-
dnf update
3. Run the command to install docker on Rocky Linux
Finally, what we need to have Docker is on our Linux operating system. Just run the given single command to get all the main components or packages we need to install this container platform.
sudo dnf install docker-ce docker-ce-cli containerd.io
4. Enable and Start Docker Service
Once the installation is completed. let’s start the Docker service on Rocky Linux and also enable it to run automatically with system boot.
sudo systemctl enable docker

sudo systemctl start docker
Check the Status of the Service to know it is working properly.
systemctl status docker
5. Add your User to the Docker group
Once the installation is done, to run Docker we need to use sudo every time, however, to solve this, we can add our system user to the docker group. This will let’s influence the Docker daemon and run the containers as a normal user.
sudo usermod -aG docker $USER
After that, for the change to take effect either log out and log back in once or simply type-
newgrp docker
6. Check Docker info
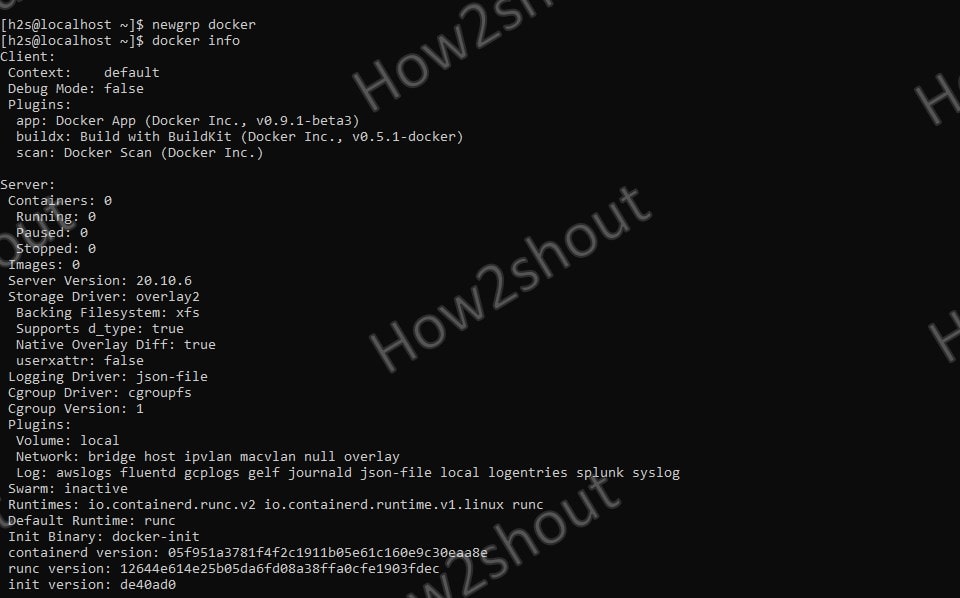
To confirm it is working without sudo, let’s run a command to know all key information related to this installed container platform.
docker info
7. Install your first container
If you here on this step then everything so far is working absolutely fine. Thus, let’s pull some docker apps like Ubuntu to run in a Container.
docker pull ubuntu
The above command will pull and install the latest LTS version of Ubuntu on your Rocky Linux docker running container. Once that is done, to access its bash, simply type-
docker run -it ubuntu
Other Articles-
- How to install Kitematic docker manager on Rocky Linux or CentOS…
- Steps to Install Xfce Desktop on Rocky Linux 8
- Quick Steps to Install Docker-CE on OpenSUSE Linux
- How to run Docker terminal online for free to learn it


