OpenStack Client (aka OSC) is an open-source tool developed by the OpenStack community to provide a set of command-line tools. That will help the users to manage various elements of OpenStack such as Computing, Identity, Image, Object Storage, and Block Storage APIs together in a single shell with a uniform command structure.
This program is written in python, hence we need it and its package manager PIP already installed on our system. Hence, let’s quickly see the commands required to install OpenStackClient on Rocky Linux or Almalinux 8.
Steps to install OpenStackClient on Almalinux or Rocky Linux 8
1. Requirements:
• RedHat based Linux – Rocky or Almalinux
• Python 2 or later & PIP
• Non-root sudo user
• Command Terminal access
2. Run system update
If you have not updated your system for a while or just got a fresh server then first run the system update command. This will not only refresh the repository cache but also install the latest updates.
sudo dnf update && sudo dnf upgrade
3. Install Python 3 & PIP3
As we mentioned in the introduction, the OpenStack Client tool required the Python PIP tool to get installed easily. Hence, we first install Python 3 and its corresponding PIP tool on our Rocky Linux or AlmaLinux 8.
sudo dnf python3-dev python3-pip
sudo pip3 install --upgrade pip
Note: those who want Python2 can go for:
sudo dnf python2-dev python2-pip
sudo pip install --upgrade pip
4. Check PIP version
Once the installation is completed, let’s confirm it has been on our system successfully by checking its version.
pip3 --version
or
pip --version
4. Install OpenStack Client on Rocky or AlmaLinux 8
Once the setup process of Python and Pip is completed, the next is to use the PIP to download and install the packages required for OpenStack Client. The below-given command will do that for you.
Note: Project source code is available on GitHub.
sudo pip install python-openstackclient
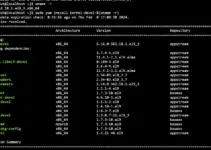
To get more info about the install OpenStack Client command-line tool, you can use:
pip3 show python-openstackclient
or
pip show python-openstackclient
5. Check OpenStack Client Version
The installation of this command-line tool will be system-wide, hence regardless of the directory in which we are, can evoke the client command line.
However, first, reload your bash session.
source ~/.bashrc
Check version:
openstack --version
To know what are the options available to use with this command-line tool, we can use:
openstack --help

6. Configure OpenStack Client
As you start pulling the information of the OpenStack server service, the client tool will ask for the Authentication URL and password. For that, you can either pull the configuration file from the OpenStack directory or create the one using the given command:
sudo dnf install nano -y
nano ~/.keystonerc
Add the following lines and change username, password, and URL to the server (if OpenStack is on some remote server) also add your project details.
unset OS_SERVICE_TOKEN
export OS_USERNAME='admin'
export OS_PASSWORD='adminpassword'
export OS_AUTH_URL=http://localhost:5000/v3
export PS1='[\u@\h \W(keystone_admin)]\$ '

export OS_PROJECT_NAME=admin
export OS_USER_DOMAIN_NAME=Default
export OS_PROJECT_DOMAIN_NAME=Default
export OS_IDENTITY_API_VERSION=3
Save the file Ctrl+O, hit the Enter key, and then exit- Ctrl+X.
Source the created file, and then you can connect to OpenStack Cloud to start managing it.
source ~/.keystonerc
Now, you can start using the OpenStack command line to administrator your OpenStack Cloud. For example:
To get network information
openstack network list
For available images:
openstack image list
For more information about the OpenStack client tool and its commands, refer to the official documentation.
Other Articles:
How to Disable or Turn Off SELinux on Rocky or AlmaLinux
How to reset NextCloud Admin Password using command
How to install NextCloud sync client on Almalinux or Rocky
Install FileZilla client on Rocky Linux