Let’s see the steps and commands to install Glances on the monitoring tool on Ubuntu 20.04 LTS and start keeping track of system processes and resources.
Glances is a system monitor for the command line. Compared to the classic top and htop, the program offers process information as well as additional real-time statistics on the file system, network, hardware components, etc. It has a ncurses interface and can be easily operated with the keyboard. It was created with Python and the library psutil, thus, supports any major platform having python installed such as Windows, macOS, Linux, FreeBSD, and Android.
If you want to monitor a remote computer, you can use the integrated web server in addition to an SSH connection, server/client mode, or API (XML-RPC and RESTful). Stats can also be exported to files or external time/value databases such as InfluxDB, Cassandra, CouchDB.
Steps to install Glances on Ubuntu Linux
The commands given here can also be used on other versions of Ubuntu such as 18.04/21.04 including Linux Mint, Kali, Debian, MX Linux, and POP! OS and more… For the latest Ubuntu Jammy see: Glances installation tutorial for Ubuntu 22.04.
System update
First, run the system update command that will refresh the repository cache and also install any latest update available for the system.
sudo apt update
Command to install Glances on Ubuntu such as 20.04
We, don’t need to add any third party to download and install Glances on Ubuntu operating systems, just use the APT package manager and it will fetch the required things from the standard repository of the system.
sudo apt install glances
Glances Usage Options – Standalone server
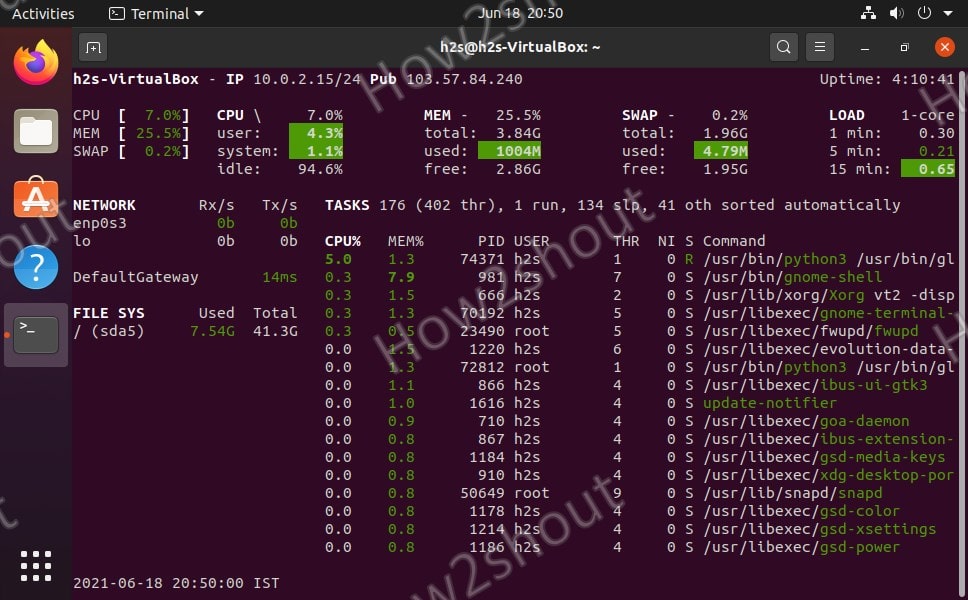
Once this Linux system monitoring tool is installed on our system, you can start using it by just typing the below command in your terminal.
glances
And you will have the process and other details of your system right in front of you:

If you want to customize the settings that can be made in the file /etc/glances/glances.conf (system-wide; root rights required ) or ~ /.config/glances/glances.conf (per user).
Options
The options available here can be used with this monitoring tool to perform various functions. Further information can be found on the manual page and in the detailed program documentation.
| Parameter | function |
-V | Show version |
-h, --help | Show quick help |
-t N | Refresh rate in N seconds (default 3) |
-C DATEI | Use a different configuration file |
-p PORT | Default: 61208 |
-w | Start the integrated webserver |
-s | Start SERVER mode |
--password ***** | SERVER mode password |
--browser | Search for SERVER (client mode) |
-c SERVER | Connect to SERVER (client mode) |
Keys to operate glances
Here are some keys that can be used to get various information on glances.
| Keys | function |
| C | Sort processes by% CPU usage |
| M | Sort processes by% memory usage |
| P | Sort processes by name |
| I | Sort processes by I / O rate |
| D | Show/hide disk I / O statistics |
| F | Show/hide file system statistics |
| N | Show/hide network statistics |
| S | Show/hide hardware sensors |
| T | Show network I / O combined |
| U | Show cumulative network I / O |
| W | Delete log entries of the WARNING level |
| X | Delete log entries of the WARNING and CRITICAL levels |
| Y | Show/hide hard drive temperature |
| 1 | Global CPU statistics or per core |
| L | Show/hide log entries |
| B | Bit / s or Byte / s for network I / O |
| Q , Esc , Ctrl + C. | break up |
Server/client mode
If you want to access the data from another system using a terminal without ssh then run server & client mode. So to run Glances in server mode, use
glances -s
You can now establish a connection to the server machine on the client using:
glances -c @SERVER-IP
Very useful if you don’t want to log in to the server. However, the remote/client computer must have glances installed to get performance data of the remote system.
Note: Open port 61209 using the command-sudo ufw allow 61209
Start Glances Web server UI Interface
To access the glances web User interface, in the command terminal, first, start it.
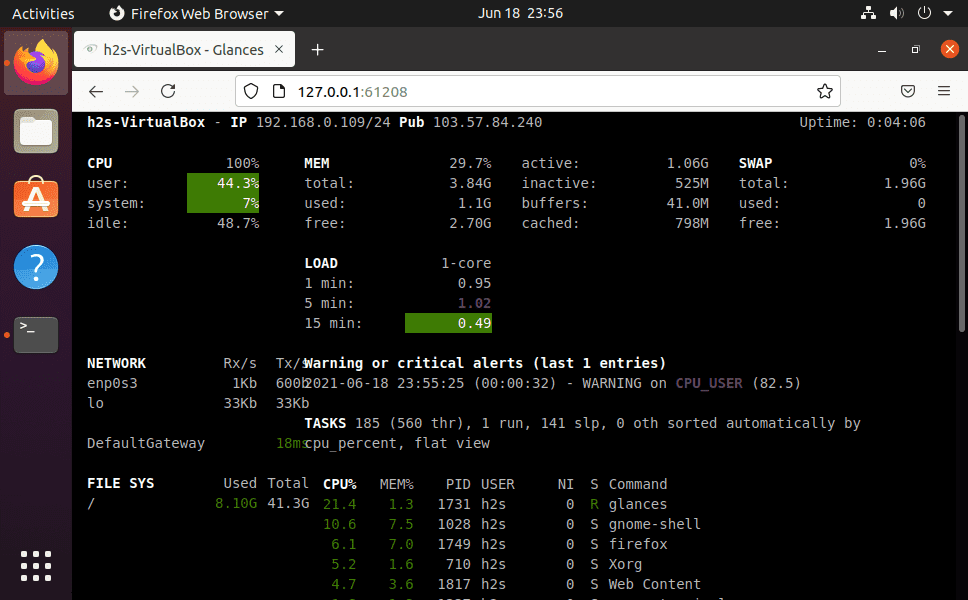
glances -w
The above command will occupy the terminal and as you close this it will also stop the webserver. Thus, you can run it in the background for the current session using –
glances -w &
Or create a service file by following this guide further.
output
Glances web server started on http://0.0.0.0:61208/
Open your web browser and type-
http://SERVER-IP-ADRESSE:61208
Replace SERVER-IP-ADRESSE with the IP address of the machine where you have installed glances.
Also, if you are accessing it on some other computer remotely, then open the 61208 port in Ubuntu’s firewall-
sudo ufw allow 61208

Create a Glances Service file to run in the background
In a normal way, you have to start glances web server every time to access it over the network using the browser. However, to run automatically with system boot and in the background create a service using the below commands.
sudo nano /usr/lib/systemd/system/glances.service
Paste the below-given block of text:
[Unit]
Description = Glances in Web Server Mode
After = network.target

[Service]
ExecStart = /usr/bin/glances -w -t 5

[Install]
WantedBy = multi-user.target
Save the file- press Ctrl+X, type Y, and then hit the Enter key.
Restart your system.
Now, Enable and start the service file:
sudo systemctl enable glances.service
sudo systemctl start glances.service
sudo systemctl status glances.service

To know more about it see the official documentation.


