Glances is a free open-source command line software solution for Linux systems to monitor computer activity in real time. It can be considered a good alternative to top/Htop command line system monitoring tools for Ubuntu. Here in this tutorial, we learn how to install Glances Ubuntu 22.04 for our Linux performance monitoring.
Glances which is a real-time system monitoring can display several information about computer resources such as CPU usage, memory usage, network traffic, and more. It is not just limited to the local system but even can be used for remote system monitoring, which makes it useful for system administrators and power users alike.
Using it users or admins can identify any potential issues or bottlenecks hampering the overall performance of their Linux system. Moreover, it can be used on all Debian and RPM-based Linux easily.
Some of the benefits of using Glances on Ubuntu Linux include:
- Real-time monitoring to identify and respond to issues as they occur.
- Customizable interface, so that users can adjust the display of system metrics as per their requirements.
- Low system resource monitoring tool for Linux.
- It also supports container monitoring such as Docker and LXC.
- Remote system monitoring is possible via a web interface or command line interface.
1. Start with a system update
Execute the system update command on your Ubuntu 22.04 before installing Glances. It is because the process will not only install the popular updates but also refresh the APT cache.
sudo apt update2. Install Python3 & require dependencies
Glances required Python to run properly, so your system must have Python installed. Although Ubuntu comes with Python pre-installed, however, still run the given command for some of the required dependencies:
sudo apt-get install -y python3-pip python3-dev python3-docker gcc lm-sensors wireless-toolsTo check the version:
python3 -V3. Install Glances on Ubuntu 22.04
Well, there are two easy ways to install Glances on Ubuntu 22.04 LTS Linux, one is using the default system package manager which is APT, and the other uses Python’s package manager – PIP.
The only difference is the version of Glances via APT to install will be the most stable but older. However, for the latest version, we can use the PIP.
Here we will show both methods but choose only one to install Glances on your Linux system. However, to perform this tutorial we used the PIP method.
#Using APT package manager:
sudo apt install glances#Using PIP Python’s package manager:
This will install a complete package of Glances for all major supported items to be monitored.
pip install --user 'glances[action,browser,cloud,cpuinfo,docker,export,folders,gpu,graph,ip,raid,snmp,web,wifi]'4. Add Glances to the system PATH
Once using the PIP the latest version of Glances is on your Ubuntu 22.04 Linux, add its installation folder to your system path. This will allow us to use the Glances command line anywhere from the terminal.
Edit the Bashrc file, if the nano editor is not then you can install it using sudo apt install nano.
nano ~/.bashrcAfter that scroll to the end of the file and paste the following line.
PATH="$PATH:~/.local/bin"Save and Exit the file using Ctrl+X, press Y and then the Enter key.
Reload the shell’s configuration, using :
source ~/.bashrc5. Check the version
As you have completed the previous step of Glances installation for Linux, use the given command to check its version and confirm whether it is working or not.
glances --version6. Glances Usage Options – Standalone server
Once this Linux system monitoring tool is installed on our system, you can start using it by just typing the below command in your terminal.
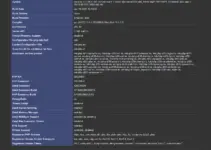
glances
And you will have the process and other details of your system right in front of you:

If you want to customize the settings that can be made in the file /etc/glances/glances.conf (system-wide; root rights required ) or ~ /.config/glances/glances.conf (per user).
Keys to operate glances
Here are some keys that you can press on the keyboard while having Glances running to get a view of various information.
| Keys | function |
| C | Sort processes by% CPU usage |
| M | Sort processes by% memory usage |
| P | Sort processes by name |
| I | Sort processes by I / O rate |
| D | Show/hide disk I / O statistics |
| F | Show/hide file system statistics |
| N | Show/hide network statistics |
| S | Show/hide hardware sensors |
| T | Show network I / O combined |
| U | Show cumulative network I / O |
| W | Delete log entries of the WARNING level |
| X | Delete log entries of the WARNING and CRITICAL levels |
| Y | Show/hide hard drive temperature |
| 1 | Global CPU statistics or per core |
| L | Show/hide log entries |
| B | Bit / s or Byte / s for network I / O |
| Q, Esc, Ctrl + C. | break up |
Here are some options useful command-line options that can be used with the glances command in the terminal:
-cor--config: This option allows you to specify a path to an alternate configuration file. By default, Glances looks for its configuration file at/etc/glances/glances.conf.-tor--time: This option sets the refresh interval for Glances in seconds. For example, runningglances -t 5will refresh Glances every 5 seconds.-for--process-filter: This option allows you to specify a process filter that will limit the display of process information to only those that match the filter. For example, runningglances -f sshwill display only the processes that contain “ssh” in their name.-sor--server: This option starts Glances in server mode, allowing you to connect to it from a web browser on another system. Runningglances -swill start Glances as a server on the default port of 61209.-por--process-sort: This option allows you to specify the sorting order for process information. For example, runningglances -p namewill sort the process list by name.-nor--network: This option displays network information, including network usage and TCP/UDP connections.-mor--memory: This option displays memory information, including total memory usage and usage by process.-cor--cpu: This option displays CPU information, including usage and load average.-dor--diskio: This option displays disk I/O information, including read and write rates.
These command-line options can be used with this monitoring tool to perform various functions. Further information can be found on the manual page and in the detailed program documentation.
7. Server/client mode on Ubuntu 22.04
If you want to access the data from another system using a terminal but without using ssh then run the server & client mode of this monitoring tool.
So, first run Glances in server mode on the system that data you want to access remotely, use
glances -s
After that, on your local system use the client mode of Glances and connect to the remote system where the server part of Glances already running via the domain or its IP address.
glances -c @SERVER-IP
This is quite handy if you don’t want to log in to the server but still want to monitor its hardware.
Note: Both Remote and Client computers must have glances installed to get performance data.
8. Open Port 61209 of Glances
Further to fetch the data from the remote system port 61209 must be opened in the system firewall or service providers.
For Ubuntu UFW firewall use:
sudo ufw allow 612099. Start Glances Web server UI Interface
Those who want to access the glances web User interface instead of the command terminal to monitor the system performance in real-time can run it with the given command.
glances -wThe above command will occupy the terminal and as you close this it will also stop the webserver. Thus, you can run it in the background for the current session using the –
glances -w &output
Glances web server started on http://0.0.0.0:61208/Open your web browser and type-
http://SERVER-IP-ADRESSE:61208Replace SERVER-IP-ADRESSE with the IP address of the machine where you have installed glances.
Also, if you are accessing it on some other computer remotely, then open the 61208 port in your Ubuntu’s firewall, where you have activated its web server.
sudo ufw allow 61208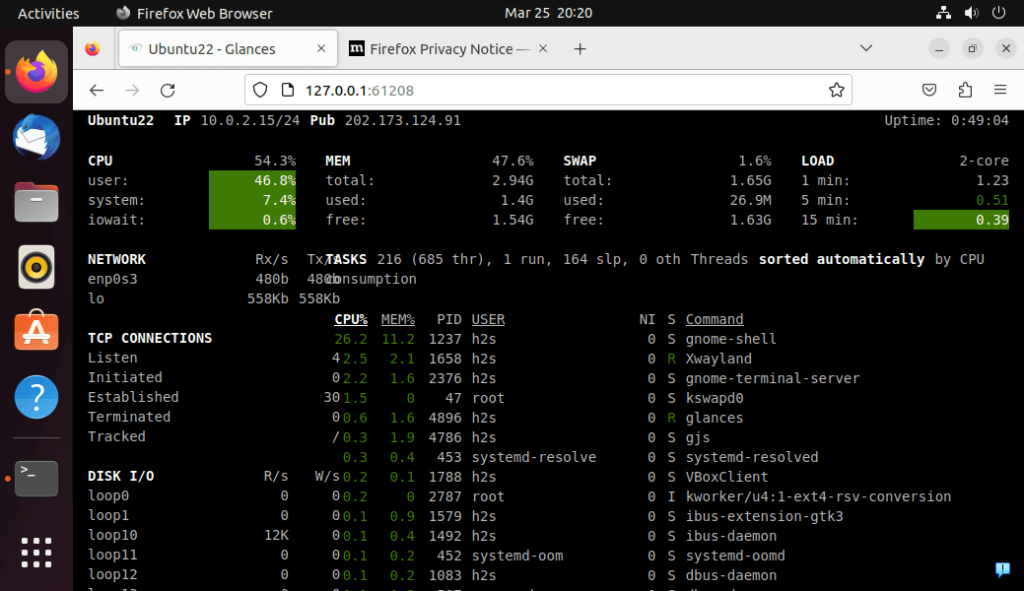
10. Create a Glances System Service file
In a normal way, you have to start glances web server every time to access it over the network using the browser. However, to run automatically with system boot and in the background, create a service using the below commands.
First, create a Symlink:
sudo ln ~/.local/bin/glances /usr/local/bin/Create a service file:
sudo nano /etc/systemd/system/glances.servicePaste the below-given block of text:
Note: Replace h2s in the given code with your current system username under which the glance service will be running.
[Unit]

Description=Glances
After=network.target

[Service]
ExecStart=/usr/local/bin/glances -w -t 5
User=h2s
Restart=on-abort
RemainAfterExit=yes


[Install]
WantedBy=multi-user.target
Save the file- press Ctrl+X, type Y, and then hit the Enter key.
Reload Daemon:
sudo systemctl daemon-reloadNow, Enable and start the service file:
sudo systemctl enable glances.service
sudo systemctl start glances.service
sudo systemctl status glances.service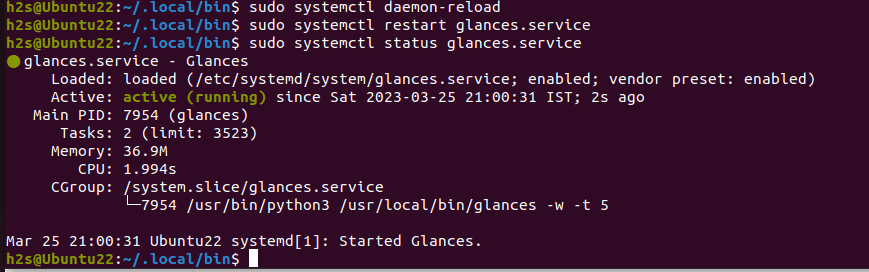
11. Glances Upgrade and Uninstallation on Ubuntu 22.04
If you have used the APT to install Glances, then to get the latest update, if available, simply run the system update command:
sudo apt update && sudo apt upgradeWhereas those who have used Python’s PIP can run:
pip install glances --upgradeHowever, if you don’t require this monitoring tool anymore then remove Glances from Ubuntu run:
For APT users:
sudo apt remove glancesFor Python PIP users:
pip uninstall glancesTo know more about it see the official documentation.
Other Articles: