Docker is a virtualization platform, popular for its ability to run applications in Containers. We can build and communicate containers with one another. Here we learn how to install the Docker CE platform on Rocky Linux 8 to create containerized virtual machines.
Steps to install Docker CE on Rocky Linux 8
What will we learn here?
- Docker Installation Process for Rocky Linux 8
- How to pull Images from Docker Hub to install and run a container?
- Commands to start, stop, and restart the Docker Engine
The steps given here will also work for RHEL and CentOS 8… Also, see our article on how to install the KiteMatic Docker GUI on Rocky Linux.
1. Add Docker Repo on Rocky Linux
Add an official Docker CE repository on your Rocky Linux 8, so that we can install it without downloading its packages manually.
Note– It is a single command, thus use it as a whole
sudo dnf config-manager --add-repo=https://download.docker.com/linux/centos/docker-ce.repo
2. Run system update
To let the system recognize the added Docker repository and the packages available in the same, run the system update that will force Rocky Linux to rebuild the system repo cache.
sudo dnf update
3. Command to Install Docker CE Engine
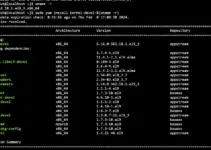
So, we already have the Docker repo and now it’s time to run the simple command using the DNF package manager for installing the Docker-CE along with its command-line tool and containerd.io to efficiently manage the container lifecycle of its host system.
sudo dnf install docker-ce docker-ce-cli containerd.io
4. Enable and Start Docker Service
Once the installation is completed, start the Docker service on your Rocky Linux and enable it to run automatically with system boot.
sudo systemctl enable docker

sudo systemctl start docker
Check the Status of the Service to know if it is working properly.
systemctl status docker
5. Add Rocky Linux User to Docker User Group
To run docker commands we need sudo rights or root access and to avoid that add your current system user to the Docker group so that you can easily run its command for downloading and creating containers.
sudo usermod -aG docker $USER
Check whether your user is in the docker group or not.
id $USER
If you want to use some other user than the current one, simply replace $USER in the above command with the specific system’s user you want to give the rights to manage Docker.
Restart the Server
To make sure all the changes work smoothly restart your host Rocky Linux server or desktop where you have installed the Docker.
To get the information and details related to installer docker such as version, several containers installed, Host kernel version, Architecture, CPU, OS Name, etc. Type:
docker info
6. Test Docker by pulling Image
Let’s download some Images such as Ubuntu to create a Container and test, whether everything is working fine or not.
docker pull ubuntu
The above command will fetch the latest Image file of the LTS version i.e. Ubuntu 20.04 LTS to install and create a container corresponding to it from Docker Hub.
To know what are Images have been downloaded and available to use on your Docker system locally, run:
docker images
7. Run Container
Now, we have the Docker Image of Ubuntu, let’s create and run a container using it. The command for that is very simple:
docker run -it ubuntu
After that, you can use the Ubuntu APT package manager to run the command and install the various applications over it. Know more about its commands and work on the official documentation page.
Ending note:
Being a REHL-based operating system Rocky Linux works exactly like CentOS 8, thus the same commands and repositories to install for getting various packages including Docker can be used on it as well.


Thanks for the article.
Step 2 modification:
#dnf update –allowerasing –skip-broken –nobest
Following your Step 2, I got:
# dnf update
Docker CE Stable – x86_64 142 kB/s | 15 kB 00:00
Error:
Problem: package podman-3.2.3-0.10.module+el8.4.0+643+525e162a.x86_64 requires runc >= 1.0.0-57, but none of the providers can be installed
– package containerd.io-1.4.9-3.1.el8.x86_64 conflicts with runc provided by runc-1.0.0-74.rc95.module+el8.4.0+643+525e162a.x86_64
– package containerd.io-1.4.9-3.1.el8.x86_64 obsoletes runc provided by runc-1.0.0-74.rc95.module+el8.4.0+643+525e162a.x86_64
– package containerd.io-1.4.9-3.1.el8.x86_64 conflicts with runc provided by runc-1.0.0-73.rc93.module+el8.4.0+556+40122d08.x86_64
– package containerd.io-1.4.9-3.1.el8.x86_64 obsoletes runc provided by runc-1.0.0-73.rc93.module+el8.4.0+556+40122d08.x86_64
– cannot install the best update candidate for package runc-1.0.0-74.rc95.module+el8.4.0+643+525e162a.x86_64
– cannot install the best update candidate for package podman-3.2.3-0.10.module+el8.4.0+643+525e162a.x86_64
– package runc-1.0.0-65.rc10.module+el8.4.0+559+c02fa3b2.x86_64 is filtered out by modular filtering
– package runc-1.0.0-71.rc92.module+el8.4.0+558+7340b765.x86_64 is filtered out by modular filtering
(try to add ‘–allowerasing’ to command line to replace conflicting packages or ‘–skip-broken’ to skip uninstallable packages or ‘–nobest’ to use not only best candidate packages)
For step 3, I ran:
# dnf install docker-ce docker-ce-cli containerd.io –allowerasing
Just a small typo in step 5 when you make sure that the user has been added to the docker group, there’s a missing space:
This line:
id$USER
Should be:
id $USER