Learn the commands to install and configure daloRADIUS a GUI web interface for FreeRADIUS on Ubuntu 20.04 or 18.04 LTS server.
FreeRADIUS server is an open-source product and widely used RADIUS server in the world and, in addition to EAP, also supports the RADIUS protocol stands for “Remote Authentication DIAL In User Service”. FreeRADIUS implementation provides users a central authentication system for servers and desktops.
Clients who want to access a network must first log on to the RADIUS server before a connection to the desired network is established. This increases security and makes it easier to manage networks.
The client uses the IEEE 802.1X protocol for authentication, which is why this term is often used as a synonym for this type of network login.
FreeRADIUS has developed rapidly from simple authentication methods in which the user name and password were transmitted in cleartext to Extensible Authentication Protocol (EAP), which supports various cryptographically secured methods (EAP-TLS / -TTLS, PEAP, LEAP), one-time passwords, and SIMs. Username/password combinations or certificates are used for authentication.
Well, managing FreeRADIUS using a command-line interface could be difficult especially for novice system administrators. Hence, to ease their problem to some extent, we can use daloRADIUS, a web-based GUI for FreeRADIUS.
FreeRADIUS System Requirements:
- An Ubuntu 20.04 server with sudo rights.
- 1.4 GHz 64-bit CPU minimum
- At least 512 MB RAM
- Minimum 300 MB Disk Space
FreeRadius & web GUI daloRADIUS installation on Ubuntu 20.04 server
1. Run Ubuntu 20.04 system update
On your command terminal run the system update command first to download and install the latest packages and security updates.
sudo apt update
2. Install Apache & PHP
The daloRADIUS is based on PHP and needs an Apache web server on Ubuntu 20.04 to run, thus, we need to install these requirements on our Ubuntu 20.04 LTS.
sudo apt-get install apache2 php libapache2-mod-php php-mail php-mail-mime \
php-mysql php-gd php-common php-pear php-db php-mbstring \
php-xml php-curl unzip wget -y
Paste the whole single block of command given above in your terminal and hit the Enter key.
Enable and start Apache:
sudo systemctl enable --now apache2
3. Setup MySQL/MariaDB server
FreeRADIUS need a database server to save its data, and here, for that, we will install the MariaDB database server.
sudo apt install mariadb-server
Enable and start MariaDB server:
sudo systemctl enable mysql
sudo systemctl start mysql
Secure your MariaDB installation:
sudo mysql_secure_installation
When you run the above command to secure Database installation, the instance will ask you multiple questions. For most of them, you have to type Y and hit the Enter key. When it asks to set up a root password for the database, do that.
4. Create a Database for FreeRADIUS
Log in as root. When asks for a password enter the one you have set in the above command.
sudo mysql -u root -p
Create DB for FreeRADIUS:
CREATE DATABASE demodb;
Grant all permissions of created database to a user created using the below command:
GRANT ALL ON demodb.* TO demouser@localhost IDENTIFIED BY "PASSWORD";
Note: Change demodb, demouser, and PASSWORD in the above command as per your choice.
5. Command to install FreeRADIUS on Ubuntu 20.04
Now, let’s run the command that will install FreeRADIUS on our Ubuntu 20.04, the packages are available in the official repository of the OS. Thus, we don’t need to add any repo or PPA.
sudo apt-get install freeradius freeradius-mysql freeradius-utils -y
Note: Replace demodb in all commands with your database created for FreeRADIUS.
6.Import FreeRADIUS database schema
Now, run the below command to import the pre-built database schema available in the FreeRADIUS directory.
sudo -i
mysql -u root -p demodb < /etc/freeradius/3.0/mods-config/sql/main/mysql/schema.sql
exit
cd
7. Create a symbolic link for the SQL module
sudo ln -s /etc/freeradius/3.0/mods-available/sql /etc/freeradius/3.0/mods-enabled/
Change the ownership of SQL files
sudo chgrp -h freerad /etc/freeradius/3.0/mods-available/sql
sudo chown -R freerad:freerad /etc/freeradius/3.0/mods-enabled/sql
8. Download daloRADIUS on Ubuntu 20.04 LTS
Get the latest copy of daloRADIUS using wget command from Github:
wget https://github.com/lirantal/daloradius/archive/master.zip
9. Unzip and move it to the ‘www’ directory
Extract the file:
unzip master.zip
Now, move the same:
sudo mv daloradius-master /var/www/html/daloradius
10. Import the daloRAIUS MySQL tables to the FreeRADIUS database
The daloRadius directory already has SQL tables or file which we import to our FreeeRADIUS database using the below commands:
cd /var/www/html/daloradius
sudo mysql -u root -p demodb< contrib/db/fr2-mysql-daloradius-and-freeradius.sql
sudo mysql -u root -p demodb< contrib/db/mysql-daloradius.sql
11. Change permission of daloRADIUS directory
Rename Sample file:
cd /var/www/html/daloradius/library/
sudo mv daloradius.conf.php.sample daloradius.conf.php
Give Apache user permission
sudo chown -R www-data:www-data /var/www/html/daloradius/
Change Configuration file permission
sudo chmod 664 /var/www/html/daloradius/library/daloradius.conf.php
12. Add Database details in the daloRADIUS configuration file
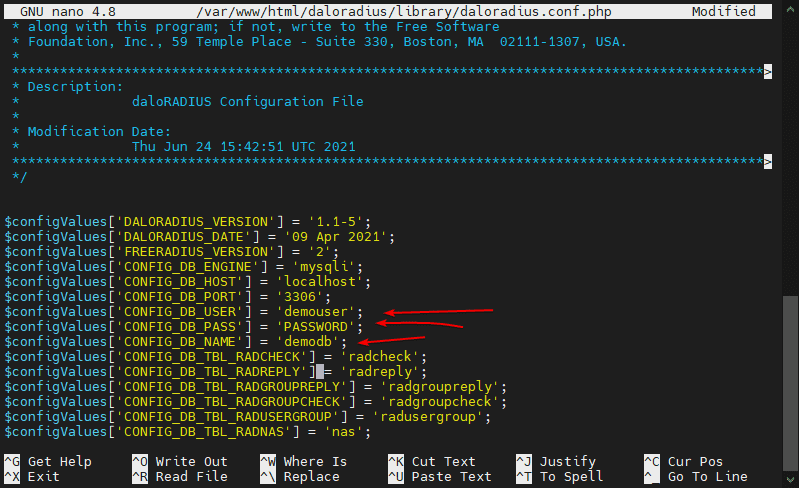
To let the web interface of daloRADIUS access FreeRADIUS, we need to add its database details in the configuration file of daloRADIUS.
sudo nano /var/www/html/daloradius/library/daloradius.conf.php
Change the following values as per your configuration of the FreeRADIUS database:
$configValues['CONFIG_DB_USER'] = 'demouser';
$configValues['CONFIG_DB_PASS'] = 'PASSWORD';
$configValues['CONFIG_DB_NAME'] = 'demodb';
To save the file press Ctrl+X, type Y, and then hit the ENTER key.
13. Restart FreeRADIUS and Apaches services
To make sure all the changes have been applied successfully to our web server and FreeRADIUS instance, let’s restart their services:
sudo systemctl restart freeradius
sudo systemctl restart apache2
14. Access GUI web interface
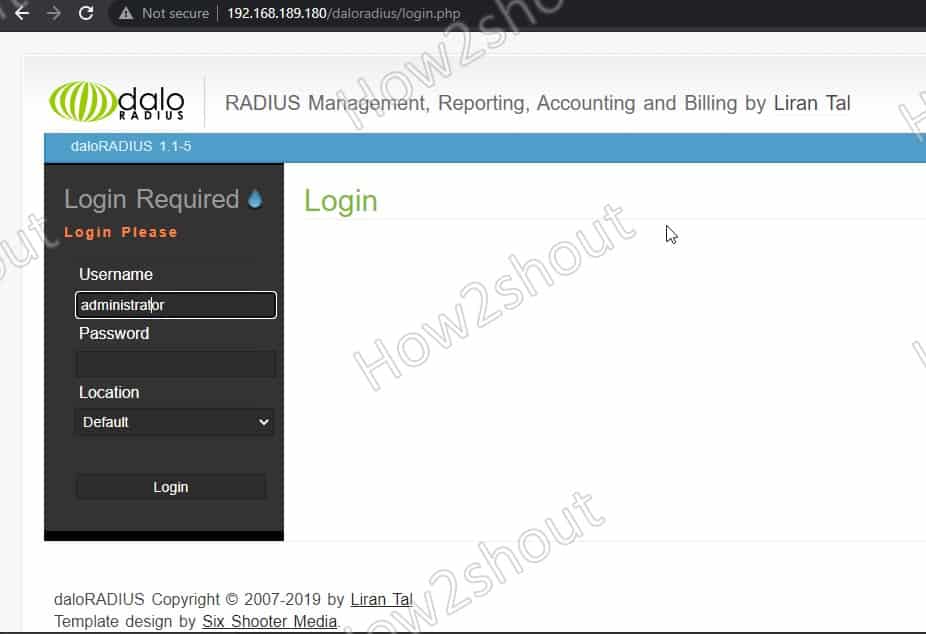
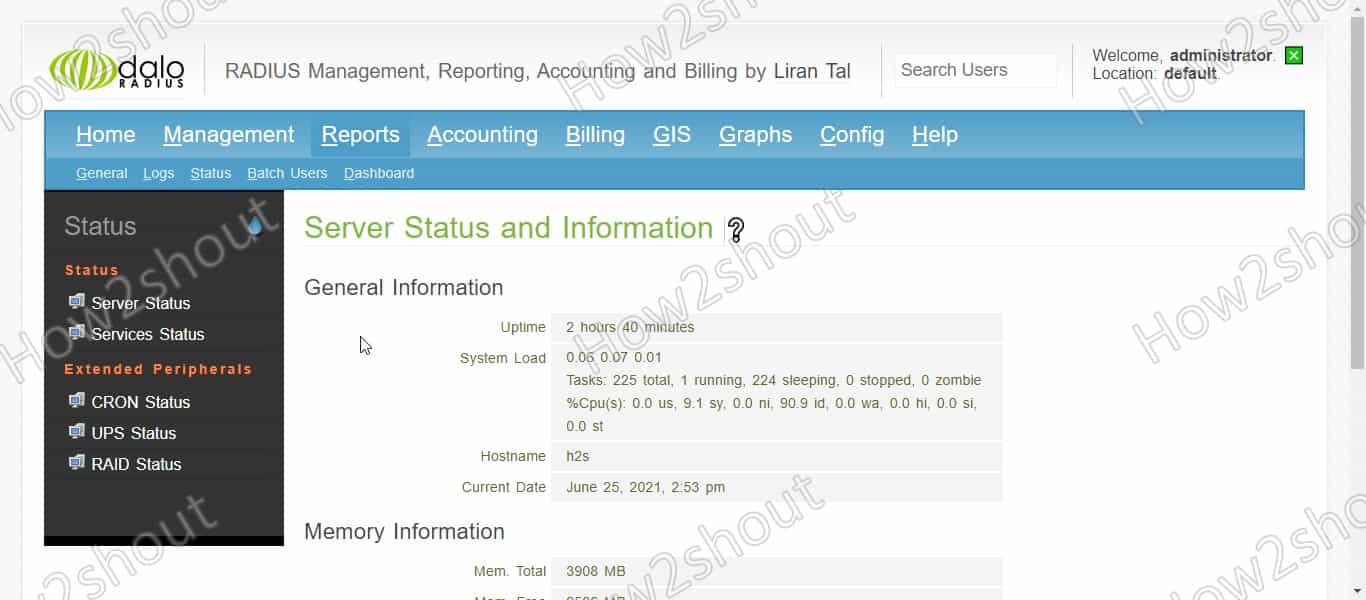
Now, open your browser on your system and point it to the IP address of the server where you have installed daloRADIUS. Format Example– http://server-ip-address/daloradius
Login. The default username– administrator and password is – radius, respectively.
Important Links: FreeRadius documentation and daloRADISU information.
Other Articles:
- How to access remote MySQL database in local phpMyAdmin
- Install and Use Glances to monitor Ubuntu 20.04
- How to install PrestaShop on Ubuntu 20.04 Server
- Install and Configure Virtualmin on Ubuntu 20.04



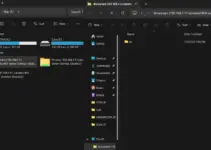
This folder and file in step 11 are not found when I extracted the zip file and copied. I downloaded the package (and unzipped) twice, but the conf file as well as the /library folder are missing
cd /var/www/html/daloradius/library/
sudo mv daloradius.conf.php.sample daloradius.conf.php
Hi Prad
did anyone get back you you on this? i have same problem, going to play arround a bit and see if i can come up with anything
same here, any solution or do we just need to create that directory?