Here is the Link to Download Rocky Linux, a Long term supported alternative to CentOS after AlmaLinux, and if want then can also follow the steps given here to test RockyLinux on VirtualBox.
With the RedHat announcement that they are going to end the Long Term supported version of CentOS, a couple of solutions came forward and Rocky Linux is one of them. However, lots of people were waiting for its release because of the man behind the announcement of this project. Greg Kurtzer is one of the founders of the CentOS project which later became a part of RHEL. Well, again he is here with Rocky Enterprise Software.
Rocky Linux Installation on VirtualBox Virtual machine
Here we are installing RockyLinux Minimal ISO, however, the below-given steps will be the same for Full DVD ISO as well.
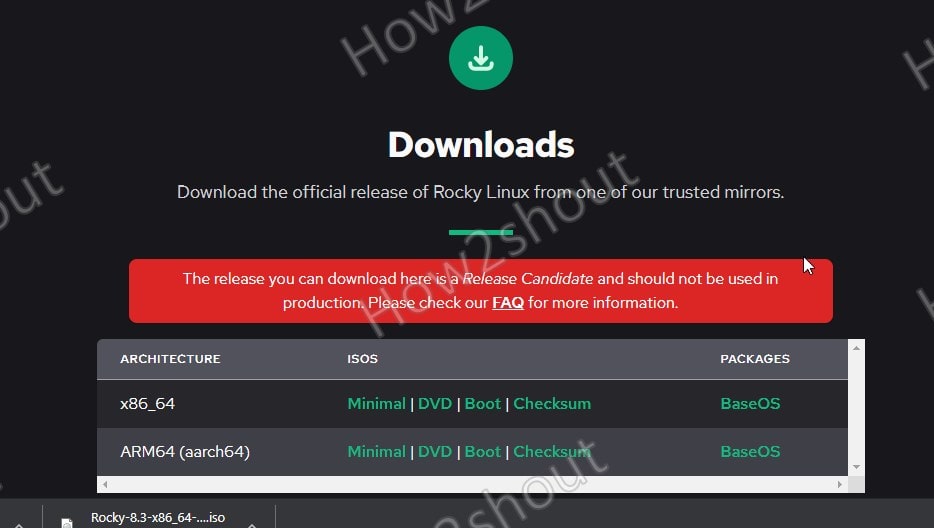
1. Download Rocky Linux ISO file
While doing this article, this RHEL based Linux OS was still in the testing phase, however, the method to install the stable and release candidates will not be different. Therefore, visit the official website- https://rockylinux.org/download and download either Minimal (1.7 GB) or Full ISO (around 8 GB).
2. Install VirtualBox
If you don’t have VirtualBox installed on your existing system, then download it from the official website- www.virtualbox.org. However, for Debian or Ubuntu-based system simply run –
sudo apt install virtualbox
3. Create Virtual Machine for Rocky Linux
Open VirtualBox and follow the below steps to set up a virtual machine to boot this Linux ISO file.
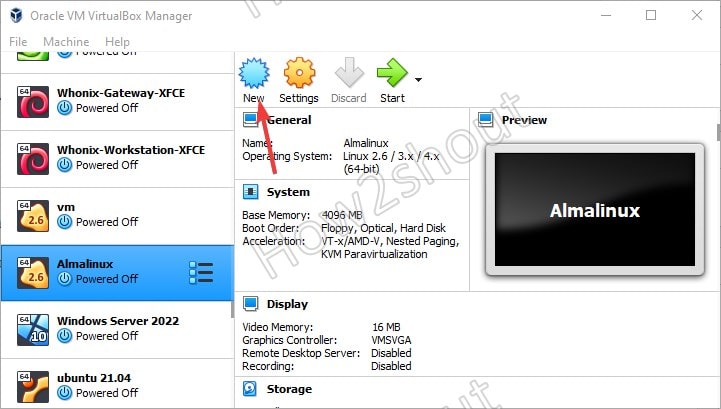
- Click on the New button.
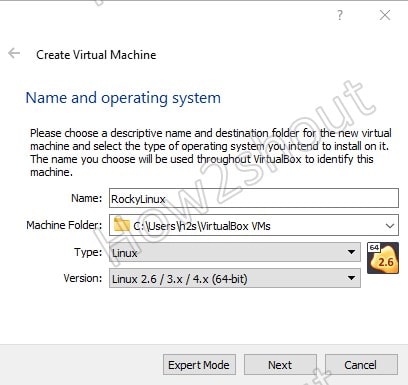
- Give Name- Rocky Linux and select Type- Linux
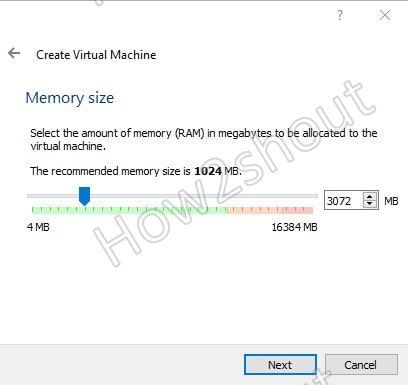
- Assign amount of RAM- around 3GB will be good if you are planning to use the Gnome GUI interface
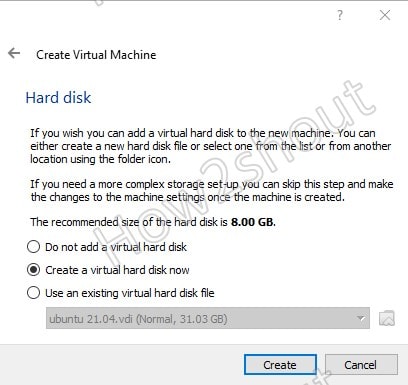
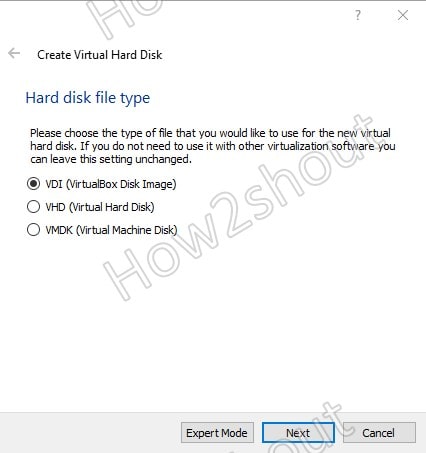
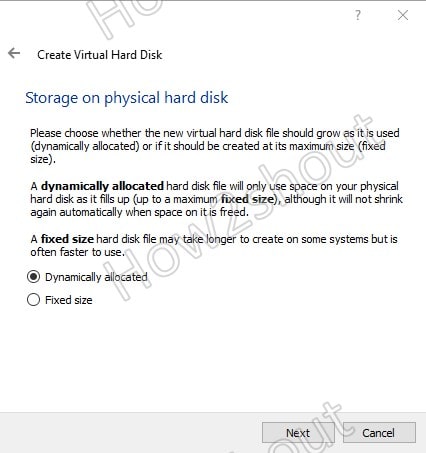
- Create Virtual Hard Disk- Let the default option selected such as VDI and Dynatimncally allocated.
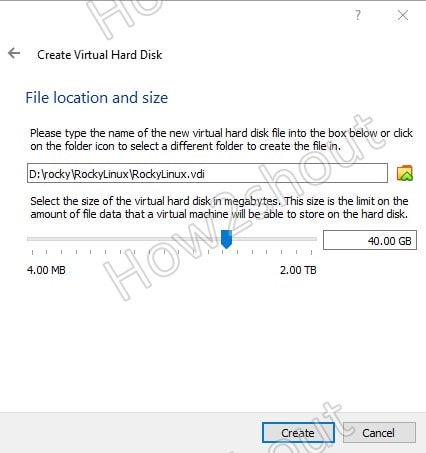
- 20 GB at least more as per your requirement, here we are giving 40GB.
Follow the below screenshots to get a clear idea
4. Run Virtual machine
You will see your created VM on the left side given list of VirtualBox. Select the one you have just created and click on the Start button.
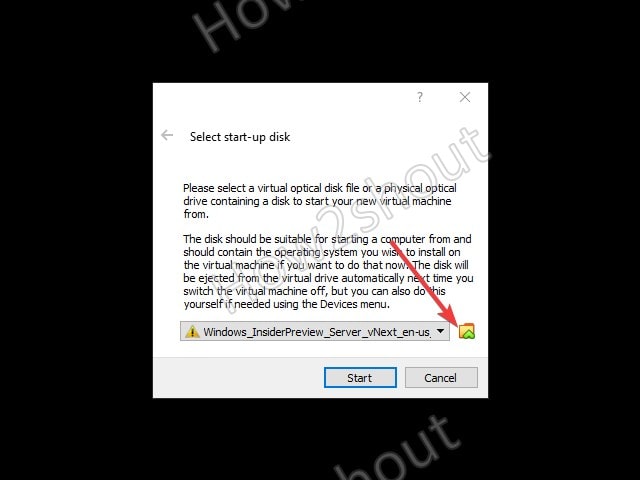
5. Set Rocky Linux ISO as a bootable medium
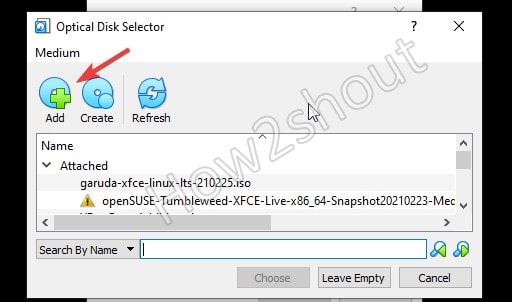
As we start the virtual machine, it will ask to set the Startup Disk. Click on the Folder icon -> and then Add button. A File Explorer will open, now select the downloaded Rocky Linux ISO file.
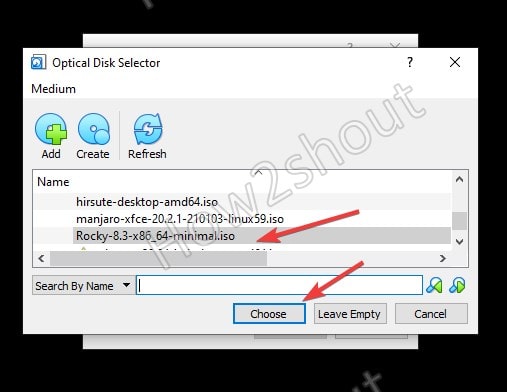
Now, from the ISO file list area, select added Rocky ISO -> hit the Choose and after that click the Start button.
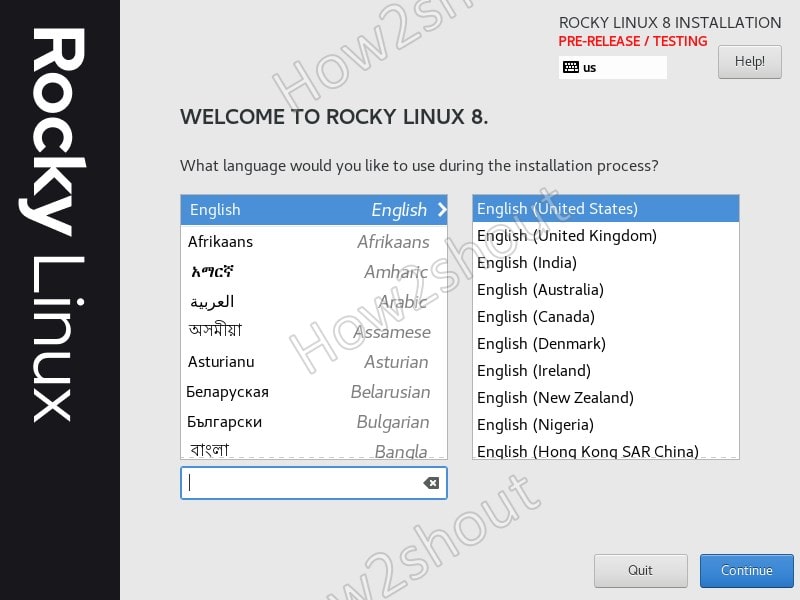
6. Select Language
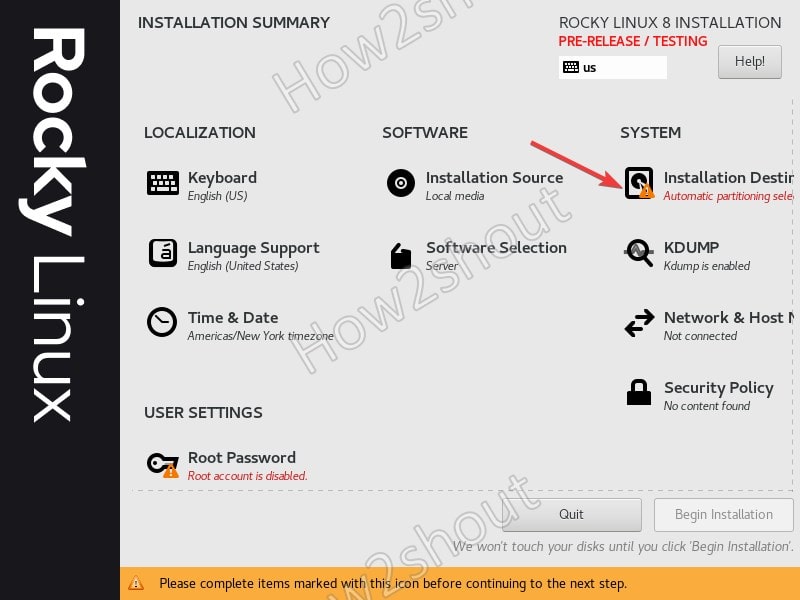
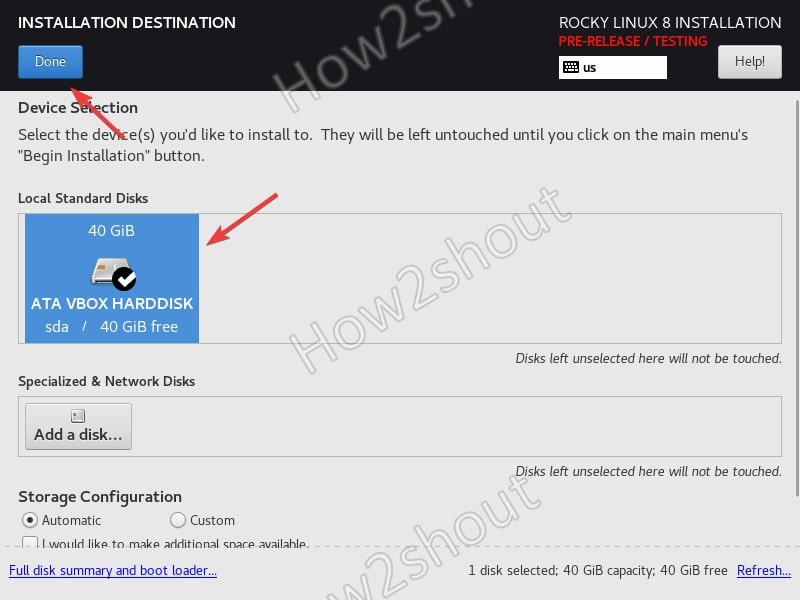
7. Installation Destination
Select this option and then you will see the created Hard disk attached, select it to install the OS.
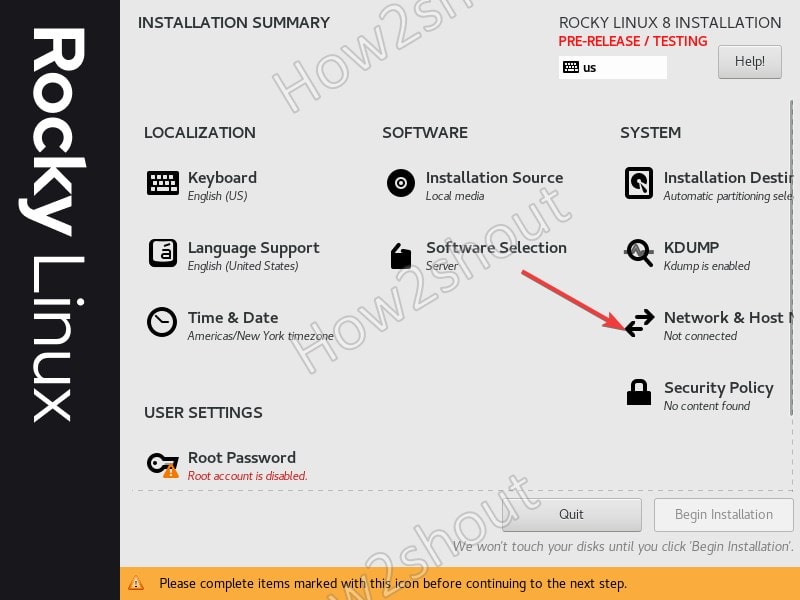
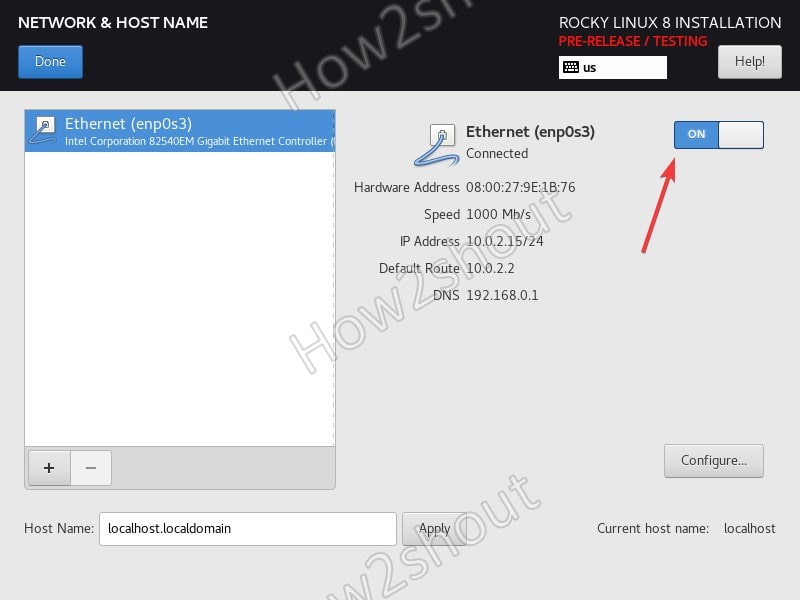
8. Enable Ethernet
Select Network and Host and then Enable the Ethernet by sliding the Toggle button.
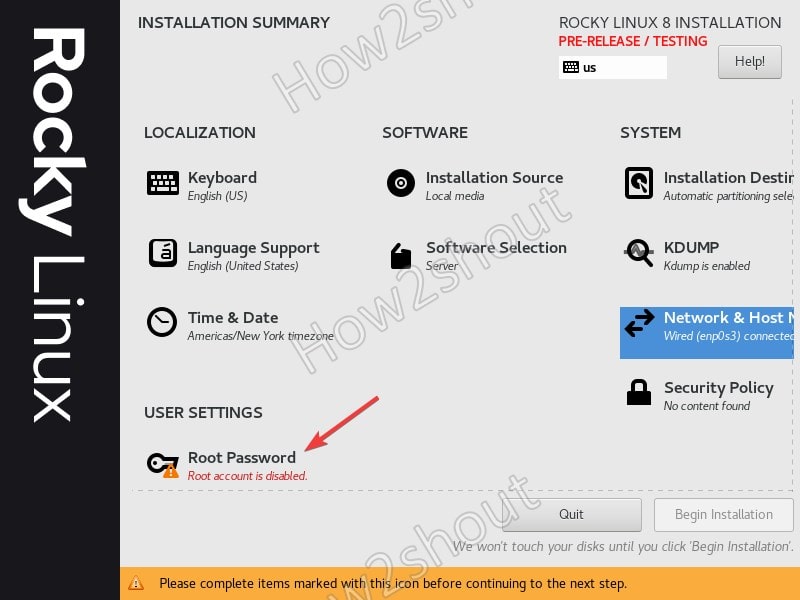
9. Set Root user password
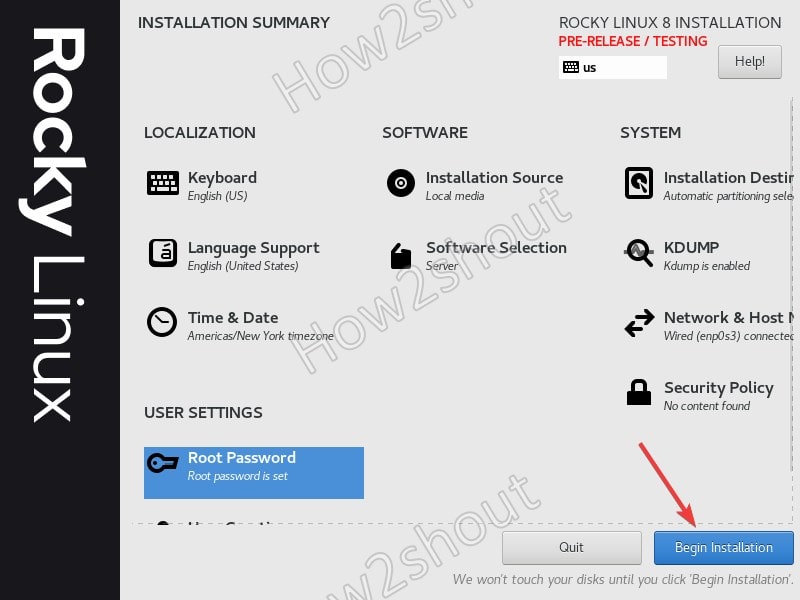
Click on the Root Password and type the password that you want to use.
10. Reboot the system and log in
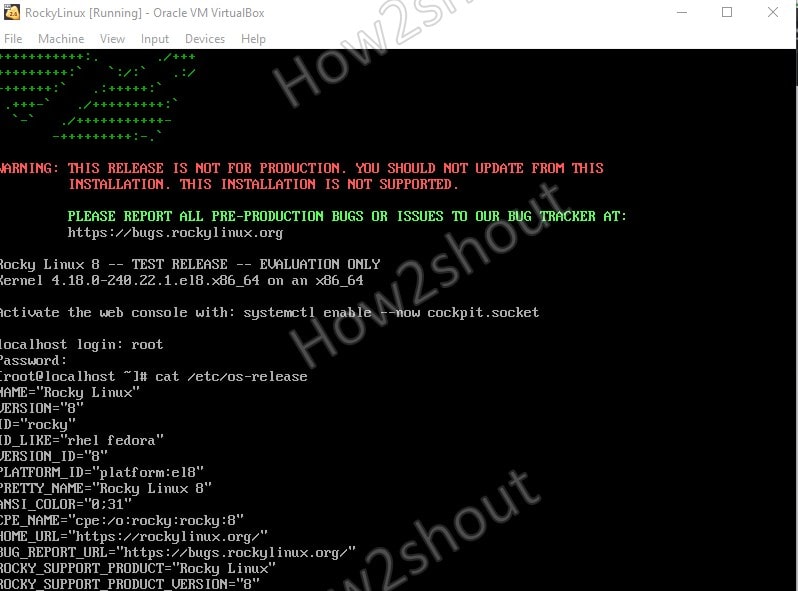
Once the installation is done, click on the Reboot button and the VM will restart to boot with Rocky Linux.
Other Linux tutorials-


Thanks for covering us and writing some documentation!