The commands in this tutorial to install Doxygen on Ubuntu 20.04 LTS can be used for Ubuntu 18.04/21.04, Linux Mint, Debian, ElementaryOS, MX Linux, POP!OS, and other similar distros.
Doxygen is a free software documentation tool. Using special comments in the source code, Doxygen creates documentation in HTML , LaTeX , CHM (help files under Windows), XML , RTF , PostScript , PDF and man pages . Doxygen analyzes both the comments and the source code itself in order to identify and document modules, classes, methods, and functions as well as various types of variables.
Since Doxygen analyzes the source code, it must be able to recognize the respective syntax. Among other things, C ++, C, Java, Objective-C, Python, IDL, Fortran, VHDL, PHP, C #, TCL, and partly D are officially supported.
Steps to install Doxygen GUI on Ubuntu 20.04 LTS
1. Refresh system repo cache
Before moving further, run once the system update command to refresh the system cache and also update the already installed packages.
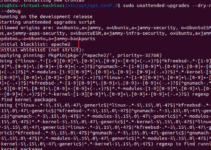
sudo apt update
2. Install Doxygen on Ubuntu 20.04 LTS Linux
Well, we don’t need to add any third-party repository to install Doxygen, its packages are already available on the default Ubuntu package sources, we can get the following packages for this tool:
• doxygen
• doxygen-doc (documentation, optional)
• doxygen-gui ( universe – graphical user interface based on Qt, optional)
• graphviz (required to create diagrams; e.g. collaboration diagram, optional)
To install all of them you can run:
sudo apt-get install doxygen doxygen-doc doxygen-gui graphviz

To check the installed version, we can use:
doxygen --version
And to see all the available options for the doxygen command, we can go for help:
doxygen --help
Now, to generate documentation of source code, use the following command-
doxygen -g TEST.conf
This will create a configuration file called TEST.conf. This is now to be edited with any text editor. As a rule, most of the settings can be retained. Some configuration parameters are listed in the Important Settings section.
In order to create the documentation, the following command is executed in the terminal:
doxygen TEST
After the program has run through, there is a new subfolder in the current folder, depending on the selected documentation format. For example, if HTML documentation was created, a directory named html was created. The index.htm file in it can now be viewed with any browser. In order to publish the documentation, all files in the html folder must of course be published.
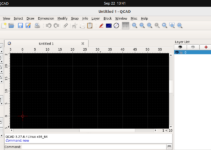
3. Run Doxygen GUI- Graphical user interface
To use the graphical user interface, the doxygen-gui package must be installed. No Application launcher menu entry will be created by default after the installation. Hence, to use the application go to your terminal and simply run the command following command to start it.
doxywizard
Doxywizard summarizes all configuration parameters in a graphical user interface. Two approaches are offered for configuration. The “Wizard” tab only offers the basic setting options and enables beginners to configure Doxygen quickly and easily. If you need various fine adjustments and are familiar with Doxygen, select the “Expert” tab. All available parameters are displayed including a short explanatory text and grouped according to the topic.
After you have made all the required settings, you switch to the “Run” tab and start creating the documentation using the “Run doxygen” button. Depending on which format was selected for the documentation, there is a corresponding subfolder in the project directory (e.g. html ).

Uninstall or Remove Doxygen completely
sudo apt-get --purge remove doxygen doxygen-doc doxygen-gui graphviz