In this tutorial, we will learn the steps to install Puppet Server on AlmaLinux or Rocky Linux 8 distros using the command terminal.
Puppet is an open-source project with enterprise support, it allows admins to automate the configuration of a single server or computer to a large network of systems; Ansible and Foreman are a few of its alternatives.
When developers and administrators have to configure multiple servers at a time with similar configurations then instead of repeating the same tasks on each system one by one they use special configuration managers such as Puppet. Ideally, many tasks can be automated with it using Puppet’s Domain-Specific Language (DSL) — Puppet code — which you can use with a wide array of devices and operating systems. It was developed in 2005 by Puppet Labs, Portland, Oregon; written in Ruby and designed to be cross-platform. Any login term enterprise operating system can be used to host Puppet servers such as OracleLinux, RedHat, SuSE, Ubuntu, Debian AlmaLinux, and Rocky Linux. Systems running Windows can also be configured and managed with Puppet, with some limitations.
It uses the Client-server principle
Like most of the tools used for monitoring and managing remote systems, Puppet also uses Client-Server architecture. The server part of it is known as “PuppetMaster” which keeps all configurations of the computers active in the network. It makes the admins centrally manage all computers connected to a network with the help of agents. Yes, the agent is the client part, known as PuppetAgent installed on all the systems that need to be configured. It makes a significant contribution to the comfort of Puppet architecture. It is executed by the master on all systems to be configured. The configuration settings stored in the catalog as the target state serve as the basis. The communication between agent and master takes place via HTTPS. Certificates on both sides serve to secure the bidirectional communication processes.
When talking about the editions, then apart from the open-source, it also offers Puppet Enterprise (PE). It is the commercial version of Puppet that is built on top of open source Puppet platform. Both products allow you to manage the configuration of thousands of nodes. Open source Puppet does this with desired state management. PE provides an imperative, as well as a declarative, approach to infrastructure automation. Hence as per the official statement of the developers, if a person has a complex or large infrastructure operated and managed by multiple teams then they should go for the Enterprise version of the Puppet because of the graphical user interface, point-and-click code deployment strategies, continuous testing, and integration, and the ability to predict the impact of code changes before deployment.
Steps to install Puppet server & Client on Rocky Linux | AlmaLinux 8
1. Requirements
• Minimum 2-core processor with at least 1 GB of RAM or 4 core with at least 4GB of RAM to serve at least 1,000 nodes.
• A fresh RedHat based Linux such as Oracle, Rocky or AlmaLinux
• At least non-root sudo user access
• Terminal access
• Internet connection
2. Run Dnf Update command
First, run the system update and upgrade command to ensure everything is at its latest state on your Linux system.
sudo dnf update && upgrade
Also, install a few tools we required during the setup:
sudo dnf install wget curl nano
Enable EPEL repo & PowerTools:
sudo dnf install epel-release
sudo dnf config-manager --set-enabled powertools
sudo dnf update
3. Set FQDN as system hostname
The FQDN that you want to use to access Puppet, set as the server hostname using the command given below:
sudo hostnamectl set-hostname puppetmaster.how2shout.com
Note: Replace puppetmaster.how2shout.com with whatever you want to set and also add the same in /etc/hosts the file along with the Ip-address of your Puppet server.
sudo nano /etc/hosts/
Add the hostname along with server IP-address, for example
192.168.1.45 puppetmaster.how2shout.com puppetmaster puppetserver
192.168.1.45 is the server IP address where the puppetmaster.how2shout.com FDQN for puppet along with some alternative names we have assigned to the IP.

Reboot the Server:
sudo reboot
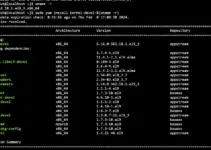
4. Add Puppet repository on Rocky or Almalinux 8
The latest packages can easily be downloaded by adding the official Yum repository of Puppet on Rocky Linux as well as AlmaLinux. For that simply follow the given commands:
sudo dnf -y install https://yum.puppet.com/puppet-release-el-8.noarch.rpm
sudo dnf update -y
5. Install Puppet Master Almalinux 8 | Rocky Linux 8 server
Once we have added the repository it is quite easy to install Puppet Master on our server using the default DNF package manager.
sudo dnf install puppetserver -y

6. Configure Puppet Master Server
As of now you already have the server part of the Puppet successfully installed on your system. Next, let’s edit its configuration file to perform some changes.
sudo nano /etc/puppetlabs/puppet/puppet.conf
Add FQDN you have set on the server, in the configuration file, for example,”
dns_alt_names=puppetmaster.how2shout.com,puppetmaster,puppetserver,puppet
Whereas also add the following lines to tell it about certificate and server name:
[main]
certname = puppetmaster.how2shout.com
server = puppetmaster.hwo2shout.com
environment = production
runinterval = 1h
Save the file using CtrL+O, hit the Enter key, and then exit the file using Ctrl+X.
To know more about the Puppet Settings configuration files you can visit the following links:
# – https://puppet.com/docs/puppet/latest/config_important_settings.html
# – https://puppet.com/docs/puppet/latest/config_about_settings.html
# – https://puppet.com/docs/puppet/latest/config_file_main.html
# – https://puppet.com/docs/puppet/latest/configuration.html

7. JVM Memory Allocation (optional)
Be default the JAVA memory allocated to the Puppet Master Server is 2GB, however, if your system doesn’t allow that much memory to allocate or if you want to allow more, then we can do that by editing the Puppet server configuration file:
sudo nano /etc/sysconfig/puppetserver
In the file, find two arguments -Xms2g -Xmx2g and change 2g to 1g (means 1GB) or 4g (for 4GB). After that save the file: using Ctrl+X, press Y, and hit the Enter key.

8. Allow Puppet service in firewall
Open the Puppet service in your system’s firewall to ensure it can easily communicate over the network with agents.
sudo firewall-cmd --add-service=puppetmaster --permanent
sudo firewall-cmd --reload
9. Start Puppet Server on Rocky | AlmaLinux 8
Well, we have completed all the necessary settings to start with the server. By default Puppet master services won’t be running, let’s start and enable the same.
sudo systemctl start puppetserver
sudo systemctl enable puppetserver
To check the status of the service use:
sudo systemctl status puppetserver
To restart you can use:
sudo systemctl restart puppetserver

10. Add Puppet to your system path
To use the command line of this tool regardless of the directory in which you are:
echo 'export PATH=$PATH:/opt/puppetlabs/bin' | tee -a ~/.bashrc
Reload bash:
source ~/.bashrc
To confirm you can use:
puppet --version
Switch to root:
sudo su -
Issue certificates
puppetserver ca setup
To List:
puppetserver ca list --all
Let’s confirm that server is working fine by using it with a locally installed Puppet Client.
puppent agent -t
or
puppet agent --test --ca_server=puppetmaster.how2shout.com

To list all available certificates on Puppet Master Node.
puppetserver ca list --all

You can sign all pending certificates by running the command:
puppetserver ca sign --all
In this way, we can install both master and agent on Rocky Linux or Almalinux. If you want an agent on remote or server in the network then follow the steps further.
—————————————————————————————————
11. Setup Puppet Agent on remote system or node
Now, if you want to install Puppet agent on some remote Linux or Windows server, then we can do that easily.
#For RPM systems such as Redhat, CentOS, Rocky, Oracle Linux, Almalinux… use the following commands:
sudo dnf -y install https://yum.puppet.com/puppet-release-el-8.noarch.rpm
sudo dnf update
#For Ubuntu and Debian systems:
Visit https://apt.puppet.com and copy the link of repo-package as per your Debian system.
For example-
Ubuntu 20.04
wget https://apt.puppet.com/puppet7-release-focal.deb
For Debian Bullseye:
wget https://apt.puppet.com/puppet7-release-bullseye.deb
To install
sudo dpkg -i puppet7-release-focal.deb
Run system update:
sudo apt update
Install Puppet Agent
sudo apt install puppet-agent
Start service:
sudo systemctl enable --now puppet
12. Configure Puppet Agent
Edit agent file:
sudo nano /etc/puppetlabs/puppet/puppet.conf
Add:
[main]
ssldir = /var/lib/puppet/ssl
vardir = /var/lib/puppet
cadir = /var/lib/puppet/ssl/ca
dns_alt_names = puppet

[agent]
server=puppetmaster-ipadress
ca_server=puppetmaster-ipadress
Save the file.
Now, edit host and define DNS for puppetmaster
sudo nano /etc/hosts
example, in the following way:
192.168.1.45 puppet-master-server fqdn
192.168.1.16 your-node-01-hostname
In the same way, edit the PuppetMaster /etc/hosts file and define IP-address and node hostnames
sudo nano /etc/hosts
192.168.1.16 your-node-01-hostname
To request CA certificate on getting then run:
sudo su -
puppet agent -t
Other Articles:
• How to install Foreman on Rocky or Almalinux 8
• How to install Zabbix Agent on Debian 11 Bullseye
• Install Centreon Monitoring on AlmaLinux 8 | Rocky
• Install Munin on Ubuntu 20.04 for Server Monitorin