Not everyone is sound and habitual to use the database command line, hence PhpMyAdmin GUI is there to create, delete and manage MySQL or MariaDB database. Here we let you know how to install PhpMyAdmin on Docker Container.
What is PhpMyAdmin?
PhpMyAdmin is a web interface through which a user has direct access to a MySQL or MariaDB database. H/she can use this graphical tool to interact with the database without having extensive knowledge of the commands used for the databases. It translates the selected function into the corresponding commands and applies them to the server or a special database.
If you have ever used some hosting service then you would already be familiar with it. Because in WHM CPanel PhpMyAdmin comes as the default GUI application to manage databases.
Which functions does PhpMyAdmin offer?
From the GUI of the program, we can perform various tasks related to MySQL/MariaDB relational database such as:
- Creation of a new database
- Deleting an existing database
- Add or Delete database users
- Copy the content to a new database
- Database Backup in SQL format
- Restoring from an existing backup
- Edit Database Tables
- Change of users and passwords
- Alter access rights
Command to install phpMyAdmin on Docker Container
Docker Installation
I don’t know whether Docker is on your system or not. However, if you here for this tutorial then I am assuming you already have installed Docker on your Linux, macOS, or Windows system. Nevertheless, if not then follow the given articles:
- How to install Docker CE on Rocky Linux/AlmaLinux/CentOS 8
- Tutorial to install Docker-container on Ubuntu 20.04 LTS…
- Steps to install Docker on Windows 10
2. Pull phpMyAdmin Docker Image
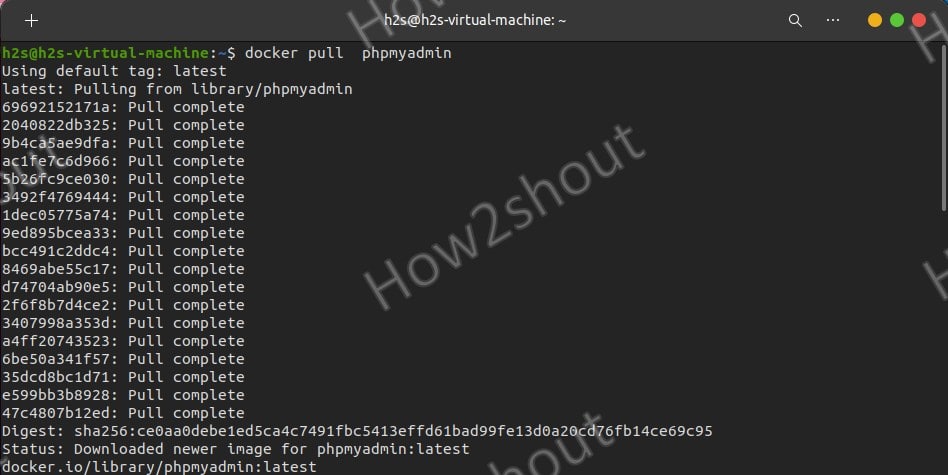
If your system already has this container platform then the next step is to download the docker image of phpMyAdmin available on Docker Hub. Here is the command to do that-
docker pull phpmyadmin
To check and find the downloaded docker image name, run –
docker images
3. Create and Run phpMyAdmin Docker Container
Once we have the docker image of phpMyAdmin, the next step is to run the same to create a container. Please go through the below-given command.
docker run --name myh2sadmin -d -e PMA_ARBITRARY=1 -p 8080:80 phpmyadmin
The explanation for the above command-
docker run – This is a command to create and start a container using an image.
--name myh2sadmin: By Default, while creating a container the system will assign some random name to it, this will create confusion when we want to remember its name to start or stop it. Thus, manually assign a name to our container. Here we are giving it myh2sadmin you can use whatever you want.
-d – This makes the container run in the background
-e PMA_ARBITRARY=1 – We don’t want to assign some particular MySQL/MariaDB database server to phpMyAdmin, thus this option will give us the ability to manually use the address of our Database server to connect and manage through the phpMyAdmin.
-p 8080:80 : You cannot access PHPMyAdmin outside the docker container by default for that we have to forward or map its default port with the port of the host machine. The syntax is like this- -p host-port:conainer-port, where 8080 is the host port that we have mapped with the 80 port of the PHPMyAdmin container.
phpmyadmin – It is the name of the Docker image we have downloaded.
4. Access web interface locally or from outside (remotely)
Open browser on the host system and type http://localhost:8080, however, if you want to access the web interface in some remote system then first allow port 8080 in your host system’s firewall, you can follow the below given commands:
For Debian, Ubuntu, or their derivatives:
sudo ufw allow 8080
For RHEL/CentOS/Rocky Linux/AlmaLinux
sudo firewall-cmd --zone=public --add-port=8080/tcp --permanent
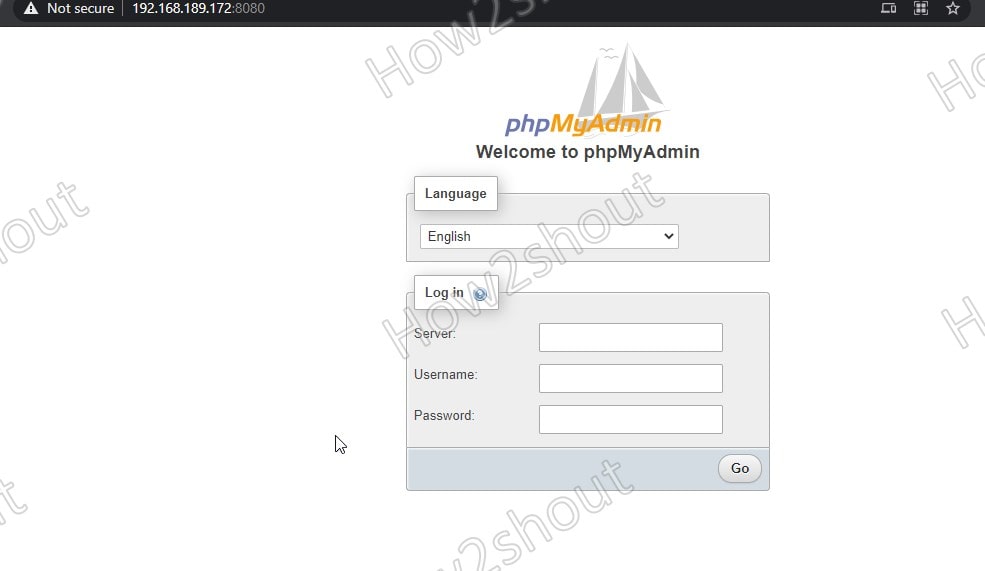
Now, open the browser on any system that can access the IP address of the host or system where you installed your docker.
Type: http://host-ip-address:8080
Example: http://192.168.189.172:8080/
You will get something like the below:
5. Enter Database Server Details
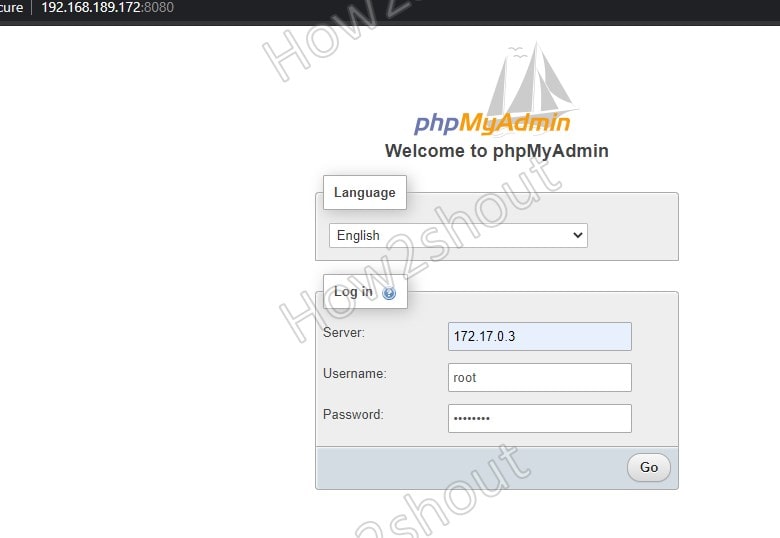
Here is the key part, suppose you have MySQL or MariaDB running on some Docker container or any remote server, to access that in the installed phpMyAdmin docker container, simply add its details:
If your database server is on a docker container on the same host where the PHPMyAdmin container has been created, then first find the Ip-address of your database server using the below command:
docker inspect mariadbh2s | grep IPAddress
In the above command change the mariadbh2s with your Database container name. The output will be something like this:
"SecondaryIPAddresses": null,
"IPAddress": "172.17.0.3",
       "IPAddress": "172.17.0.3",
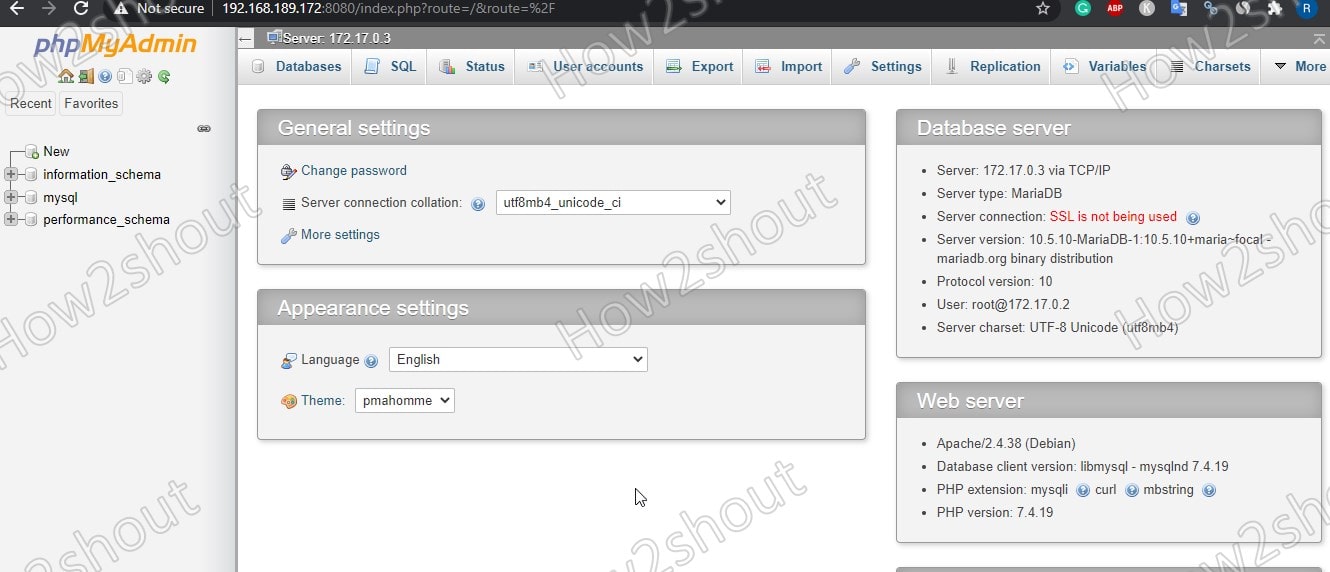
Note down the IP address and enter that in the PHPMyAdmin web interface box given for the server and then MySQL or MariaDB root user password.
If your database server is on some remote server or cloud then enter the IP address of that along with username and password.
Note: In case your database server is running on some different port than the default one, then also mentioned that as well in the Server’s column.
You can also see our article– Commands to Install & Run MariaDB on Docker Container
Other Articles:
- How to run Docker terminal online for free to learn it- Play with
- How to access remote MySQL database in local phpMyAdmin
- Quick Steps to Install Docker-CE on OpenSUSE Linux



Thanks for the article, here is another phpmyadmin docker image, it is based on the original one, but has much smaller footprint and has some extra dark themes.
https://github.com/beeyev/phpmyadmin-docker-lightweight