In this tutorial let’s learn the steps to use Nginx as a proxy server for the Apache web server on Ubuntu 22.04 LTS for better performance.
Apache is a well-established name in the server world as a web server and so the Nginx. Although, both are powering millions of hosting servers, however when it comes to performance Nginx is generally faster than Apache whereas the latter one known for a wide range of powerful features and modules.
Steps to set up Nginx as a reverse proxy for Apache on Ubuntu 22.04
To follow this tutorial you must have Ubuntu 22.04 or earlier version with sudo user rights for installing Apache and Nginx.
1. Update Ubuntu 22.04
Execute the system update command first on your system to install the latest available updates. This will ensure that we are getting the latest available package updates for our system.
sudo apt update && sudo apt upgrade
2. Install Apache Web server
If you already have and using the Apache web server on your Ubuntu 22.04 system then skip this step and move to the next one. Otherwise, use the APT and install it.
sudo apt install apache2
3. Change the Default Apache port
If we want to use the Nginx server as a proxy one to serve your website then the port 80 needs to be used by it. Therefore, we have to make sure that Apache is not reserving the HTTP port 80. So, in this step, we will edit the port configuration file of Apache to change the port from 80 to 8000.
sudo nano /etc/apache2/ports.conf
Find and Change port 80 to 8000
From: Listen 80 to 8000
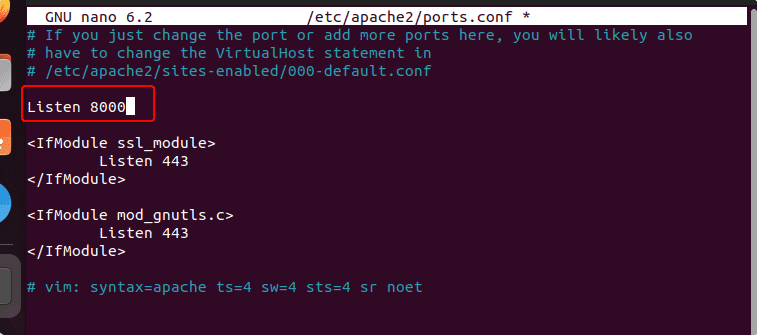
Save the file using Ctlr+O, hit the Enter key, and then exit the file editor using Ctlr+X.
Also, change the default port 80 in the virtual host configuration file as well.
sudo nano /etc/apache2/sites-enabled/000-default.conf
Change Virtualhost’s port 80 To 8000
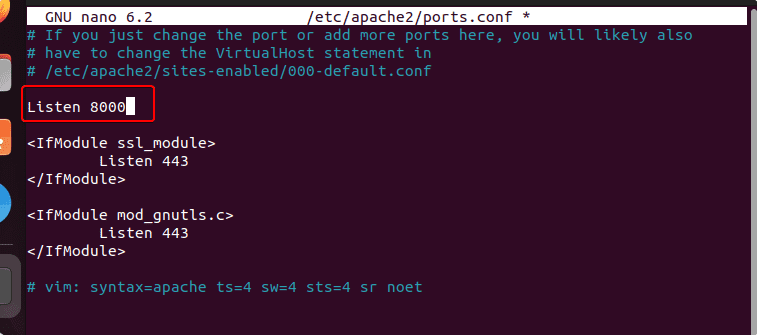
Save and exit the file as we did earlier.
Now, restart the apache server
sudo systemctl restart apache2
4. Test Apache is working on the new port
Once you are done with the changing of the Apache default port, let’s check whether it is working on the new set port or not. For that simple type your server IP address or domain with port 8000. The format example is given below:
http://your-serer-ip:8000
or
http://example.com:8000
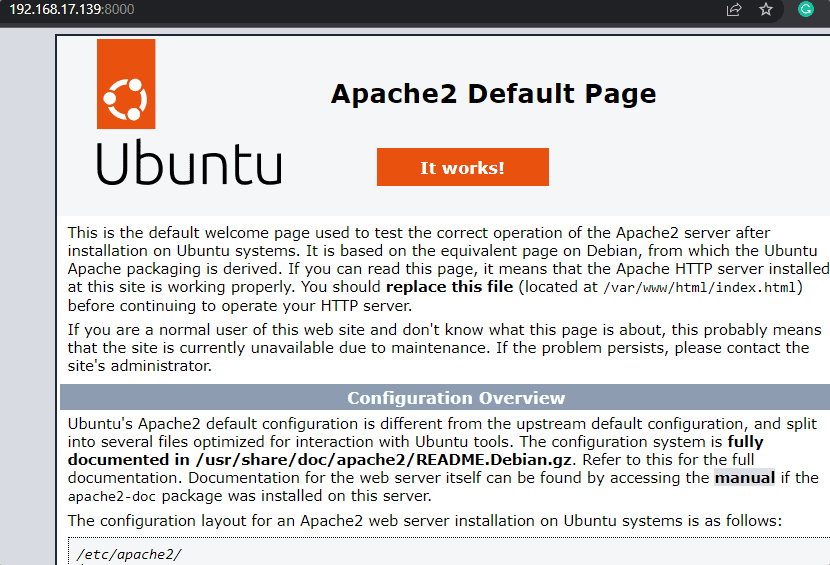
5. Install Nginx
We have configured the Apache to work on a new port which means our port 80 is free to use by Nginx. Let’s first install the Nginx on our Ubuntu 22.04.
sudo apt install nginx
After completing the installation move the default configuration file somewhere safe, in case you want to use it later.
cd /etc/nginx/sites-enabled/
sudo mv default /opt
Now create a new default site configuration file with the given lines:
sudo nano default
Copy-paste the following lines. Here we are redirecting Nginx to read the Apache web server-generated content.
server {
listen 80 default_server;
index index.php index.html index.htm;
location / {
proxy_pass http://localhost:8000;
proxy_set_header Host $http_host;
proxy_set_header X-Real-IP $remote_addr;
proxy_set_header X-Forwarded-For $proxy_add_x_forwarded_for;
proxy_set_header X-Forwarded-Proto $scheme;
}
}
Save the file by using Ctlr+O, hit the Enter key, and then exit using Ctrl+X.
Check the Nginx for any configuration error:
sudo nginx -t
Restart Nginx
sudo systemctl restart nginx

Now, you can access your website running on the Apache server behind the Nginx Proxy server using the server IP address or domain without adding any port number.
You can check whether the Nginx is working as a proxy server or not:
curl --haproxy-protocol localhost
The output will show you the Nginx/x.x.x to confirm.
Other Articles:
♦ Install Google Cloud SQL Proxy on Ubuntu 22.04 | 20.04
♦ How to Install Ntopng on Ubuntu 22.04 LTS…
♦ 9 Best Linux distro systems for special




Well done. The first, among a hundred tutorials, that works!
Nice procedure and instructions, but they have so far not worked for me. The two illustrations for the port change steps are identical, so there is definitely an issue with that.
I’m sure I will resolve my issues, but so far still working on it.