LightZone is a free and open-source alternative to image editing software like Adobe Lightroom. One can use it to view pictures, organizing your images and at the same time provides a wide range of editing functions.
It is possible to adjust various elements exposure, colour, sharpness and more of a RAW image using a slider. You can quickly create impressive black-and-white versions or apply preset effects with a click of the mouse.
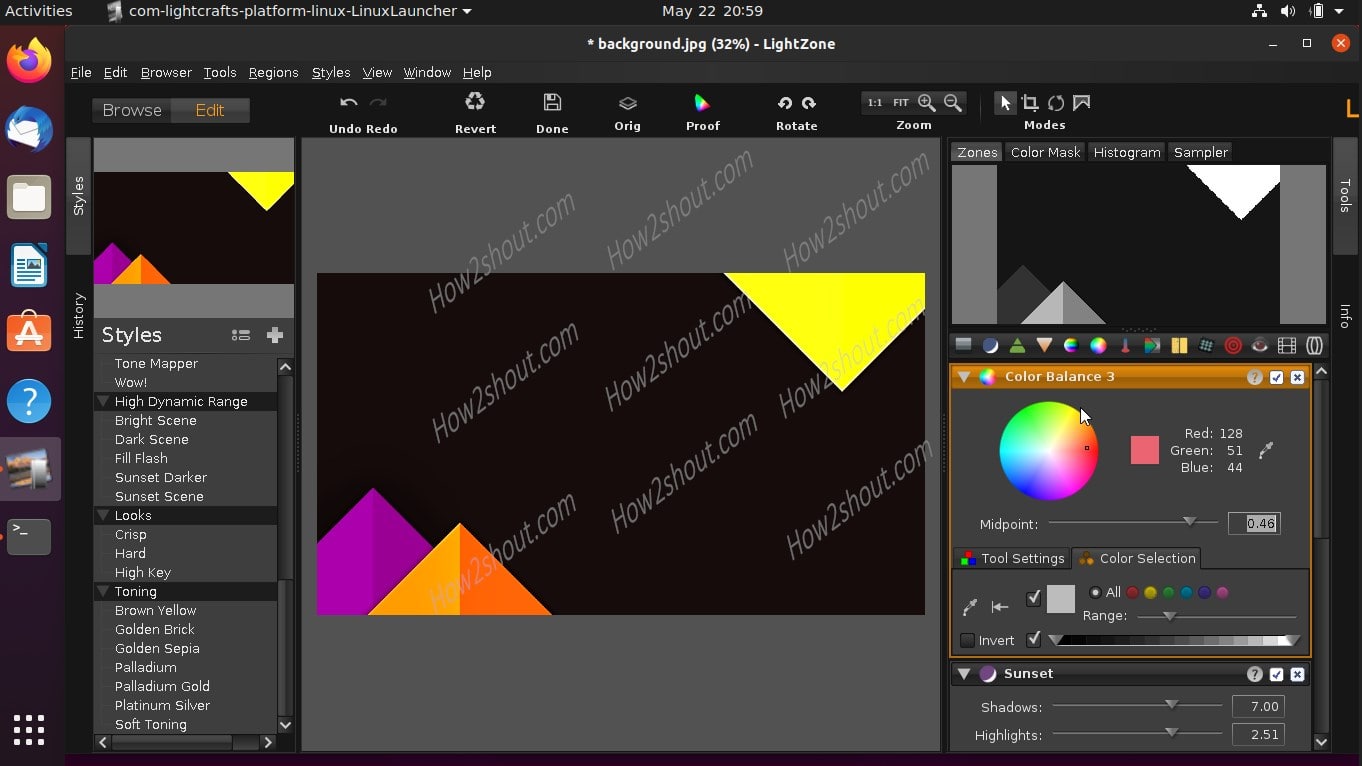
Zones, Color Mask, Histogram, Sampler, removing of red eyes, cropping of images; various styles (Hight contrast, Dynamic range, Looks, Detail enhancement and more). All processing is lossless and can be adjusted at any time or completely reversed.
Furthermore, LightZone will not write the original image and creates a separate file. On the main screen, it shows a folder structure of the system from where it is easy to select or organize photos. The star rating and various sorting according to metadata make it easier to find specific photos. Unfortunately, there are no filters.
Here we will see the steps to install LightZone on Ubuntu 20.04 LTS focal fossa along with earlier versions such as Ubuntu 18.04/19.04/19.10 including Linux Mint, Elementary OS, Zorin OS and other Ubuntu-based Linux distros.
Steps to install Lightzone photo editor on Ubuntu 20.04 LTS
-
Open command Terminal
The first thing which generally, we do on Linux distro to install software is opening of command terminal. You can either do it on Ubuntu from Activities or directly using the keyboard shortcut CTRL+ALT+T.
-
Add LightZone Image editor repository
Yes, you can install it directly from downloading the Debian packages of the software, however, that need a manual installation and would create dependency issues. Thus, it is recommended to add a PPA repository that offers the command line installation of LightZone.
sudo add-apt-repository ppa:lightzone-team/lightzone
-
Update your Ubuntu system
After adding the repo on Ubuntu 20.04 LTS or the version you are using, its time to flush the APT cache so that our system could recognize the added repository to download the LightZone packages for installation.
sudo apt update
-
Command to Install LightZone on Ubuntu
Finally, run the below command to get this image editor program along with dependencies it requires to install the software.
sudo apt-get install lightzone -y
-
Run the program
Go to applications, and click on the Egg shape icon of LightZone to run it. This will open the familiar interface of the software which you can use to edit and enhance various kinds of images you have on Linux.


