After setting up Linux (Amazon Linux, Ubuntu, CentOS, RHEL, etc.) running ec2 Instance on AWS cloud computing platform we can use SSH to connect and control it remotely; instead of using the console directly from ec2 Dashboard.
SSH is a secure shell protocol that default uses port number 22 to connect remote systems. To use it, the remote system must be running on SSH servers such as OpenSSH, then only any client machine will be able to connect remotely.
Well, the Linux OS running on Ec2 instances come with a pre-installed OpenSSH server. Hence, we just need to generate an SSH key pair or private that will help us to log in it remotely but securely.
Generate SSH to connect AWS ec2 Linux Instances
1. log in to AWS
First of all, go to the AWS login page to access all the cloud services offered by it.
2. Go to ec2 Dashboard
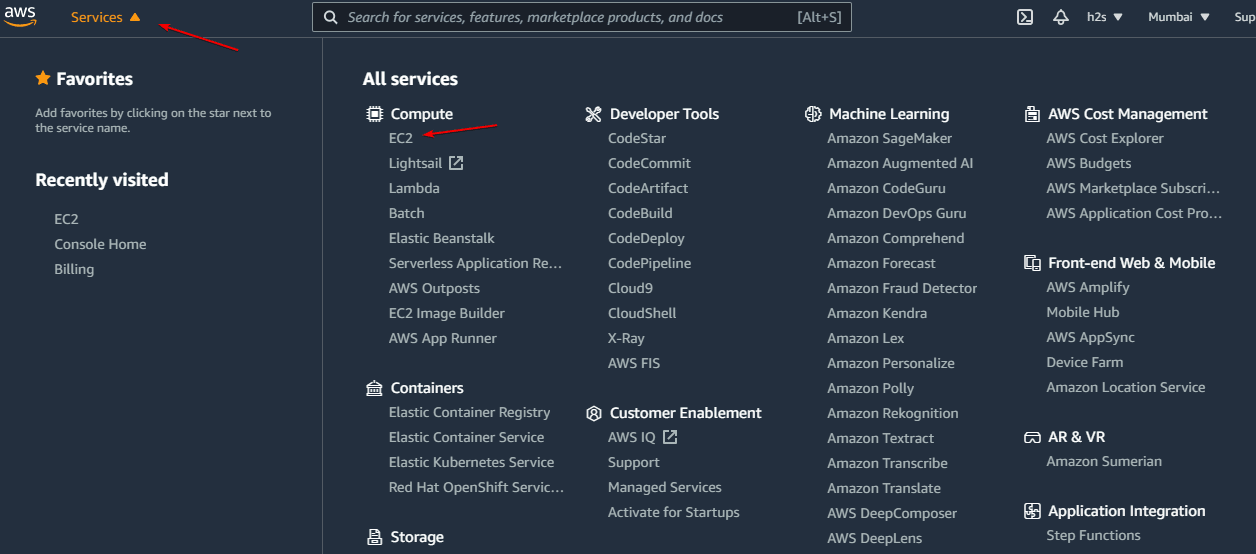
Once you log in to your AWS account you will see the AWS Management Console. On the left top side, click on the Service drop Menu to select EC2. Or else use this link
2. Create a New Amazon ec2 Instance (optional)
If you already have a running ec2 Instance then for sure you have the Private key already with you. Hence, move to the next step. Whereas, users who are new to AWC Ec2, need to first create an “Instance” and for that, we already have a step by step tutorial, please refer to that- Steps to create a new AWS Ec2 Instance
3. Go to your Instance
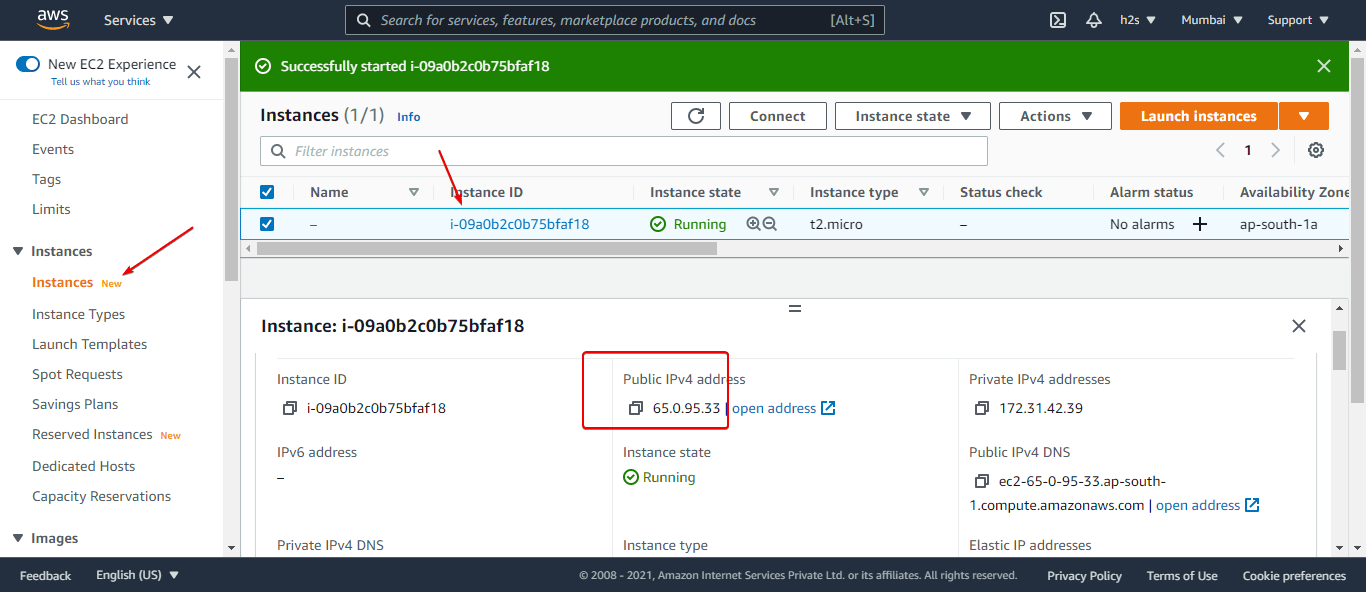
Now, from the left side panel, select the Instances option. And click on the Instance ID that you want to connect over SSH remotely.
Also, note down the Public Ip-address attached to your Instance because we need it to connect and access the same remotely over SSH.
Note: Well, if you don’t have any running instances then create a new one using the “Launch Instances” button given on the top right side.
6. Connect to ec2 Instance over SSH
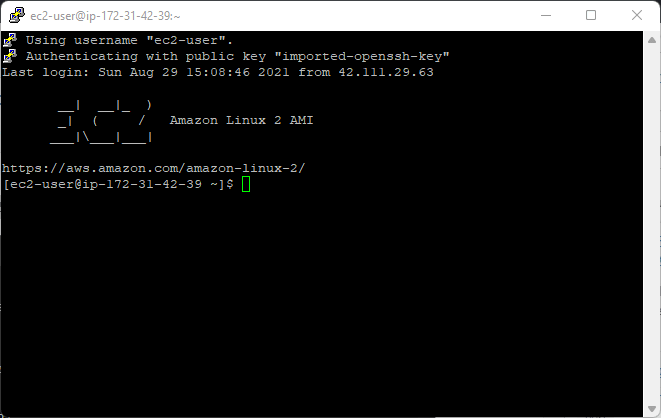
To connect your Linux or Windows AWS ec2 instance over SSH you can either use some dedicated SSH client application such as Putty or MobaXterm. Alternatively, just open your Windows or Linux PC command terminal and ssh your remote machine using the steps given here.
Using Putty
If you are a Putty user on Windows, then here are the steps to follow.
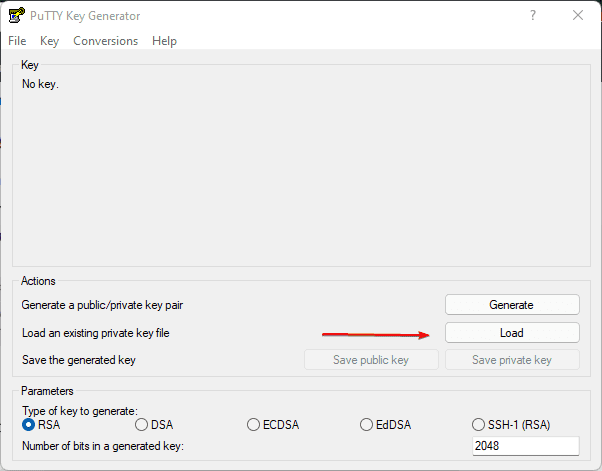
1: PuTTy Key Generator- Load an existing private-key file
Go to the Windows 10/11 start menu and search PuTTYGen. Once it appears, click on the Load button.
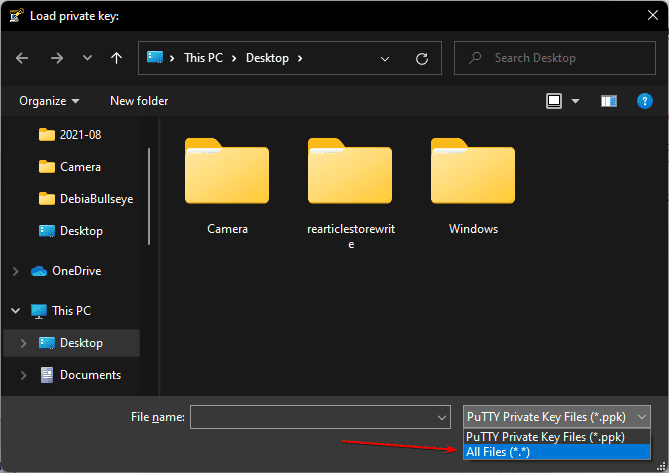
2: Open Pem Key
Click on the drop-down box and select “All Files“; after that navigate to the place where you have saved your downloaded Ec2 instance Private key in PEM format and select it to open.
3: Convert and Save PEM to PPK key
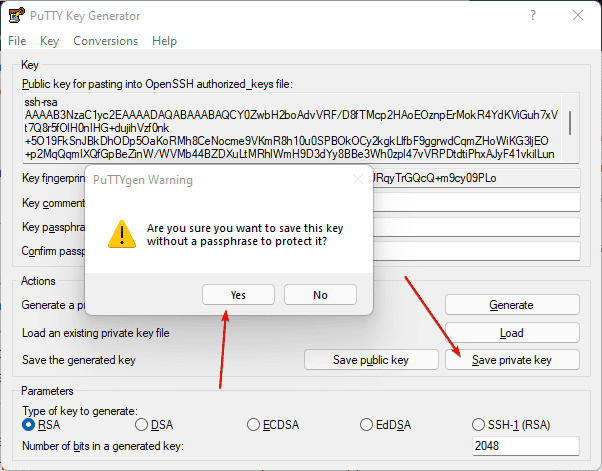
Now, Click on the “Save Private Key” button and then click on the “Yes“. Give some name to your newly generated PPK key and save it on your system.
4. Configure Putty HostName
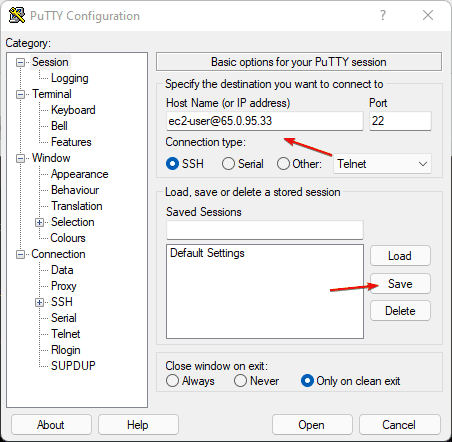
Under Session, go to the Host Name box and type – ec2-user@publc-ipaddress. Replace public-ipaddress with the address of your ec2 instance that you want to connect over SSH.
After that click on the “Save” button.
5. SSH Authentication
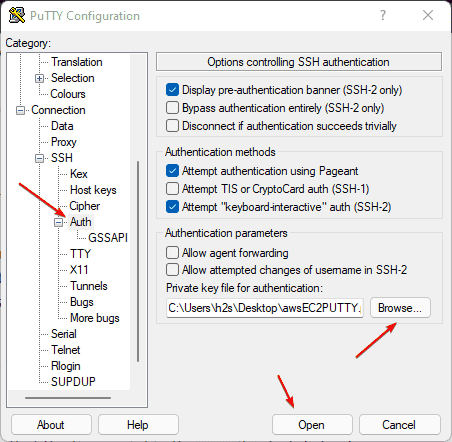
Now, go to Auth from the Putty’s Category section, click on the Browse button to select the newly generated.PPK key that you saved in the 3rd step.
After that click on the “Open” button.
6. Login
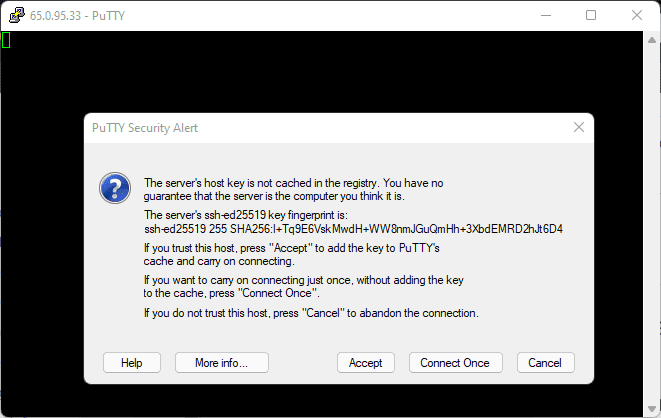
Finally, you will have a Security warning – with two options “Accept” and Connect Once“. For security, if you are using some PC that is not yours then select “Connect Once“. Whereas on your personal system and if you don’t want to add key again and again, then simply select “Accept” to let Putty store Server’s host key in the cache.
Using Windows Command prompt
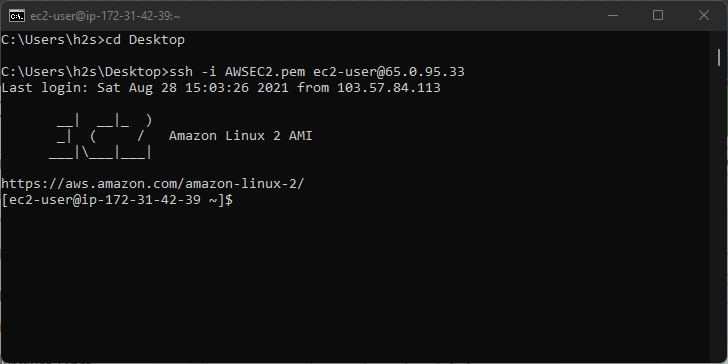
Open your command prompt of the Windows operating system that you are using. Now, use the below-given command syntax:
ssh -i /path-to/private-key ec2-user@public-ipaddress
In the above command replace /path-to/private-key with the path where you have saved your ec2 Instance Private key. After that replace public-IP-address with the IP-address of your ec2 Instance that you want to connect remotely.
For example:
ssh -i AWSEC2.pem [email protected]
Using Linux command terminal
Those who are using Linux distro, can simply open their terminal and use the below command syntax:
chmod 400 ~/my-key-pair.pem
ssh -i /path/my-key-pair.pem ec2-user@instace-public-IP
Replace:
/path/my-key-pair.pem with the path where you have to save your key
instace-public-IP: With the IP address of your Ec2 Instance
Using WSL
WSL users can also use it to connect Ec2 Instance.
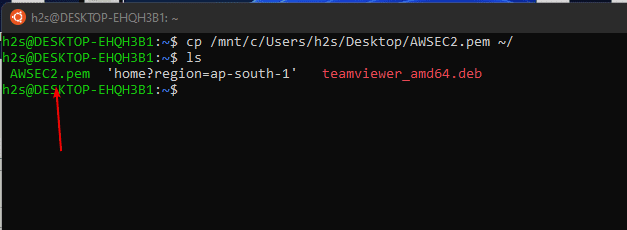
First, copy your downloaded key to WSL.
cp /mnt/<Windows drive letter>/path/my-key-pair.pem ~/
Note: Replace <Windows drive letter> with the drive letter of the Windows system where you have saved the ec2.PEM key
Example: In our case:
Now, change the permission to ensure your key is not publicly viewable:
chmod 400 ~/your-Key.pem
Replace your-Key.pem with the name of the key you have.
Now, to connect, run
ssh -i /path/my-key-pair.pem ec2-user@instace-public-IP
Replace:
/path/my-key-pair.pem with the path where you have to save your key
instace-public-IP: With the IP address of your Ec2 Instance
A TIp: On Linux, you can set an environment variable for your key so that we can use it globally without specifying its path again and again:
aws_key="~/your-Key.pem"
ssh -i $aws_key ec2-user@instace-ip-address
Ending notes:
These are some simples steps one can follow to connect any Amazon Ec2 running Instance over SSH securely. If you are facing any problems while following the above steps, let us know. The comment section is all yours. Furthermore, you can know more about this topic directly from the official documentation.
