Tutorial to learn the commands to install WildFly (JBoss) latest version on Debian 11 Bullseye using its repository and terminal.
Wildfly is an open-source application server that was earlier known as JBoss and it is the further development of the JBoss under a new name. It is written in Java, hence need the support of the JDK to install; WildFly developed by RedHat to manage application runtime and build apps.
The management concept of the application server is based on a generic, untyped management API. Regardless of which management interface is used, all changes are persisted and versioned. All management interfaces of the server are secured by default. These include a CLI, a web-based administration console, a native Java API, an HTTP/JSON-based REST API, and a JMX gateway.
Based on the generic management API, the CLI offers a complete view of all manageable resources on the server. A connection to a local or remote instance can be established with the script jboss-cli.sh or jboss-cli.bat.
In summary, the CLI is a powerful tool for configuring and managing JBoss instances. The use of JVM-based scripting languages enables integration into existing DevOps and monitoring tools. As an alternative to the CLI, other interfaces such as the web console or HTTP-based REST interfaces are also available.
Steps to install WildFly on Debian 11 Bullseye Linux
The steps given here will be the same for Debian 10 Buster, Ubuntu 20.04, Linux Mint, and other similar Debian-based operating systems.
1. Apt System Update
We need to install a few packages using the APT package manager, so it would be good to run the system update command once if you have not for a while. This will rebuild the APT cache.
sudo apt update
2. Install Default OpenJDK 11
The default Open Java version is available through the Debian repository is OpenJDK 11. Therefore, we go for the same using the APT package manager command given below.
sudo apt install default-jdk
To confirm the Java version, you can use the given command:
java --version
3. Download WildFly on Debian 11 Bullseye
Well, just like many other open-source tool packages, WildFly is also not available through the default base package repository of Debian 11. Hence, we have to download its latest archive file available on the WildFly official website.
Go on the link and then hit the “Download THE TGZ” button to get the archive file.
Alternatively, right-click on the button and select “Copy link address”. After that use it with wget command.
Example:
wget https://github.com/wildfly/wildfly/releases/download/26.0.0.Final/wildfly-26.0.0.Final.tar.gz

The downloaded file will have the following items:
• WildFly
• Jakarta EE
• Servlet-Only Distribution
• Application Server Source Code
• Quick Start Source Code AL Source
• Release Notes
4. Extract Tar file
Now, extract the archive we have downloaded in the previous step. Also, if you have downloaded the WildFly via browser then don’t forget to switch to the Downloads directory.
tar -xf wildfly-*.Final.tar.gz
Move to /opt directory, so that we won’t delete it accidentally.
sudo mv wildfly-*Final /opt/wildlfy
5. Created dedicated WildFly user
To run the WildFly with a non-root user without sudo access, we create a separate user that will have only access to its files and folders.
Add Group
sudo groupadd -r wildfly
Add a new user:
sudo useradd -r -g wildfly -d /opt/wildfly -s /sbin/nologin wildfly
6. Change Ownership
The directory where we have copied the extracted files is under /opt, give its permission to WildFly users.
sudo chown -RH wildfly:wildfly /opt/wildfly
7. Configure WildFly (JBoss) running on Debian 11
Create WildFly directory under /etc and copy some important configuration files such as pre-configured service for Systemd to run the application server in the system background.
sudo mkdir -p /etc/wildfly
Copy the files:
sudo cp /opt/wildfly/docs/contrib/scripts/systemd/wildfly.conf /etc/wildfly/
sudo cp /opt/wildfly/docs/contrib/scripts/systemd/wildfly.service /etc/systemd/system/
sudo cp /opt/wildfly/docs/contrib/scripts/systemd/launch.sh /opt/wildfly/bin/
8. Make the script executable
Now, let’s make some script files executable to make them run on our Debian 11, required by WildFly to run properly.
Here are those:
add-user.sh, appclient.sh, common.sh, domain.sh, elytron-tool.sh, jboss-cli.sh, jconsole.sh, jdr.sh, launch.sh, standalone.sh, wsconsume.sh and wsprovide.sh.
sudo chmod +x /opt/wildfly/bin/*.sh
9. Start and Enable Service
To make the WildFly application server run automatically with system boot; start and enable its service.
sudo systemctl daemon-reload
sudo systemctl enable --now wildfly
Check status:
systemctl status wildfly
To stop or restart:
sudo systemctl restart wildfly
sudo systemctl stop wildfly
10. Create WildFly Management Console and Application user
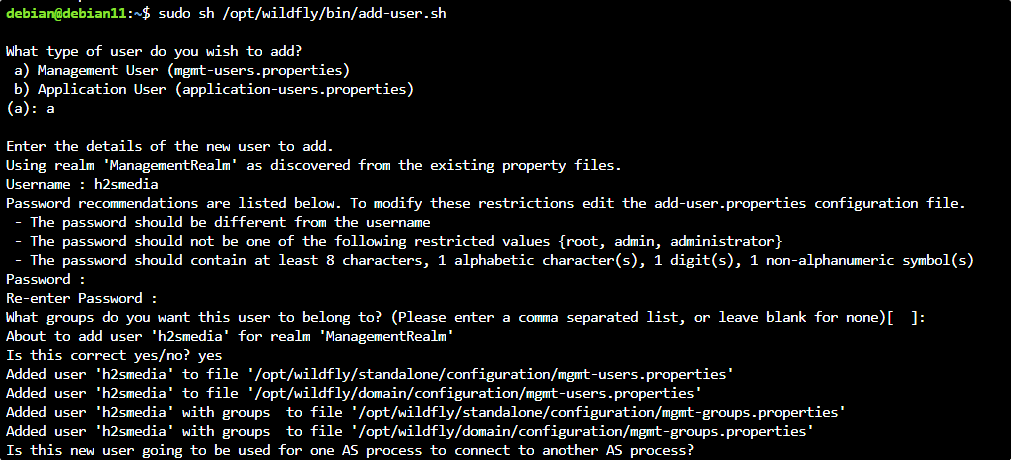
Next, we run a script to either configure the existing “admin” user or create a new one. Just execute the given command:
sh /opt/wildfly/bin/add-user.sh
11. Configure Wildfly Admin Hal Management Console
By default, you won’t be able to access the Admin interface because as you do, the system will give the following error:
Unable to redirect.

An automatic redirect to the Administration Console is not currently available. This is most likely due to the administration console being exposed over a network interface different from the one to which you are connected to.

To access the Administration console you should contact the administrator responsible for this WildFly installation and ask them to provide you with the correct address.
To remove this error and login to Management console on the system where you have installed WildFly, edit its configuration file:
sudo nano /etc/wildfly/wildfly.conf
Replace 0.0.0.0 with 127.0.0.1 in the following line:
WILDFLY_BIND= 127.0.0.1
Restart WildFly service:
sudo systemctl restart wildfly
Open 8080 port in Firewall:
If you are using a firewall then open the port it:
sudo ufw allow 8080/tcp
sudo ufw allow 9090/tcp
Access web interface, open your browser on the server or desktop where you have installed this Application server. And then point to-
http://127.0.0.1:8080
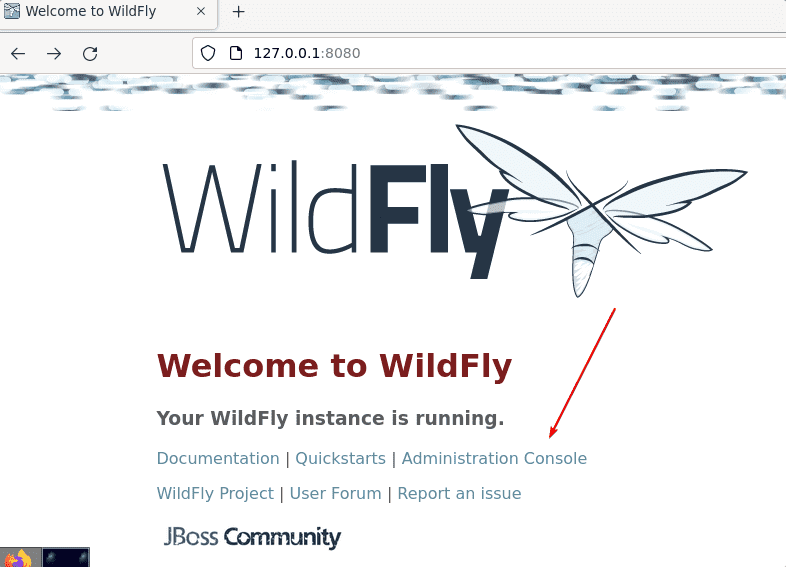
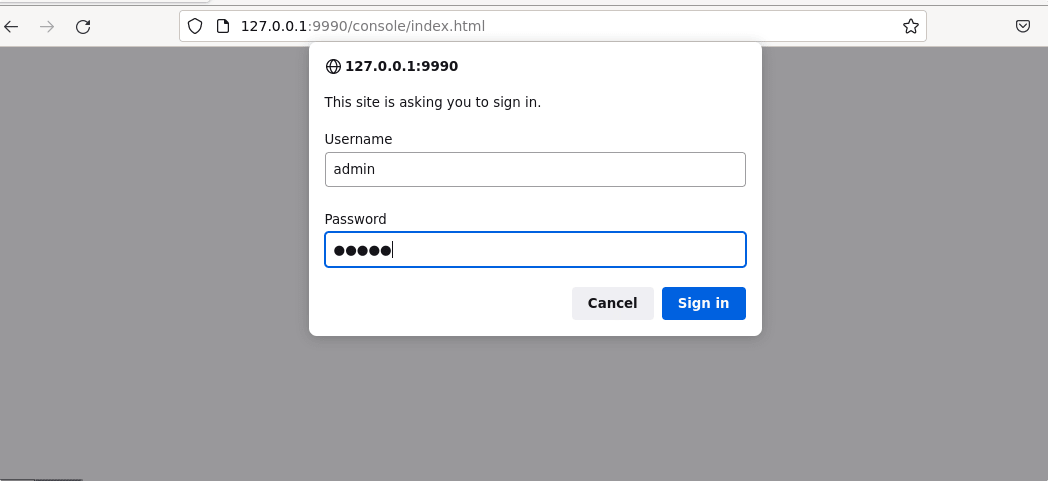
To access the Hal Management interface, you will be asked to log in first. Enter the user and password you have created for Management Interface.
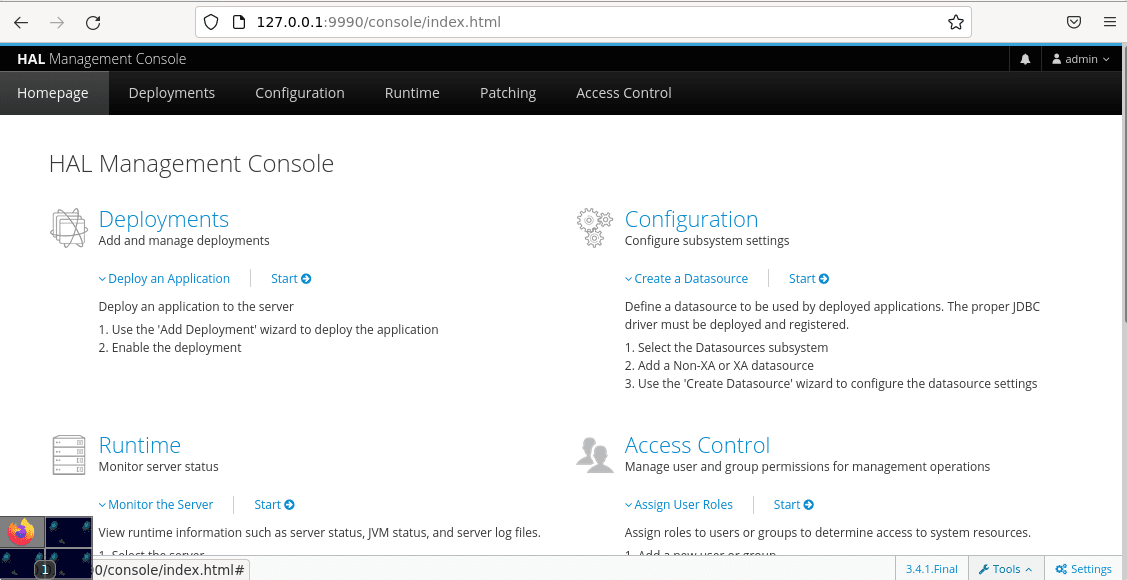
HAL Management Console Dashboard Interface
12. Access WildFly Remotely
If you want to access this Application server running on some Debian 11 or 10 servers. Then we have to make some changes first. Edit Standard configuration
Edit the configuration file:
sudo nano /opt/wildfly/standalone/configuration/standalone.xml
Scroll to the end of the file and find the Interfaces section and edit the Ip-address from 127.0.0.1 to 0.0.0.0. After that save the file by pressing Ctrl+O, hit the Enter, and then Ctrl+X to exit. This will allow all machines that can access the server IP address to get the web interface of WildFly, remotely.
Note: For security, if you want to bind the public access of the Management console to some particular trusted machine, then in the “public” section of Interface, bind its address to the Ip-address of the system through which you want to access it.
<interfaces>
<interface name="management">
        <inet-address value="${jboss.bind.address.management:0.0.0.0}"/>
</interface>
<interface name="public">
        <inet-address value="${jboss.bind.address:0.0.0.0}"/>
</interface>
</interfaces>
Now edit the front end configuration file:
sudo nano /etc/wildfly/wildfly.conf
There also change the address to 0.0.0.0
Save the file.
Restart the server:
sudo systemctl restart wildfly
Once this is done, you can access your Application server from any other computer by pointing to the Ip-address of the server where you are running the WildFly.
Other Articles:
• How to Install Cockpit Web Console on Debian 11 Bullseye
• How to install MariaDB 10 on Debian 11 Bullseye Linux
• Snap-on Linux- Installation, update, and delete commands
