If you are wondering how to create your private cloud to store sensitive or regular data, then OwnCloud can be a solution. However, some expertise in Linux is needed to install OwnCloud on Ubuntu 24.04 or any other distro you use. For those unaware of this open-source self-hosted cloud storage platform, it is free-to-use software that provides a similar service to Google Drive, Dropbox, or OneDrive. However, unlike any third-party service, OwnCloud allows you to host your data on your server. Users can even Share and Synchronize the files stored on it.
Here are some key features of OWNCLOUD:
- File Storage and Sharing
- Files stored on the OwnCLoud can be synchronized across multiple devices
- Enterprise-level security features.
- Highly customizable
- Supported plugins to extend functionality
- Robust user management features.
- Accessible via a web interface, desktop client, and mobile apps
- Allows Team Collaboration
Advantages of OwnCloud
- Data Control
- Cost-Effective
- Open Source
- Flexibility
Steps for Installing OwnCloud on Ubuntu 24.04 LTS Linux
The steps given here can be used on other Ubuntu server versions, such as 22.04 or 20.04 LTS…
Step 1: Perform package update
Instead of running the additional commands given in this tutorial to install various server software directly, it is recommended that you start with the system update command first. This command will ensure that the existing packages on the Ubuntu system are up to date and apply the latest security packages, if available.
sudo apt update && sudo apt upgradeStep 2: Install Apache, MySQL or MariaDB, and PHP
OwnCloud is written in PHP, so we need that on our Ubuntu 24.04 to run it. It is also a web-based application that requires a web server to serve files, so we are also installing Apache. Furthermore, a database server is needed to store the data generated by OwnCloud, so MySQL or MariaDB will be the options.
Install Apache:
sudo apt install apache2Install MySQL or MariaDB:
Depending on your preference, you can install either MySQL or MariaDB. Here, we show the commands for both.
Run only one, not both.
# For installing MySQL:

sudo apt install mysql-server

or

# For installing MariaDB:

sudo apt install mariadb-server
After installing the Database server, run the command to secure your database installation. You get a text-based wizard. Follow it, and you will be done.
sudo mysql_secure_installationNote: (optional) In case you want to set or change the root password of MySQL or MariaDB, first log in to your database server and run the given command:
To Login database:
#For those you have not set any root password yet:

sudo mysql

# Those who already have created a root password for database and now want to chnage it:

sudo mysql -u root -p
To change MySQL root password:
ALTER USER 'root'@'localhost' IDENTIFIED WITH mysql_native_password by 'MyPassword@123';For changing the MariaDB root password:
ALTER USER 'root'@'localhost' IDENTIFIED BY 'new_password';To exit:
quit;Install PHP and Required Modules:
The latest version of PHP 8.x is not supported by the OwnCloud Server release while writing this tutorial; however, this version is available by default on the Ubuntu 24.04 server. Therefore, to get the supported PHP 7.4 version, we need to add a third-party PPA repository, i.e., ONDREJ, which is quite popular and trustable:
sudo add-apt-repository ppa:ondrej/phpAfter adding the PPA repo, run the command to get PHP 7.4 and extensions.
sudo apt install php7.4 php7.4-{opcache,gd,curl,mysqlnd,intl,json,ldap,mbstring,imagick,cli,bcmath,mysql,xml,zip}Step 3: Create a MySQL or MariaDB Database and User
We need to create a database and have a user store data generated by OwnCloud. Whether you have chosen MySQL or MariaDB doesn’t matter; the commands in this step will be the same for both.
First, log in to the DB server:
sudo mysql -u root -pRun the given commands one by one and change values such as Database name “your_DB” with the name you want to give to your Database and “yourpassword” with the password you want to set for the DB user “your_user” that also needs to be changed with whatever you want to use:
CREATE DATABASE your_DB;
CREATE USER 'your_user'@'localhost' IDENTIFIED BY 'yourpassword';
GRANT ALL PRIVILEGES ON your_DB.* TO 'your_user'@'localhost';
FLUSH PRIVILEGES;
EXIT;
Step 4: Download and Configure OwnCloud
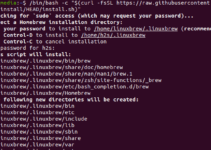
We have installed the basic requirements for installing and configuring OwnCloud on Ubuntu 24.04 or 22.04; now let’s download the latest version of OwnCloud using the wget command:
Downloading:
cd /tmpwget https://download.owncloud.com/server/stable/owncloud-complete-latest.zipExtract the downloaded file:
unzip owncloud-complete-latest.zipMove the extracted directory to the Apache root directory:
sudo mv owncloud /var/www/html/Set the correct ownership and permissions:
sudo chown -R www-data:www-data /var/www/html/owncloud
sudo chmod -R 755 /var/www/html/owncloud
Step 5: Configure Apache webserver for OwnCloud
After copying the OwnCloud files to the web server root folder, let’s create a configuration file containing a few lines to guide the web server in serving files when users request them using the browser. The file will contain the OwnCloud file path, the server’s Domain or IP address, and other settings.
Create a new Apache configuration file for OwnCloud:
sudo nano /etc/apache2/sites-available/owncloud.confAdd the following configuration to the file:
Replace your_domain_or_IP with your domain name or server IP address. Save the file by pressing Ctrl+X, after that ‘Y‘ and then Enter keys.
<VirtualHost *:80>
    ServerAdmin [email protected]
    DocumentRoot /var/www/html/owncloud
    ServerName your_domain_or_IP

    <Directory /var/www/html/owncloud/>
        Options +FollowSymlinks
        AllowOverride All

        <IfModule mod_dav.c>
            Dav off
        </IfModule>

        SetEnv HOME /var/www/html/owncloud
        SetEnv HTTP_HOME /var/www/html/owncloud

    </Directory>

    ErrorLog ${APACHE_LOG_DIR}/owncloud_error.log
    CustomLog ${APACHE_LOG_DIR}/owncloud_access.log combined

</VirtualHost>
Enable the new configuration and the Apache rewrite module
sudo a2ensite owncloud.conf
sudo a2enmod rewrite
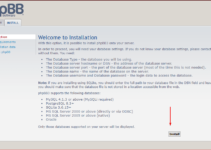
sudo systemctl restart apache2Step 6: Complete the Installation via Web Browser
- Open a browser on your local system that can access the domain or IP of the server where you have installed OwnCloud. In the URL box, type either http://your_domain.com/owncloud or http://server-ip-address/owncloud.
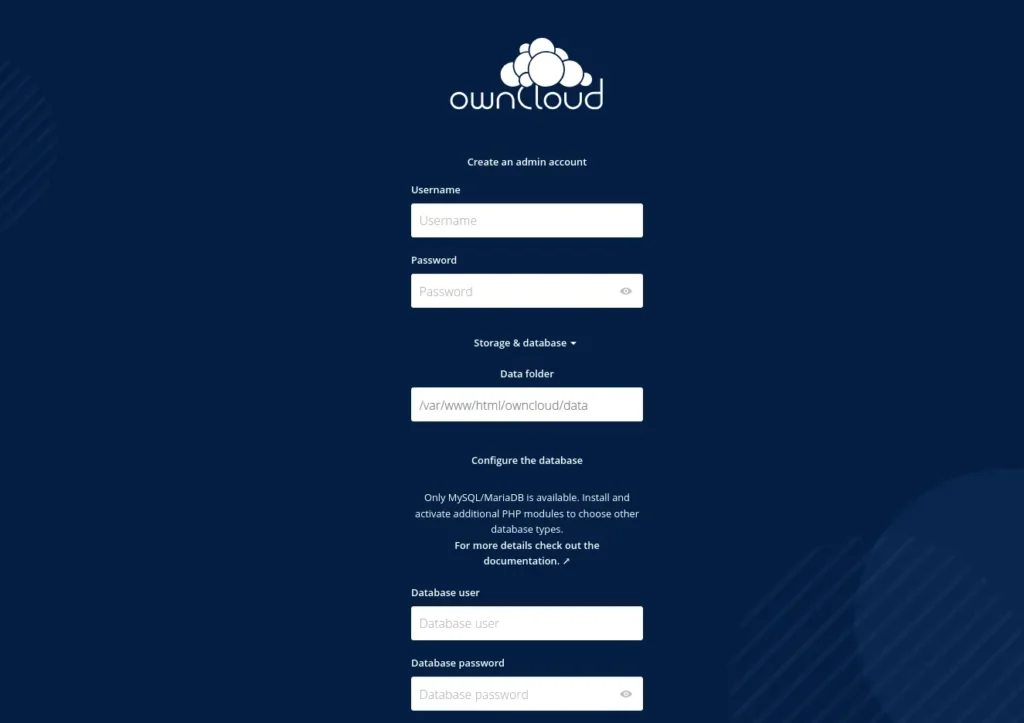
- Once you access OwnCloud’s web interface for further configuration, create an Admin Account by entering a username and password.
- Also, provide the database details, such as the name, username, and password of the DATABASE you created earlier.
- Specify where OwnCloud should store its data; however, the default directory is fine; therefore, leave it as it is unless you want to have the data on some external storage.
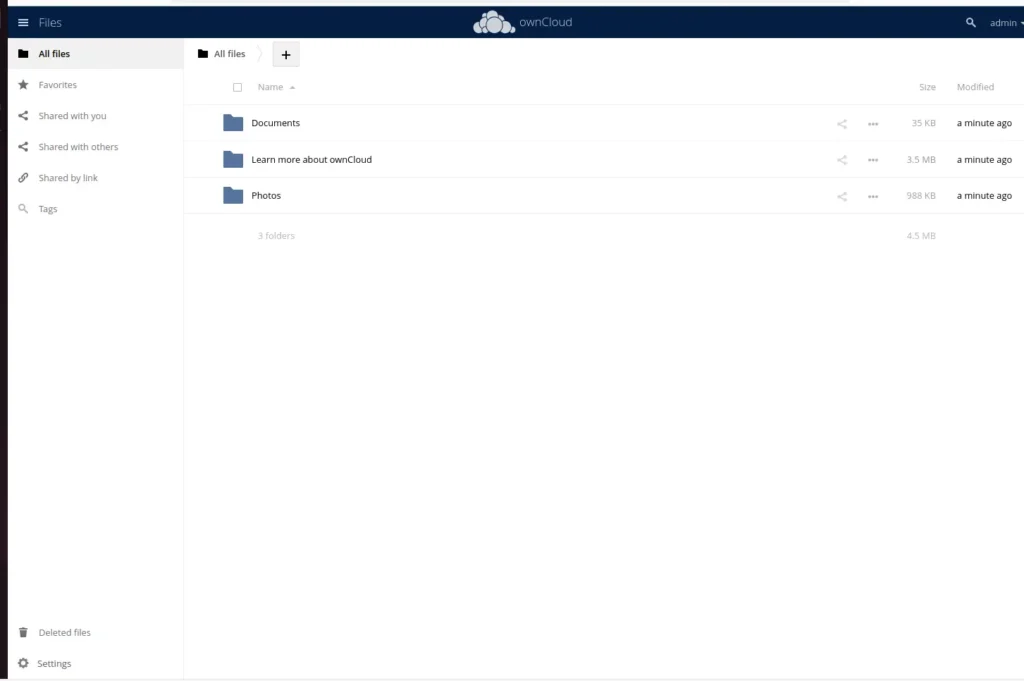
Finally, click the Finish Setup button to complete the installation.
Step 7: Secure OwnCloud with SSL (Optional)
You may also want to enable an SSL certificate for your OwnClodu instance if it will be accessed publicly. So, for better security, users can enable HTTPS to secure Apache servers with Let’s Encrypt SSL certificates.
Install Certbot:
sudo apt install certbot python3-certbot-apacheRun Certbot to obtain and install an SSL certificate:
sudo certbot --apache -d your_domainCertbot will automatically configure your Apache to redirect HTTP requests to HTTPS.
Conclusion
This was a straightforward guide to installing and configuring OwnCloud on Ubuntu 24.04 or 22.04. You can store your media files and share them with friends with complete control. Although OwnCloud will automatically get updated, it is recommended that OwnCloud be updated with the latest security patches.
Other Articles:
- How to Check GitLab Runner Configuration
- How to Install GitLab on Ubuntu 24.04 or 22.04 LTS Linux
- How to Change Ubuntu 24.04 Hostname Permanently
- Install and Configure Samba Server on Ubuntu Ubuntu 24.04
- Installing Minecraft Bedrock Server on Ubuntu 24.04 or 22.04 Linux
- Installing Jellyfin Media Server on Ubuntu 24.04 Server Linux