Create your own personal cloud storage by installing NextCloud on Debian 11 Bullseye Linux server using the command given here in this step-by-step tutorial.
What is NextCloud?
Nextcloud is free software distributed under an open-source license and can be used to set up personal cloud just like Google Drive, iCloud, Dropbox, and Onedrive. When using a client, the server is automatically synchronized with a local directory. Hence, the same data stored on NextCloud can be accessed from multiple devices using a client app or via the web interface.
The server-side program of NextCloud is meant to work on Linux operating systems, therefore any Linux user even the beginner one can easily install it. Apart from the Linux OS, the user also needs PHP and a web server like Nginx or Apache to set this personal cloud platform.
Why do we need a personal cloud?
The problem with the big players is that you don’t know where your data is exactly and whether it is really safe from access by employees. Although services like Google Cloud, Dropbox are safe, when it comes to some classified data that you don’t want to store on some third-party servers then it is good to go for something that you can control completely. With Nextcloud you can install a system that works similar to that of the major providers. It’s also free. You only have to pay for special support here.
Where you can install NextCloud?
Well, you can set it up on your own servers or buy some web/cloud hosting.
Requirements:
- NextCloud package
- Debian 11 Bullseye Linux server/desktop OS
- Minimum of 128MB RAM, and we recommend a minimum of 512MB.
- User with sudo rights
- Apache Webserver
- MySQL 8.0+ or MariaDB 10.2/10.3/10.4/10.5
- PHP 8.0 or 7.4
Steps to install NextCloud on Debian 11 Bullseye
The steps given in this tutorial will also work for Debian 10 Buster and Ubuntu 20.04 LTS as well.
1. Run system update
Make sure all the pre-installed packages are up to date and also refresh the system repo cache using the given command:
sudo apt update
2. Install Apache and MariaDB on Debian 11
As we need a webserver to use NextCloud, so here in this step, we will install an Apache web server along with the MariaDB Database server to store the data generated by this personal cloud platform.
sudo apt install apache2 mariadb-server -y
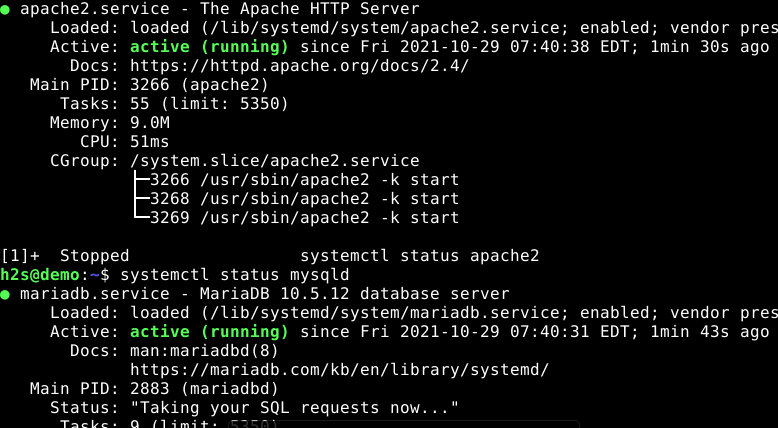
To confirm both webserver and database services are running absolutely normal, use:
systemctl status apache2
systemctl status mysqld
3. Install PHP 7.4 or 8.2 and extensions
By default, the PHP version available to install on Debian 11 bullseye is PHP 7.4, however, for those who are interested in getting the latest one- install PHP-8.0.
Here we are installing PHP 8.2
echo "deb https://packages.sury.org/php/ $(lsb_release -sc) main"\
| sudo tee /etc/apt/sources.list.d/sury-php.list
wget -qO - https://packages.sury.org/php/apt.gpg | sudo apt-key add -
Run System update:
sudo apt update
Install
sudo apt install php8.2
Extensions:
sudo apt install php8.2-{xml,cli,cgi,mysql,mbstring,gd,curl,zip}
Restart Apache
sudo systemctl restart apache2
4. Create a Database for NextCloud
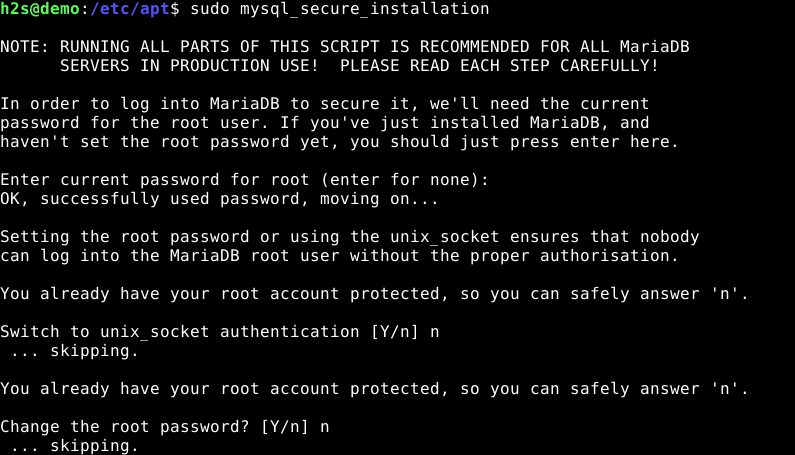
Now, let’s secure our MariaDB DB server and also create a database to store the data of NextCloud.
Run the command to remove the demo user & database, including setting MySQL root password. Just follow the text-based wizard.
sudo mysql_secure_installation
1. log in to Database Server
sudo mysql
2. Once logged in to the database server, run the below command to create a new database. Note: Change youdb with whatever name you want to give to your Database.
CREATE DATABASE yourdb;
3. Create a MySQL database user and set a password for the same. Note: Replace youuser and yourpassword with whatever you want to set.
CREATE USER 'youruser'@'localhost' IDENTIFIED BY 'yourpassword';
4. Grant all Database rights to create MySQL User and exit the MySQL command line. Note: Don’t forget to replace the yourdb and youruser values with the ones you have created.
GRANT ALL ON yourdb.* TO 'youruser'@'localhost';
FLUSH PRIVILEGES;
exit;
5. Download NextCloud on Debian 11 Bullseye
The get the latest version of NextCloud, use the wget tools and the link of the file.
wget https://download.nextcloud.com/server/releases/latest.zip
6. Setup Nextcloud
Let’s unpack the downloaded compressed file of Nextcloud
unzip latest.zip
Move the extracted file to the Apache web root folder.
sudo mv nextcloud /var/www/html/
Assign the ownership of the moved Nextcloud folder to the Apache user www-data so that it can access the files.
sudo chown -R www-data:www-data /var/www/html/nextcloud
7. Create Apache Virtual Configuration for NextCloud
sudo nano /etc/apache2/sites-available/nextcloud.conf
Paste the following lines:
<VirtualHost *:80>
     ServerAdmin [email protected]
     DocumentRoot /var/www/html/nextcloud
     ServerName example.com
     ServerAlias www.example.com

     <Directory /var/www/html/nextcloud/>
          Options FollowSymlinks
          AllowOverride All
          Require all granted
     </Directory>

     ErrorLog ${APACHE_LOG_DIR}/error.log
     CustomLog ${APACHE_LOG_DIR}/access.log combined

     <Directory /var/www/html/nextcloud/>
            RewriteEngine on
            RewriteBase /
            RewriteCond %{REQUEST_FILENAME} !-f
            RewriteRule ^(.*) index.php [PT,L]
    </Directory>
</VirtualHost>
Save the file by pressing Ctrl+O and to exit use- Ctrl+X.
Disable the default Apache configuration and enable the new one you have created above:
sudo a2dissite 000-default.conf
sudo a2ensite nextcloud.conf
Also, enable a few modules:
sudo a2enmod headers rewrite env dir mime
Reload Apache to apply changes
sudo systemctl reload apache2
8. Access NextCloud Web Interface
Now, go to your browser that can access the Ip-address of the Debian 11 Bullseye server or desktop where you have installed the NextCloud Instance. And point to its IP address or domain name.
For example:
http://192.168.0.109/
Create NextCloud User and add Database Details
Create an admin user for NextCloud and then add the details of the MySQL/MariaDB Database we have created in Step 4 of this tutorial.
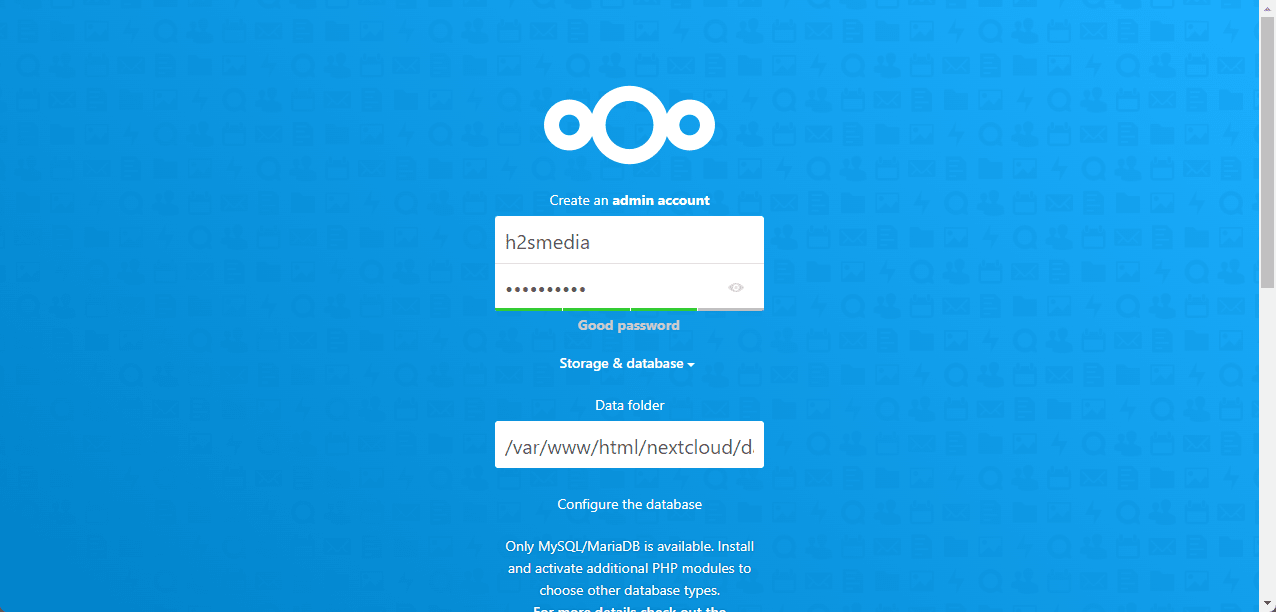
Once done, click on the Finish button and wait for a few minutes, it will install the important apps. After that, the NextCloud Dashboard will be there to access and store your data.
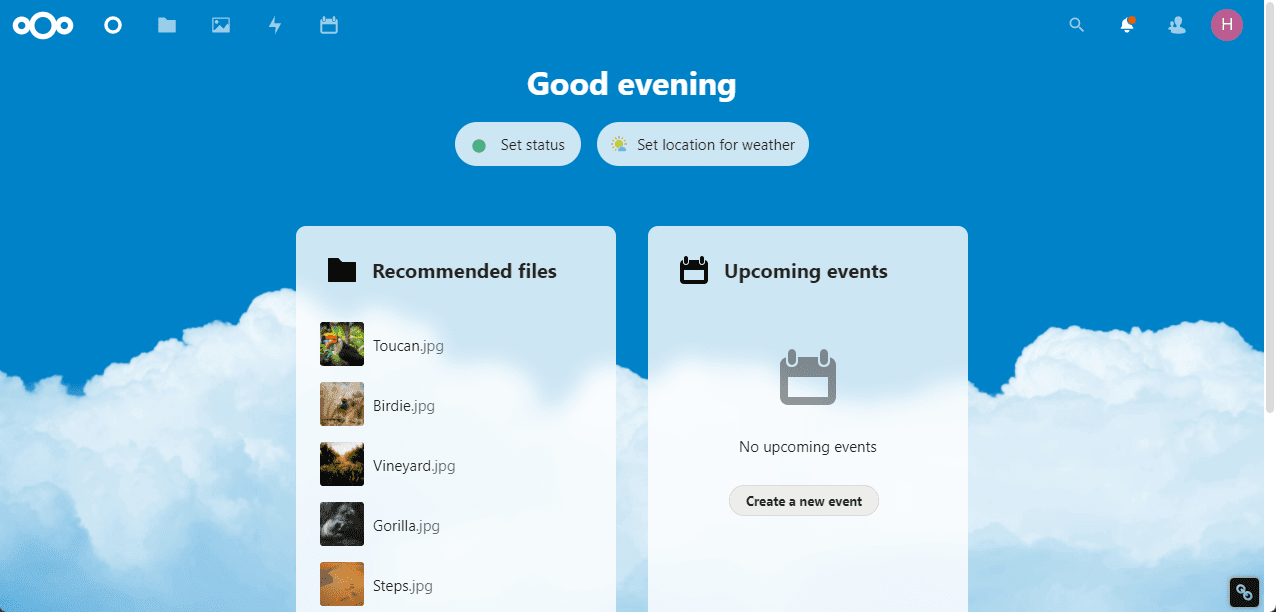
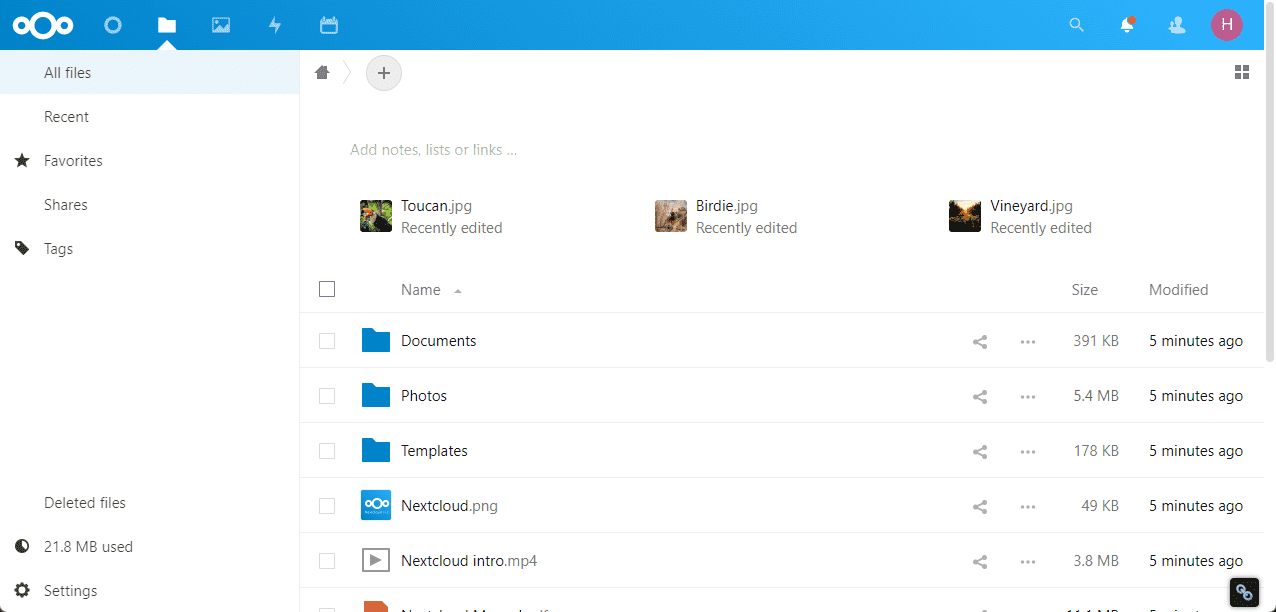
That’s it, now you can either access the Dashboard of this Personal cloud directly via the web interface or install the NextCloud dedicated Client application on your Linux, Windows, macOS, or Android to sync & manage the data.
Fails with “This version of Nextcloud is not compatible with > PHP 7.2.
You are currently running 7.4.25.”
Hi Great Tutorial.
I could set up all without any problems. Thank you.
But can you explain how to set up the “nextcloud.conf file” in your example to work on https ( virtual host :443) ? And what other modifications (config.php, .htaccess, …) have to be made?
I have a reverse proxy server (nginx) on a other machine. I have a dedicated subdomain and have lets encrypt with auto renewal of my certificates. Normally I easily achieve to secure my page with it (for example my Qnap NAS) and redirect all traffic over https.
I dont know why I am not able to set it up in this case.
Best regards
thomas
For the other commenter, I installed nextcloud 23 and it’s compatible with PHP8.0 (but not PHP8.1 which is now available) – I made the mistake of thinking I would install the latest PHP, and it was too new for nextcloud 23, so I had to go back and uinstall php8.1 and install php8.0 instead