GitLab Runner is another application in the open-source category that GitLab.com (the company) offers. It was developed to work with Gitlab CI/CD (Continuous Integration/Continuous Deployment (CI/CD)) functionality to run jobs and send the results back to the Gitlab platform. Runner provides the functionality of automated testing, building, and deployment of codes to developers. The good thing about GitLab Runner is that we can install it not only on Linux but also on Windows and MacOS; it is highly flexible, and with its ability to scale, the runner can meet various deployment and development needs.
Key Features of GitLab Runner
- Multi-platform Support
- Multiple Executors
- Parallel Execution
- Caching
- Autoscaling
- Customizable
- Secure execution of jobs.
- Easy Registration and Management
Prerequisites to perform this tutorial:
- Ubuntu 24.04, 22.04, or 20.04
- Sudo Privileges to install GitLab Runner packages.
- GitLab Account to register the runner
Installing and Registering GitLab Runner on Ubuntu
Learn how to install GitLab Runner on Ubuntu 24.04 or 22.04 to automate your CI/CD pipelines, streamline software builds, and deploy code efficiently.
Step 1: Package Update
Access the command terminal on your Ubuntu 24.04 or 22.04 Linux; if your server runs remotely, use SSH. After that, execute the system update command to ensure all the packages are up to date and the system has the latest security patches.
sudo apt update && sudo apt upgradeStep 2: Adding GitLab Runner Repository
Just like we installed the GitLab DevOps platform on Ubuntu using its official repository, we need to add one for GitLab Runner because its packages are also unavailable through the default system repo. Therefore, execute the given commands in your terminal.
curl -L "https://packages.gitlab.com/install/repositories/runner/gitlab-runner/script.deb.sh" | sudo bash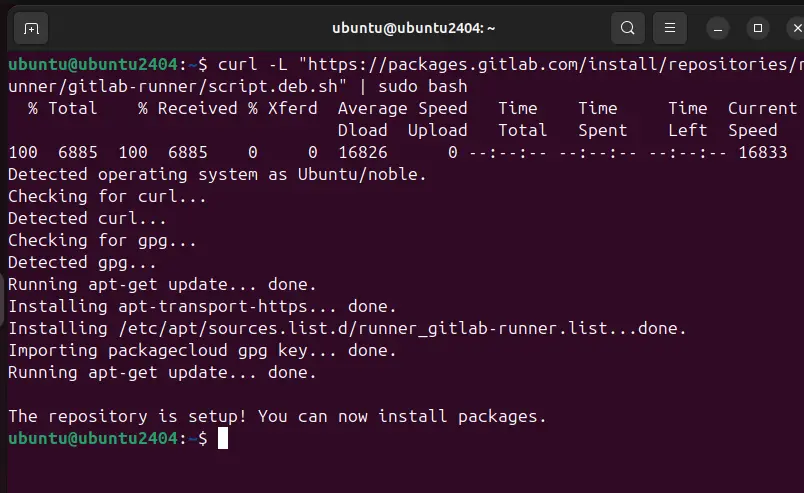
Step 3: Installing Gitlab Runner on Ubuntu 24.04 or 22.04
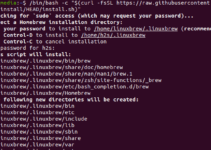
After completing the previous Step’s command, our Ubuntu system will have the official Runner repository. It will also run the system update command to refresh the repo packages list. Now, use the APT package manager along with the package name.
sudo apt-get install gitlab-runner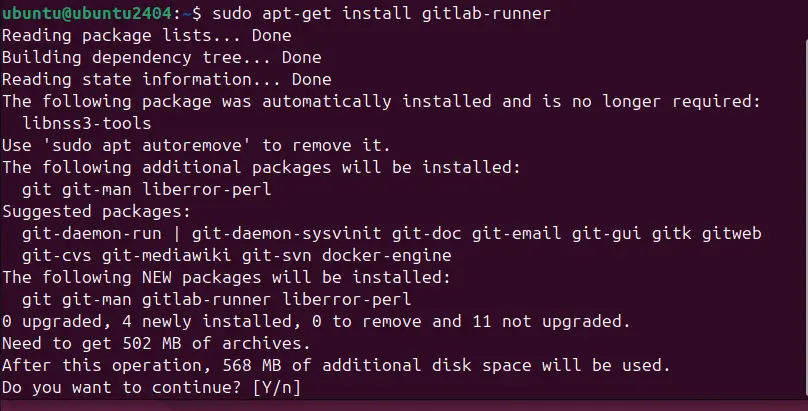
Step 4: Register GitLab Runner
After installing GitLab Runner, the next step is to register it with your GitLab instance.
Obtain the Registration Token:
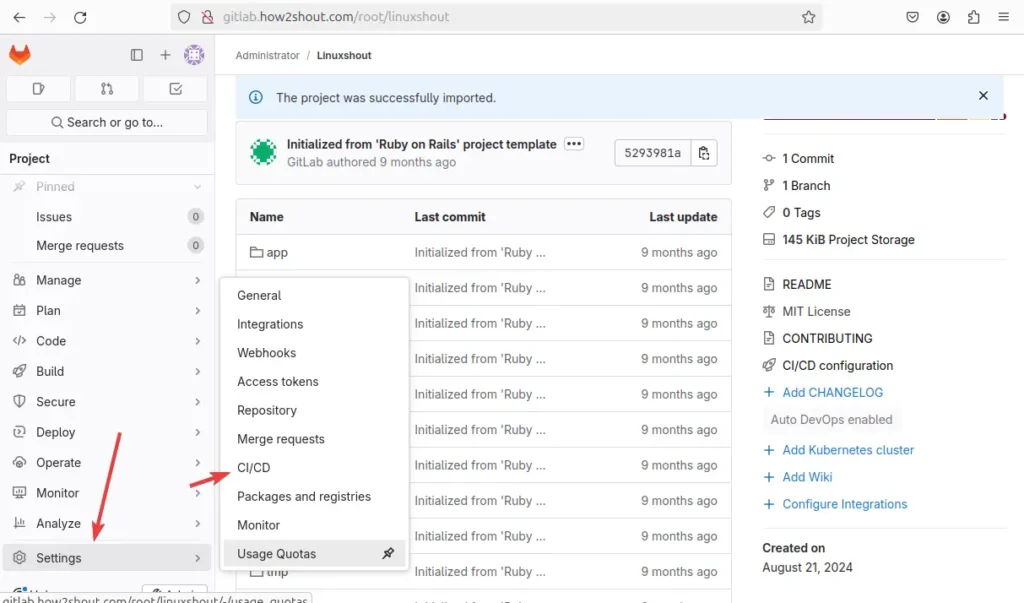
To get the registration token, we must log in to our GitLab instance and visit the project or group to which we want to add the runner.
- After that, click on Settings and select the CI / CD option.
- Through multiple sections, visit the Runners and click on the Expands button. After that, click “New Project Runner” if you don’t have any active Runner.
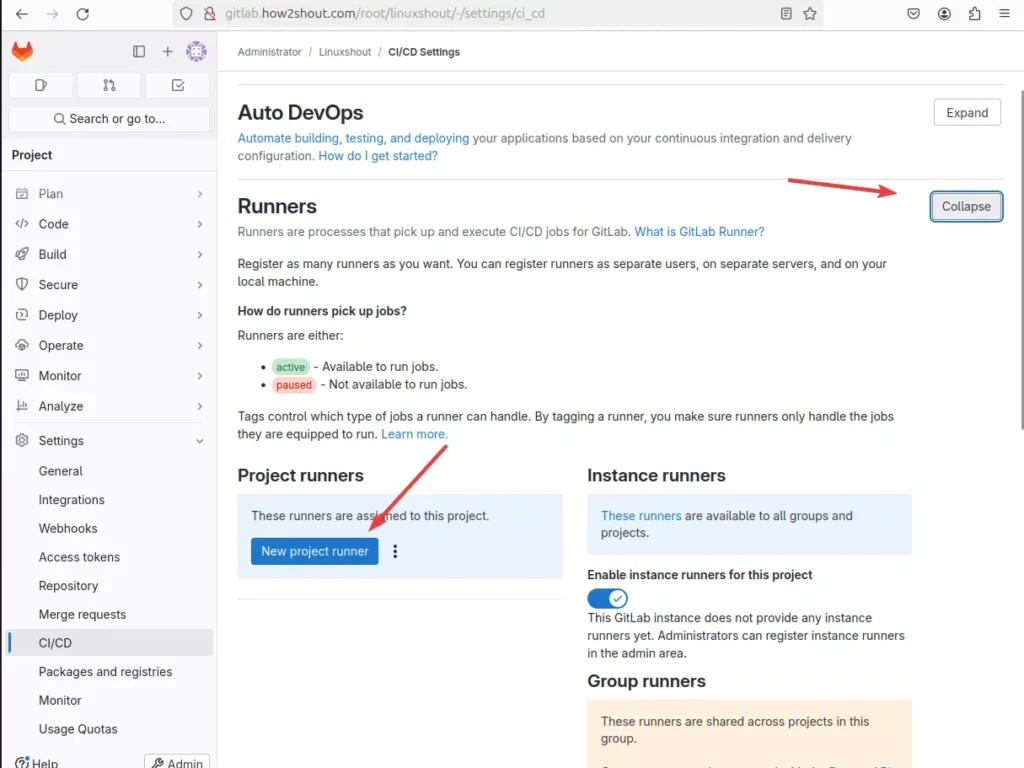
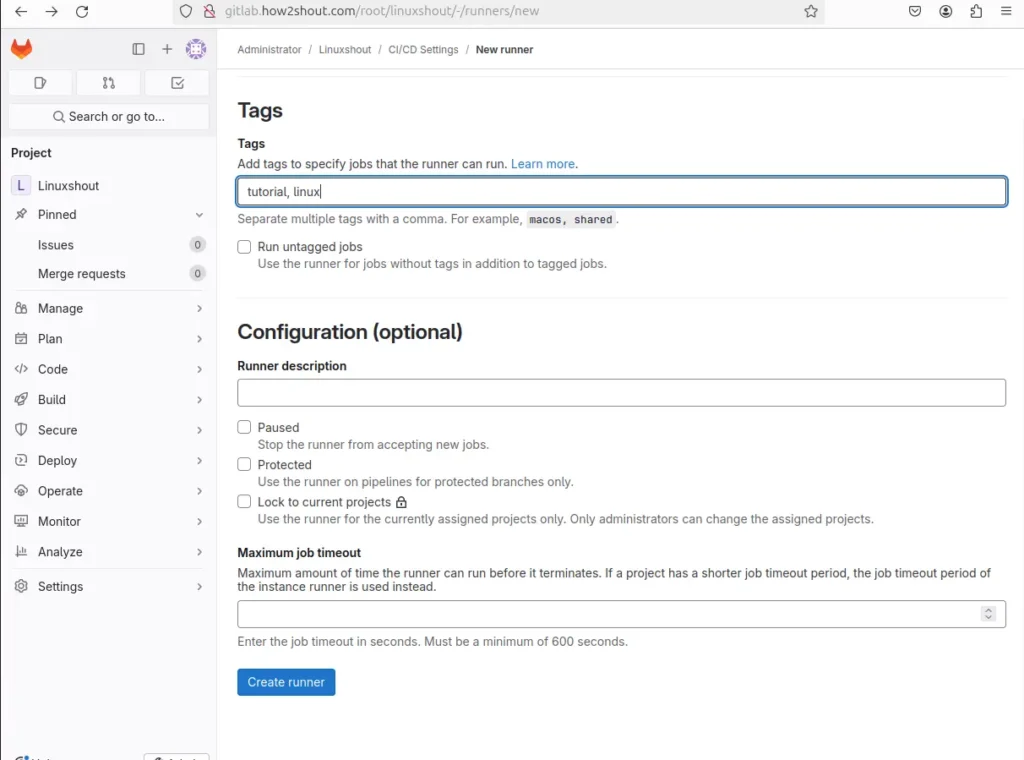
- Now, add tags to specify jobs that the runner can run. You can also run the jobs without tagging by checking the box given for it. Configure the other things if required, and click the “Create runner” button.
- Select the operating system type where you installed the Runner; for example, we choose Linux. Then, copy the code given along with the runner authentication token.

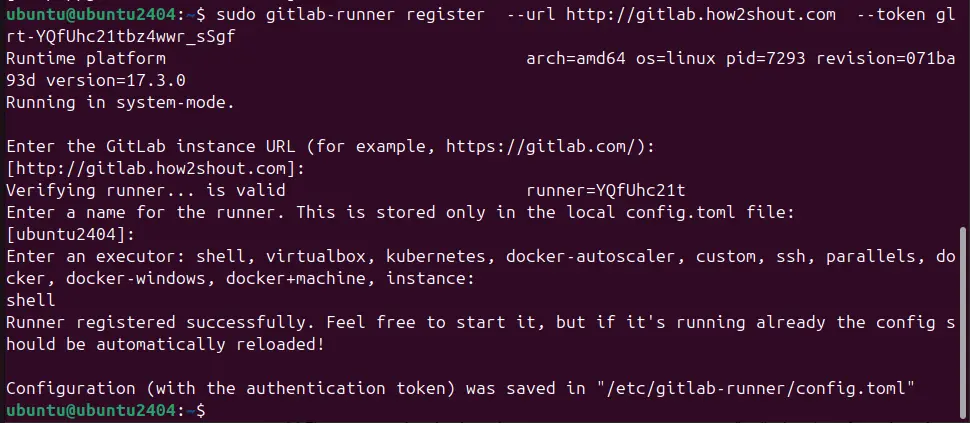
- Paste the code in your Ubuntu 24.04 terminal and hit the Enter key. The system will ask a few questions about configuring the runner. Answer, and your Runner will be registered.
Provide the Required Information:
- The registration command will prompt you for several pieces of information:
- GitLab URL: Provide the URL of your GitLab instance (e.g.,
https://gitlab.com). - Registration Token: Enter the token you obtained from your GitLab project.
- Description: Provide a name or description for the runner (e.g.,
My Ubuntu Runner). - Tags: Optionally, add tags to the runner to categorize it.
- Executor: Choose the executor type. For most cases,
shellis sufficient, but you can choose others, likedocker,virtualbox, etc.
- GitLab URL: Provide the URL of your GitLab instance (e.g.,
Step 5: Start and Enable GitLab Runner
After registration, start the GitLab Runner service and enable it to start on boot.
sudo systemctl start gitlab-runner
sudo systemctl enable gitlab-runner
Step 6: Verify the Installation
Verify the Installation service is running without any error:
sudo systemctl status gitlab-runner --no-pager -l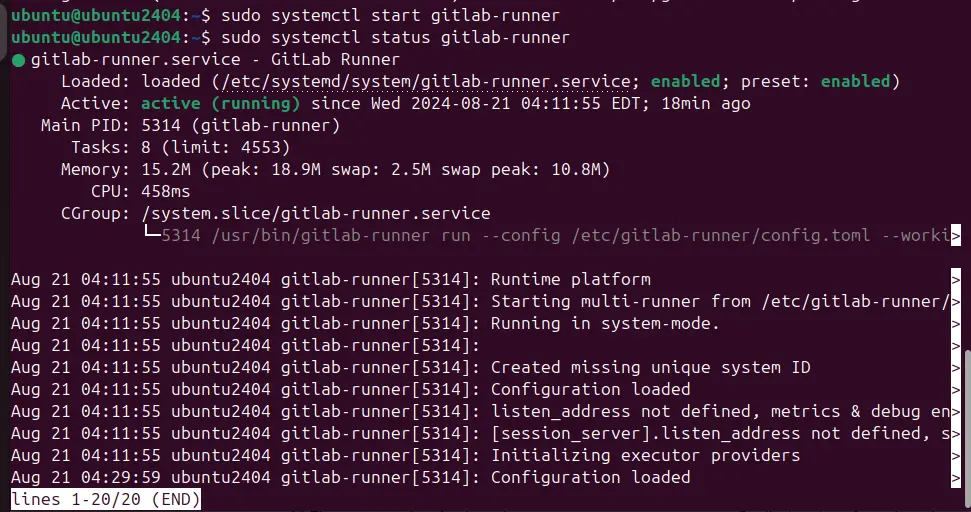
Verify Runner in GitLab:
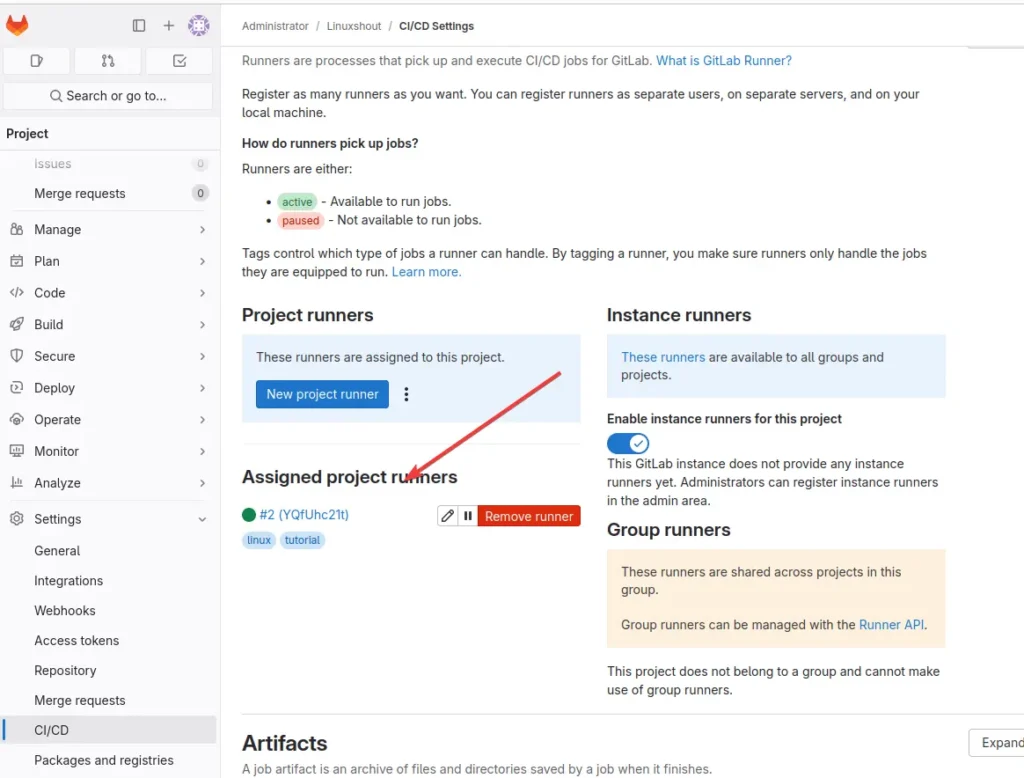
You can also check the status of the created Runner on your GitLab Instance by visiting your GitLab project’s Settings > CI / CD > Runners section. You should see your newly registered runner listed as active, from where you can also pause or delete it.
Other Articles:
- How to Install ESLint on Ubuntu 24.04 or 22.04 LTS Linux
- How to Download and Install Forticlient VPN for Ubuntu 24.04 Linux
- How to increase Swap Space in Ubuntu 24.04 or 22.04 LTS
- Get Microsoft Edge browser on Ubuntu 24.04 Linux via the command
- How to Install and Use Flatpak on Ubuntu 24.04 LTS Linux