GitLab, a popular GitHub alternative for developers, allows them to have version control over their code. Because of its open-source license, it can be easily installed on Ubuntu 24.04. In this article, we will see how to get it.
What is GitLab?
GitLab is a DevSecOps platform for developing, securing, and operating software. It also offers version control, continuous integration or continuous deployment (CI/CD), and project management in a single application. Apart from the community-supported version that users can install on their hosting server, the company also offers a cloud-hosted version (GitLab.com), ofcourse, at some cost to enterprises. Furthermore, being a web-based Git repository manager, teams can collaborate on their code.
Key Features of GitLab
- Version Control
- Continuous Integration/Continuous Deployment (CI/CD)
- Project Management with the help of various tools such as tracking, kanban boards, and milestones.
- Source Code Management
- Code Review and Collaboration
- Various security features, along with built-in security scanning tools.
- Package and Container Registry
- Automation and Scripting
- Scalability and Performance
- DevOps Automation
- Documentation and Wiki – This includes a wiki for each project, where teams can document their code, processes, and guidelines.
Steps for installing GitLab on Ubuntu 24.04 LTS
The steps given here for setting up GitLab on Ubuntu 24.04 Server can also be used for other versions of Ubuntu, such as 22.04 or 20.04 LTS.
1: Ensure packages are up to date
Open the Ubuntu 24.04 command terminal and execute the system update, which is common practice before installing the application on Linux. This ensures our system is up to date not only package-wise but also from a security perspective.
sudo apt update && sudo apt upgrade -y2. Install GitLab Required Dependencies
We also need to install a few dependencies before moving forward with the proper installation of GitLab. These are cURL, OpenSSH-server, ca-certificates, tzdata, and Perl. You may already have them on your system, but run the given to ensure they are on your system.
sudo apt install -y curl openssh-server ca-certificates tzdata perl
3. Add the GitLab Repository
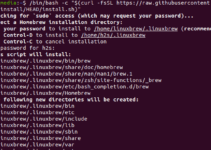
Even though GitLab offers a community version, we cannot install it simply using the Ubuntu 24.04 official repository because its packages are missing. Hence, we can add the GitLab repository using the given command.
Download and install the GitLab repository script: Add only one repository as per the edition of GitLab you want to install:
For Enterprise Editon repository:
curl https://packages.gitlab.com/install/repositories/gitlab/gitlab-ee/script.deb.sh | sudo bashFor the Community Edition repository:
curl https://packages.gitlab.com/install/repositories/gitlab/gitlab-ee/script.deb.sh | sudo bash4: Installing Gitlab EE or CE on Ubuntu 24.04
Along with its installation, you must set the URL to access the GitLab web interface, which can be done with the given command.
sudo EXTERNAL_URL="https://your_domain.com" apt-get install gitlab-eeReplace your_domain.com with your actual domain name. For example, here, we have used http://gitlab.how2hsout.com.
Those who want to set the root password correctly while installing Gitlab can use [GITLAB_ROOT_PASSWORD=”your-password” ] in the above; here is how to do it.
For Enterprise Edtion:
sudo GITLAB_ROOT_PASSWORD="your-password" EXTERNAL_URL="http://gitlab.example.com" apt install gitlab-eeFor Communtiy Edition:
sudo GITLAB_ROOT_PASSWORD="your-password" EXTERNAL_URL="http://gitlab.example.com" apt install gitlab-ce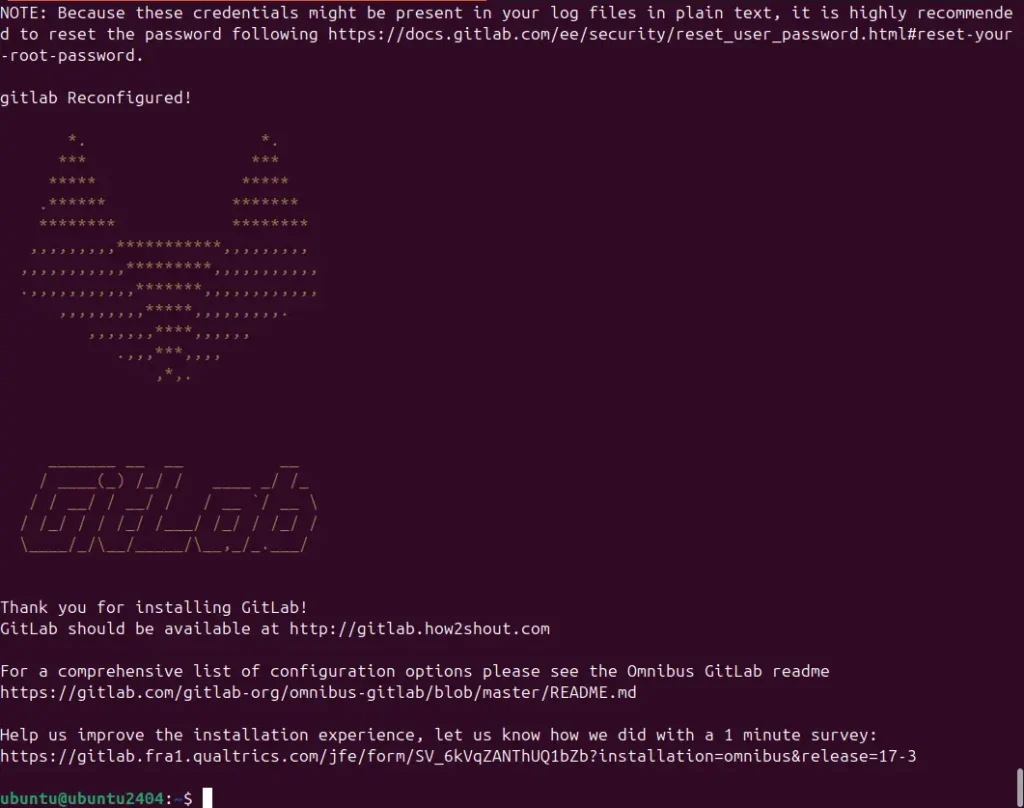
If somebody has installed Gitlab without specifying the external URL or wants to change it, they can edit the “/etc/gitlab/gitlab.rb.” In this file, you have to find the line “external_url” and change its value. If it is commented, you can also uncomment it to enable it.
sudo nano /etc/gitlab/gitlab.rbAfter making these changes, reconfigure the GitLab instance using the following:
sudo gitlab-ctl reconfigure5. Get the Gitlab password
For those who have not created the root password while installing Gitlab, the command will create one automatically, so to know or get that, we can use the given command.
sudo cat /etc/gitlab/initial_root_password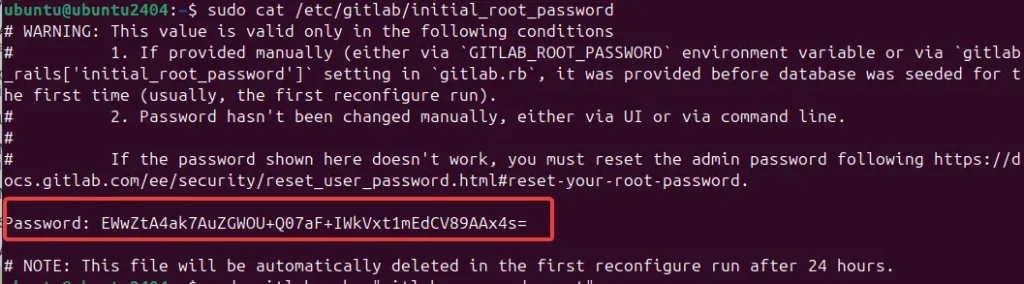
6. Access the Web interface & Login
We have completed the basic installation of GitLab. To configure further access to its web interface, open your system browser to access the domain or URL assigned to GitLab. For example, to perform this tutorial, we used http://gitlab.how2shout.com.
Upon opening the GitLab web interface, you will see the login page. Enter the username and password —root and password—set by you or generated randomly by GitLab.

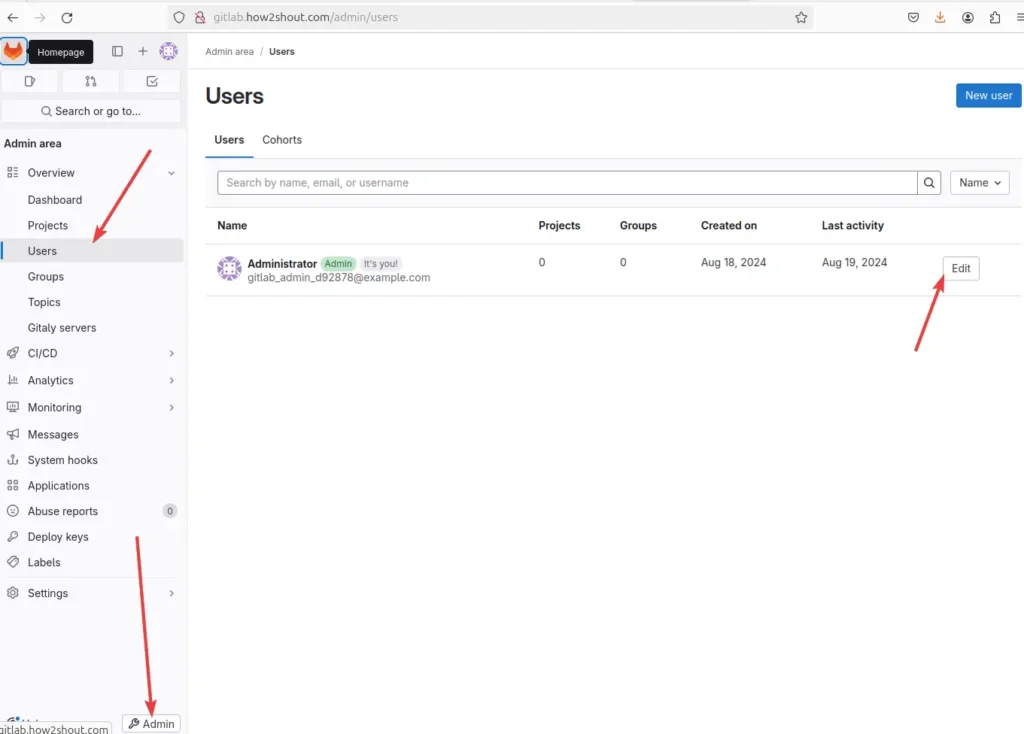
7. Dashboard
You will see the Dashboard of the GitLab; now, if you want to change the initial password using the GUI, then follow the given steps:
- On the left sidebar, at the bottom, select Admin.
- Select Overview > Users.
- For the user whose password you want to update, choose Edit.
- In the Password area, type a password and password confirmation.
- Select Save Changes.
8: (Optional) Configure GitLab for HTTPS
To secure your GitLab instance with HTTPS, you’ll need to configure SSL. You can obtain a certificate from a Certificate Authority (CA) or use a self-signed certificate.
Edit the GitLab Configuration File:
Open the GitLab configuration file using a text editor like nano or vim. Users can also uncomment the Optional values, such as the one given for auto-renewal of Let’s Encrypt.
sudo nano /etc/gitlab/gitlab.rbEnable Let’s Encrypt Integration:
Find the Let’s Encrypt section in the gitlab.rb file and make the necessary changes:
# Enable Let's Encrypt integration

letsencrypt['enable'] = true

# Specify the domain name for your GitLab instance

external_url 'https://your.domain.com'

# Optional: Provide an email address for Let's Encrypt notifications

letsencrypt['contact_emails'] = ['[email protected]'] # Optional

# Optional: Disable auto-renewal if you want to control renewal manually

# letsencrypt['auto_renew'] = false

# Optional: Customize the time for auto-renewal

# letsencrypt['auto_renew_hour'] = 0
# letsencrypt['auto_renew_minute'] = nil # should be a number or cron expression
# letsencrypt['auto_renew_day_of_month'] = "*/4"
Reconfigure GitLab:
After editing the configuration file, you need to apply the changes by reconfiguring GitLab:
sudo gitlab-ctl reconfigureThis will automatically generate a Let’s Encrypt certificate and configure GitLab to use it.
Verify the SSL Certificate
To confirm the SSL certificate has been configured successfully, open a web browser and navigate to your GitLab instance using https://your.domain.com. For further information on configuring GitLab, refer to its official documentation.