CloudPanel is a free hosting panel for easily managing websites and web apps. Here in this article, we learn the steps involve in installing and using CloudPanel on Ubuntu 22.04 Linux server.
Hosting and managing websites on the CLI server without any GUI could be hectic especially when we have multiple websites, even for developers. To solve this many free and paid web-based server control panels with GUI are available that simplify the management and administration of hosting environments, a popular example is CPanel by WHM.
Although Cpanel is great software but paid, so if you don’t, have such extensive requirements of hosting reselling and want a simple but powerful software to manage your web apps then can look for CloudPanel.
CloudPanel streamlines tasks such as domain management, SSL certificate installation, database management, and more.
In this tutorial, learn the installation of CloudPanel on Ubuntu Linux.
Prerequisites:
- You must have fresh Ubuntu 22.04 or Debian 11 to install CloudPanel
- Access to the Internet connection
- At least 1 GB Ram, 1 Core CPU, and 10 GB of free Space
- And basic knowledge of the Linux command line
Step 1: Update the Package List
Start with updating your server as it makes sure all the latest available package updates are installed on our system, including the rebuilding of the APT index cache will be done by running it.
sudo apt update && sudo apt upgradeStep 2: Install Required Packages
CloudPanel requires a few packages to be installed on your system which it needs to run its commands.
sudo apt install wget curlStep 3: Install ClouPanel Script on Debian
As per your requirement, CloudPanel supports both MySQL and MariaDB’s different versions.
Now, according to your Database server preference run any of the given commands and it will install the Open source CloudPanel automatically on your Ubuntu 22.04 LTS including required components such as PHP, MySQL, Nginx, and others.
MySQL 8.0:
curl -sS https://installer.cloudpanel.io/ce/v2/install.sh -o install.sh; \
echo "3874fff99744cf3afe6f533013282e87c95640e128d1d3998666e2929dc12978 install.sh" | \
sha256sum -c && sudo bash install.sh
MariaDB 10.11:
curl -sS https://installer.cloudpanel.io/ce/v2/install.sh -o install.sh; \
echo "3874fff99744cf3afe6f533013282e87c95640e128d1d3998666e2929dc12978 install.sh" | \
sha256sum -c && sudo DB_ENGINE=MARIADB_10.11 bash install.sh
MariaDB 10.6:
curl -sS https://installer.cloudpanel.io/ce/v2/install.sh -o install.sh; \
echo "3874fff99744cf3afe6f533013282e87c95640e128d1d3998666e2929dc12978 install.sh" | \
sha256sum -c && sudo DB_ENGINE=MARIADB_10.6 bash install.sh
Step 4: Create Admin User
Once the installation is completed, open a browser on your local system that can access the Ubuntu server IP address where you have installed the CloudPanel. After that in the URL type the server IP address with port number 8443.
For example, if the IP address is 34.235.149.52 then the URL will be like this: https://34.235.149.52:8443
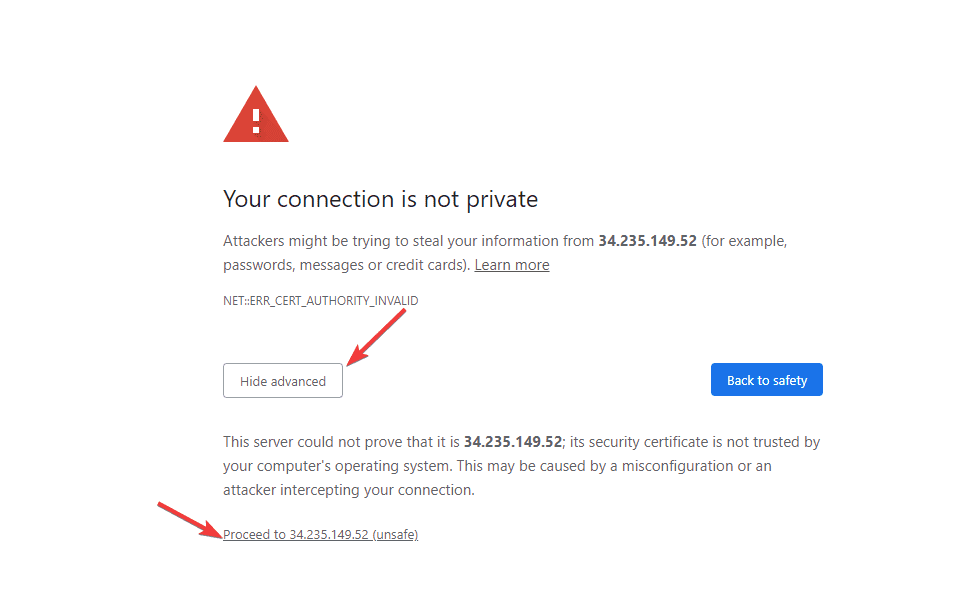
You will see an SSL certificate error, click on the Advance button and then click on the link saying “proceed to“. It can be slightly different depending on the browser you are using.
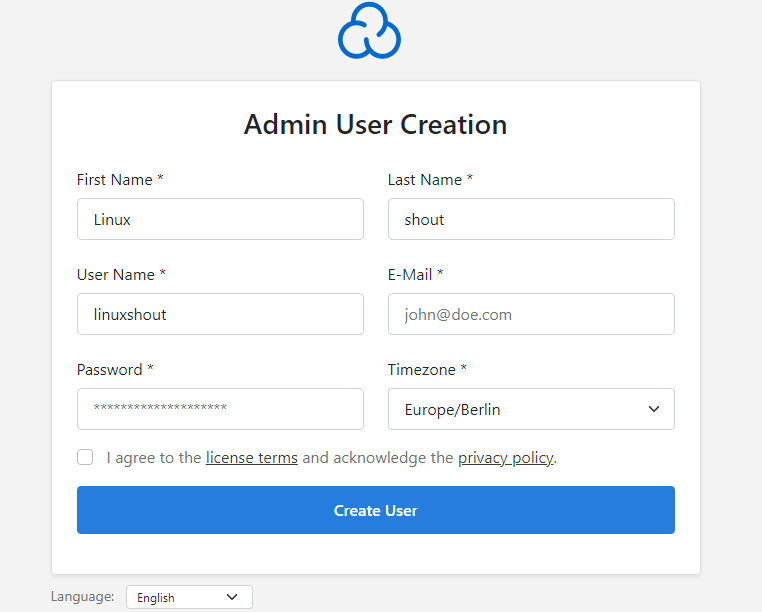
Soon, you will see the form to create an Admin account, follow it and create a Superuser to access the Settings and Dashboard of CloulPanel.
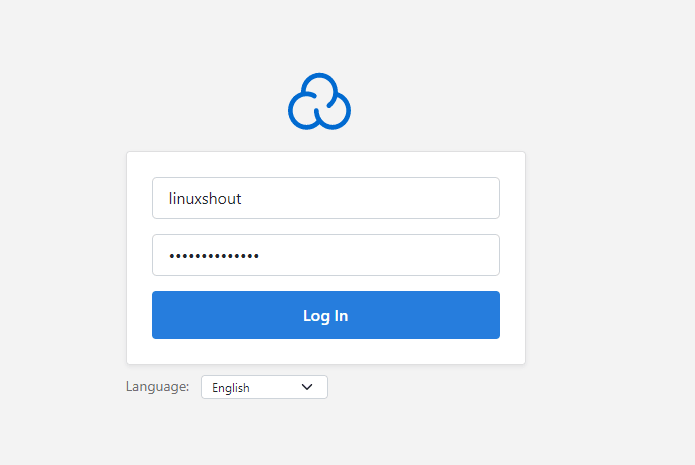
Step 5: Login CloudPanel Admin
After completing the Admin account creation process, you will see the Login Display. Enter the details to get the CloudPanel Dashboard.
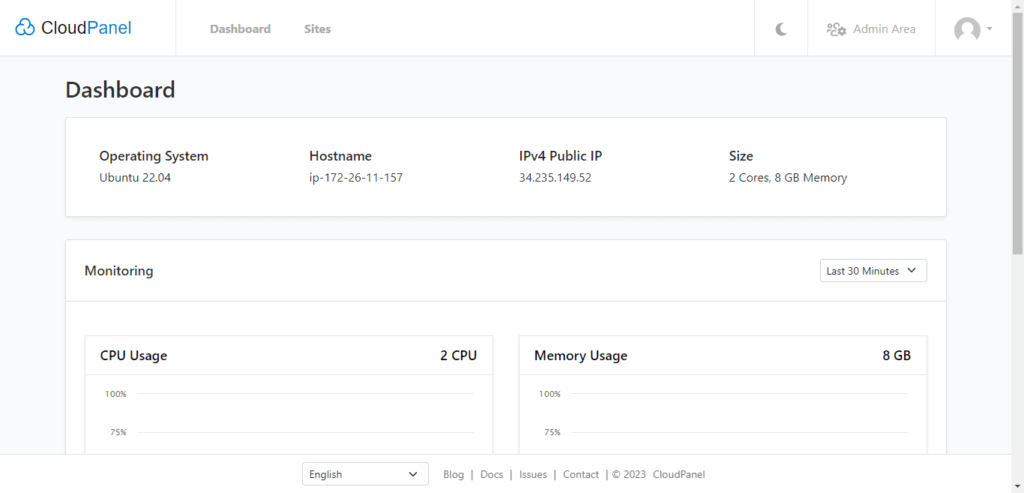
Step 6: Server Monitoring
The first screen which you will have on CloudPanel Dashboard is the metrics that will tell how much load is on your web server.
Step 7: Create a WordPress Website
Well, CloudPanel offers a one-click option to install WordPress, PHP static websites, and other web apps. Here we will see how to create WP one.
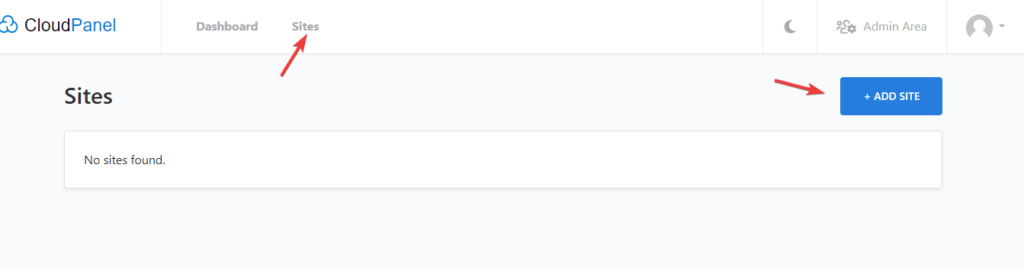
- Click on the Cloudpanel’s Sites link and then Add Site button.
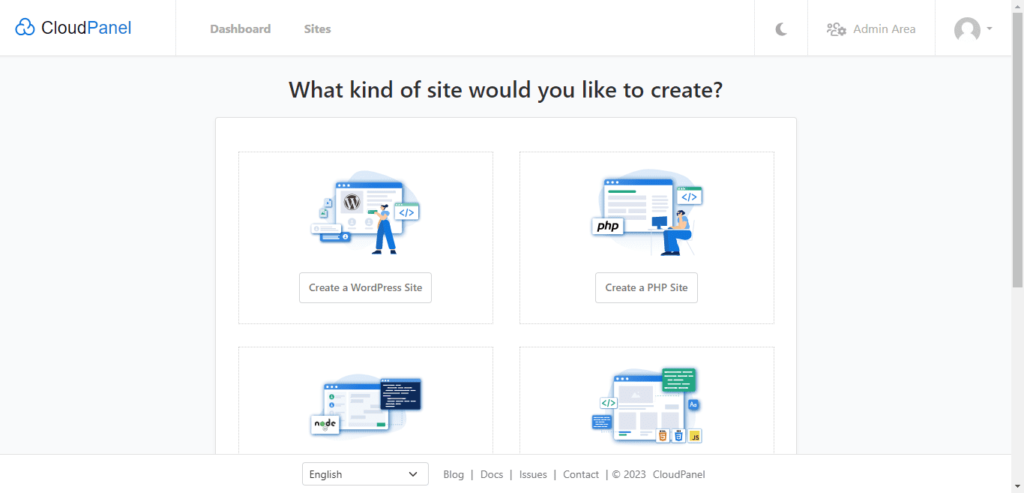
- Hit the “Create a WordPress Site” button.
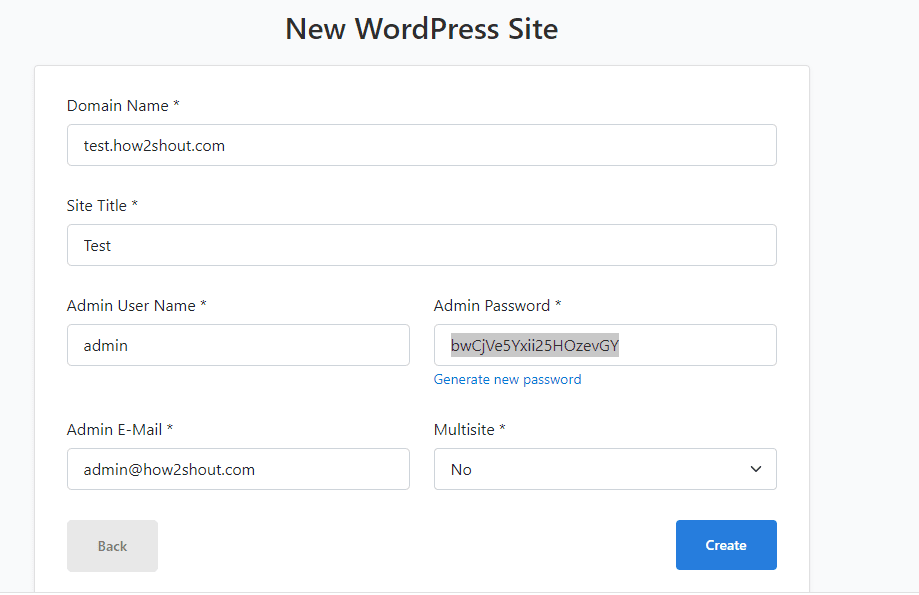
- Enter the domain that you want to use for your WordPress website
- After that set username, password, and other details.
- Once you are done click on the Create button.
Note: By default, CloudPanel will install a Self-signed SSL certificate for the website, therefore, make sure you have opened port number 443 in your Cloud service firewall.
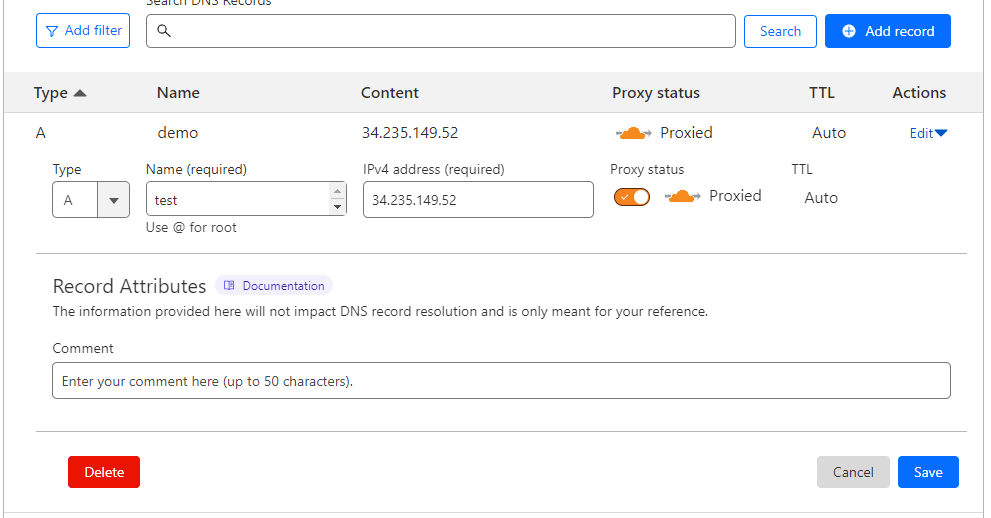
Step 8: Point your Domain A record
If you already have pointed your Domain A record in DNA to the IP address of the Ubuntu server where you have installed the CloudPanel then you will be able to access the website otherwise do it.
So this was the quick way to install CloudPanel on Ubuntu 22.04 server and manage your website using the graphical web interface. Unlike WHM Cpanel, CloudPanel is not for those who are into hosting space reselling but instead for individuals or businesses who want to manage their own websites and web servers.
Remember to refer to the official CloudPanel documentation and resources for detailed instructions on utilizing specific features and advanced configurations.
Other Articles:


