Are you looking for one of the best open-source Web Control Panel to manage websites or providing a hosting like Cpanel? If, yes, then here is the WHM alternative called CentOS Web Panel. In this tutorial, we will learn the process of its installation and setting up of Cpanel accounts.
The first thing most people look for before purchasing a hosting plan is the availability of WHM’s Cpanel. However, those are thinking to buy VPS (virtual private server) hosting or Cloud server plan such as Amazon light sail, AWS, Digital Ocean, Google Cloud, etc. and want to save few bucks over Web CPanel they can go for CentOS Web Panel. It is not only free but also has the pro version with some extra features available only at 1$ per month (billed annually). Well, from my side free version is enough and comes with all essential features from Database Management, DNS, PHP, Webserver to Firewall.
Unfortunately, just like WHM it also supports only CentOS or similar RPM-based Linux operating systems such as Redhat. So, if you an Ubuntu lover then the CentOS web panel is not for you. However, it doesn’t matter much which Linux is running in the background when you have a graphical user interface to operate and manage everything.
Steps to install CentOS Web Panel on CentOS 7 or 8
I don’t know which VPS hosting or cloud server you are going to opt for configuring CentOS web Panel but that doesn’t matter. Because the process of installation is the same even for your local machine running on RHEL or CentOS Linux.
Software Requirements
- Clean Minimal setup of CentOS 6, RedHat 6, CloudLinux 6 or CentOS 7.
Hardware Requirements
- The VPS or Cloud server instance should be running on 512 MB RAM for 32 bit Linux operating system.
- Whereas those have the 64bit operating which is common on all VPS or other servers 1GB and for full functionality and performance at least 4G+ RAM.
- At least a free HDD space of 10 GB.
We are installing it on Oracle Cloud Linux, however, we recommend Amazon Light sail those wanted a fixed monthly cloud plan. And in popular VPS Godaddy, A2Hosting and few others, one can think about. Well, here we are selling hosting plans just to give an idea I said those things. The focus of this tutorial is to set up your own Web control panel to even sell hosting services to other users around the world.
Note: After just like Cpanel after installing it you can’t uninstall this web panel from your Linux operating system.
Pre-requisites:
- Linux server
- sudo or root user access
- Of course an internet connection
CentOS web panel Demo links:
Copy and paste them in your browser to check out the live interface of this open-source project.
http://demo1.control-webpanel.com:2030
http://demo2.control-webpanel.com:2030
http://demo3.control-webpanel.com:2030
Username: root
Password: admin123
http://demo1.control-webpanel.com:2082
http://demo2.control-webpanel.com:2082
http://demo3.control-webpanel.com:2082
Username: testacc
Password: admin123
1. Update CentOS or Linux VM
The first thing we need to make sure after creating the minimal Linux Virtual Machine instance everything on it should be up to date. For that run the update command that is:
yum update
reboot
2. Download CWP installation script
As we know CentOS 6 Life cycle is about to end on November 30, 2020, thus we recommend CentOS 7 for the Web Panel setup. However, we let you know the process for both the versions and it’s your choice at the end of the day to go with which one.
Log in as the root user or just emulate your current one:
sudo -i
Switch to tmp directory
cd /tmp
yum install wget
For CentOS 6
wget http://centos-webpanel.com/cwp-latest
For CentOS 7
wget http://centos-webpanel.com/cwp-el7-latest
For CentOS 8:
yum install https://dl.fedoraproject.org/pub/epel/epel-release-latest-8.noarch.rpm

dnf install wget -y
wget http://centos-webpanel.com/cwp-el8-latest
3. Run the CentOS web panel script
Once you have the installer script, you just need to run it. After that everything will be automated, the setup will take a few minutes as per your server resources.
On CentOS 6 version
sh cwp-latest
CentOS 7 version:
sh cwp-el7-latest
CentOS 8 version:
sh cwp-el8-latest
Once the installation is done restart the server:
reboot

4. Open ports for WebPanel
The CWP uses two ports, 2030 for HTTP protocol and 2031 to access the panel on secure SSL or https. If you are using VPS hosting then both the ports will automatically get opened. However, on the cloud server instance, you need to do it manually. Thus, access the Instance’s networking or Virtual Network Interface section and allow these ports;
- 2030 (http) and 2031 (https) for CWP panel
- 2082 (http) & 2083 (https) for user end control panel.
5. Login to CWP
To access the backend panel of CWP, open your system browser and type the public Ip address of your VPS server or Cloud instance along with the port number 2030 or 2031.
http://server-ipaddress:2030
https://server-ipaddress:2031
You will see the login screen, enter the username– root and password– your server root user password. In case, you don’t know your server root user password then on the command terminal simply set a new password for that using the below command:
sudo passwd root

6. Install Web Server
It is the best part of the CWP because it provides a preset configuration of web server along with a different set of environments such as
- Apache alone
- Nginx Only
- LiteSpeed Enterprise (Free for 30 days)
- Nginx & Varnish
- Nginx & Varnish & Apache with PHP-FPM
Go to WebServer Settings option given on the left menu panel and Select Web server. You can choose any of them, however here we are selecting Nginx as a proxy, Varnish as Cache, and Apache as webserver to process and server the files.
Once that is done, the webserver will be live on your CentOS web panel. In case you get an error “Nginx service failed to assign 80” which means Nginx couldn’t get started because it couldn’t bind the host IP address to port 80. Then do one thing, go and select Nginx only webserver configuration and Save & Rebuild configuration button of the webserver again. Now, it will be able to assign the port 80 and after that again select the Ngnix+Aapache+Varnish web server environment.

7. Create CentOS Control Web Panel
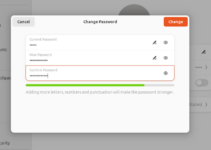
From the left panel of the CWP select User Account ⇒New Account
- Domain name: The Domain for which the Control Panel is going to be used.
- Username: The username you want to use with CPanel
- Password: password for the above username
- Admin Email: Enter the email address you want to use with Cpanel for Admin notifications.
- Package: Default
- Additional Options: Check Auto SSL option
Leave the rest of the settings as it is.

Finally, Click on the Create button.
8. Install Softaculous
One thing you will really miss is the software center on CPanel to install various PHP and other web applications with just one click. However, Softaculous is a free application thus available for CWP as well. To install and enable this just go to Script Manager and click on the
Install Softaculous (Script Installer).

9. Login to Control WebPanel
So, the all above was about the CWP which we can consider as an alternative to WHM. Now for WHM’s CPanel which we commonly use on hosting services, the Control WebPanel is there. To get login into that, again in a browser:
https://server-ipaddress:2083
or
http://server-ipaddress:2082

10. Install WordPress
On CWP CPanel Dashboard scroll down and select WordPress Add-on. After that select the domain and add other information to install it.


So, in this way, we can use the open-source CentOS web Panel to WHM/Cpanel without paying anything. However, I do recommend to buy the 1$ plan or just donate some amount to help the project live and go on.


But you didn’t tell how to map your domain to Oracle Cloud, update DNS name servers etc.
How will I map my domain to Oracle Cloud?