CloudPanel is an open-source and free server Control panel, optimal to use on command line Debian Linux servers to manage various web components, for system monitoring, and other services like MySQL, NGINX, PHP-FPM, and Redis.
Most of the time hosting services come with a popular WHM Cpanel, however, we have to pay an extra cost for that. Thus, those who have some knowledge of the Linux operating system and command line can use free CloudPanel on various VPS hosting including Public cloud platforms such as Amazon Web Services, Digital Ocean, or Google Cloud. The good thing is, this open-source Linux server control panel comes with extra functionalities to integrate properly with Public cloud services, aforementioned, to manage their various features. For example:
AWS Cloud Instance Name, Instance ID, Instance Type, Instance Region, and IPv4 Public IP can be seen directly on CloudPanel. In the same way, we can manage AWS Security Groups rules directly from this control without visiting AWS Management Console including Route 53 and Automatic Backups. The same is also applicable for Digital Ocean and Google Cloud, where after installing CloudPanel we will be able to manage Droplets, Firewall Rules, DNS, and Snapshots.
It is not just limited to this, to mitigate the hassle of issuing the various command, the CloudPanel comes with a web-based, graphical, and user interactive Dashboard, from where we can access Users, Vhost Templates for all common PHP App; multiple PHP Versions; MySQL Database including Amazon RDS or Amazon Aurora; Action Log and more.
CloudPanel also offers a CLI tool that commands can be used on the Server terminal to perform various useful operations such as backing up databases, resetting passwords, and permissions; enabling Two-Factor Authentication, and other tasks.
It supports English, German, Spanish, Chinese, Italian, and many more languages.
Key features:
- Web-based Graphical Control Panel
- Easy to install
- Supports multiple PHP versions
- NGINX Support
- Major Public Cloud support
- Quick Let’s Encrypt Certificates setup
- Monitoring Graphs
- phpMyAdmin support to manage MySQL Databases
- Cron Jobs Management
- With one Click MySQL, NGINX, PHP-FPM, and Redis services can be restarted
- Command-line support
Steps to install CloudPanel on Debian 11 Bullseye server
Minimum Server Requirements:
- Debian server
- 2 GB Memory
- One Core CPU
- 15 GB free disk space
- root user or
sudoaccess - If there is an active firewall, then make sure ports 22, 80, 443, and 8084 are whitelisted or opened.
1. Run system update & upgrade
On your Debian 11 Bullseye Server run the system update and upgrade command which ensures all installed packages of it will have their latest state.
sudo apt updae
sudo apt upgrade
3. Install dependencies
Here we need to install wget and curl tools which most of the time come by default on the Debian Server Linux distro, however, yet to make sure they are there run the following command.
sudo apt install wget curl
2. Install ClouPanel Script on Debian
Now, download and run the CloudPanel script which automatically sets up everything we need for this open-source control panel on Debian Linux such as PHP, MySQL, Nginx, and other components.
The good thing is you can choose the Database server your choice before installing the CloudPanel. Run the command according to the version of the Database you want.
MySQL 8.0
curl -sS https://installer.cloudpanel.io/ce/v2/install.sh -o install.sh; \
echo "3874fff99744cf3afe6f533013282e87c95640e128d1d3998666e2929dc12978 install.sh" | \
sha256sum -c && sudo bash install.sh
MySQL 5.7
curl -sS https://installer.cloudpanel.io/ce/v2/install.sh -o install.sh; \
echo "3874fff99744cf3afe6f533013282e87c95640e128d1d3998666e2929dc12978 install.sh" | \
sha256sum -c && sudo DB_ENGINE=MYSQL_5.7 bash install.sh
MariaDB 10.11
curl -sS https://installer.cloudpanel.io/ce/v2/install.sh -o install.sh; \
echo "3874fff99744cf3afe6f533013282e87c95640e128d1d3998666e2929dc12978 install.sh" | \
sha256sum -c && sudo DB_ENGINE=MARIADB_10.11 bash install.sh
MariaDB 10.6
curl -sS https://installer.cloudpanel.io/ce/v2/install.sh -o install.sh; \
echo "3874fff99744cf3afe6f533013282e87c95640e128d1d3998666e2929dc12978 install.sh" | \
sha256sum -c && sudo DB_ENGINE=MARIADB_10.6 bash install.sh
3. Create Admin User
Once the installation is completed, you will see your server IP address along with the port flashed on the command terminal. Enter the same in the browser, in short – https://server-ip:8443 replace Server-IP with your Debian server IP address where you have installed CloudPanel.
Enter the asked details…

4. Login CloudPanel Admin
Use the username and password created in the above steps to log in to the Control Panel.

5. Dashboard with Server Monitoring Graph
The first thing after login you will see is the graphs to give information about the Server resources usage such as Memory, CPU, Storage, and Average Load.

Note: The given steps were applicable earlier but with the latest updates, we can install WordPress on Debian 11 with just one click. Check out this article where we have discussed the way to install WordPress on CloudPanel with one click.
—————————————————————————————————————————-
6. Add Domain
Now, we have Linux Server and CloudPanel control panel, it’s time to add a domain that we want to use with it. Click on the Domain option given on the left side of the Dashboard.
After that click on the “Add Domain” button.

Type your domain name in the “Domain Name” box, the Document root will set automatically you don’t have to do anything there.
Secondly, select the Vhost Template– There are many pre-built templates for all popular PHP applications such as Joomla, WordPress, Magento, and more. Here we are selecting WordPress. If you want to use some particular PHP version then select that otherwise leave the latest one select, here it is PHP 8.0.
Learn: How to install PHP 8.0 on Ubuntu and Debian.
Note: Make sure the Domain name which you are using on CloudPanel, its “A” record has been pointed towards the Ip address of your Debian server or CloudPanel in your DNS management area.

7. Generate SSL Certificate
Once the domain is set, click on your configured domain name and select the SSL certificates Tab. There you will see an Action button, click it to reveal further options where you need to choose the “New Let’s Encrypt Certificate” option.

Click on the Create and Install button.

In few seconds you will see an SSL certificate has been issued and installed for your Domain successfully.

8. Check website and SSL certificate
Now, let’s check whether our created domain is accessible via the Nginx web server we have created along with the SSL certificate. For that simply type your CloudPanel assigned domain in the browser and you will see something like below.

9. Install WordPress on CloudPanel
So, everything is ready, now let’s install WordPress on CloudPanel. For this, access your Sever’s command-line interface either directly if you have it on the local server or using SSH for the one installed on some remote location or cloud.
1. On the terminal, switch to the Temp folder.
cd /tmp
2. Download Wordrpess file
wget https://wordpress.org/latest.tar.gz
3. Extract the WordPress tar file
tar xvf latest.tar.gz
4. Move extracted files of WordPress to your domain document root.
sudo cp -R wordpress/* /home/cloudpanel/htdocs/www.domain.com/
Note: replace www.domain.com with your domain name set in CloudPanel.
5. Change the permission of the moved file
cd /home/cloudpanel/htdocs/
clpctl system:permissions:reset www.domain.com 775
Note: replace www.domain.com with your domain name used in this control panel
10. Create MySQL Database
Creating a Database for PHP and other applications of CloudPanel is super easy. Just on the Admin frontend interface, select the Databases option, and click on the Add Database button.

Fill in, all the needed information such as Database Name, Username, and password, click on the Add Database button. That’s it.

11. Access WordPress Setup page
We have placed all the things where they should be and we needed to run “WordPress”, now it’s time to access it. For that again in your browser access your domain that you have set in Cloudpanel to install WordPress.
1. WordPress Welcome page
Click on the Let’s go button to start the installation process.

2. Enter Database Details
We already have created the MySQL database above, thus use the details of that in WordPress when it asks for. Leave the Database Host and Table Prefix as it is.

3. Run install Installation
If you are here, that means everything is gone Wonderful, hit the “Run the Installation” button

4. Create WordPress User
Create a user and password to access the login interface for the backend.


So, this was a quick way to set up this free and open-source CloudPanel Control Panel on the Debian Linux server. In case you want to restart any running services then that can be possible directly from the Dashboard of CloudPanel. You can know more about it from the official documentation page of this platform.

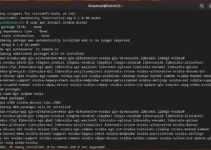

I was all excited to try this CP but apparently, it’s not been “upgraded” for Bullseye.
“…do bash
Only Debian Buster is supported”