MySQL ( full form is My Structured Query Language) on Ubuntu 24.04 LTS Linux server allows users to create a database for storing data generated by various web applications such as WordPress, phpBB, PrestaShop, WooCommerce, SugarCRM, JIRA, and more. Some reasons behind its popularity are its open-source licensing, stability, performance, scalability, flexibility, compatibility, ease of use, and administration. We have listed just a few features. Several other factors make it a worldwide go-to choice for developers, businesses, and large-scale enterprises with relational database management systems (RDBMS). For those who don’t know, MariaDB is the fork of MySQL.
What do we need to install MySQL on Ubuntu?
- An Ubuntu system (24.04, 23.04, 22.04, or 20.04).
- Sudo privileges or root access.
- A stable internet connection.
Step 1: Update Ubuntu 24.04 System
On your Ubuntu Desktop or Server, access the command terminal and run the system update command to refresh the system repositories cache and install the latest version of existing packages.
sudo apt update && sudo apt upgrade Step 2: Installing MySQL Server on Ubuntu 24.04
Installation of the MYSQL server on Ubuntu 24.04 is quite easy because the packages configuring this database server are directly available through Ubuntu’s default repository, which we can fetch using the APT package manager. The version of Mysql available to install was 8.x; here is the command to follow:
sudo apt install mysql-server
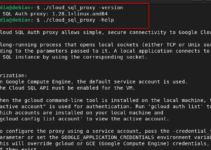
Verify the Installation:
After completing the command to install MYSQL, we can confirm its availability on our system by checking its version. You should see something like this output: “mysql Ver 8.0.37-0ubuntu0.24.04.1 for Linux on x86_64 ((Ubuntu))“
mysql --versionStep 3: Start and Secure MySQL
The MySQL server service will automatically start after the installation, so let’s check its status.
sudo systemctl status MySQL --no-pager -lHowever, if it has not been started yet, run the given command to start and enable the MYSQL server on Ubuntu 24.04.
sudo systemctl enable --now mysql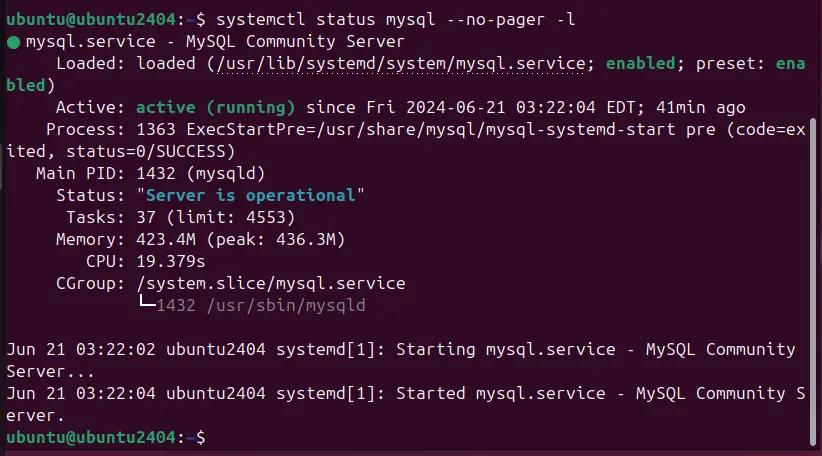
Secure MySQL Installation:
To improve the security of the MySQL database instance, it offers an inbuilt script. This script creates a step-by-step wizard that new users can easily follow. Run the given command to call that script.
sudo mysql_secure_installationDuring this process, you will be prompted to:
- Set a password for the MySQL root user (if not set during installation).
- Remove anonymous users.
- Disallow remote root login.
- Remove test databases.
- Reload privilege tables to apply changes.
- Answering “yes” to all prompts is recommended for a more secure installation.
Step 4: Test MySQL Installation
We already know our MySQL is running in the background without any error in the previous step, now, let’s login and check it is allowing us or not.
Log In to MySQL:
sudo mysql -u root -pThe system will prompt you to enter the password for the root that is set while securing the Database server using the “mysql_secure_installation” command. Once logged in, you will see the MySQL prompt.
To Exit the MySQL shell, simply type:
exit;Step 5: Create a New Database and User (Optional)
Now, to use MySQL for any web application to store data, we need to create a new database and a user with permissions for that database. Here’s how you can do it.
Log In to MySQL:
sudo mysql -u root -pCreate a New Database: Replace “your_database_name” with your desired name.
CREATE DATABASE your_database_name;Create a New User: Replace “your_username” and “your_password” with your desired username and password.
CREATE USER 'your_username'@'localhost' IDENTIFIED BY 'your_password';Grant Permissions to the User: After creating the database, assign permission to the user to use that database. Replace your_database_name with the database name you have created and your_username with the user’s name.
GRANT ALL PRIVILEGES ON your_database_name.* TO 'your_username'@'localhost';Flush Privileges: Apply the changes made to the user permissions.
FLUSH PRIVILEGES;Exit MySQL:
exit;Step 6: Configure MySQL (Optional)
Well, this step is completely optional and only required when an application has special requirements regarding using a MySQL server. The MySQL configuration files are located at /etc/mysql/my.cnf and /etc/mysql/mysql.conf.d/mysqld.cnf. These files can be used to control the MySQL server’s behavior. You can adjust settings, such as the bind address (for remote connections), buffer sizes, and logging options, using these files as needed.
The “/etc/mysql/mysql.conf.d/mysqld.cnf” file is used to configure the MySQL server daemon (mysqld). It includes specific parameters for tuning the MySQL server’s behavior and performance.
To open it, use – sudo nano /etc/mysql/mysql.conf.d/mysqld.cnf
The “/etc/mysql/my. conf” file is a global configuration file for MySQL that serves as the primary entry point for its configuration settings and is read first when the MySQL server starts.
To open and edit this file, use: sudo nano /etc/mysql/my.cnf
Restart MySQL: Don’t forget to restart MySQL service after performing any changes in its configuration file so that the system can apply them:
sudo systemctl restart mysqlConclusion
The command lines of MySQL and MariaDB work similarly, so if you are familiar with one, you can operate the other as well. Here, we have learned the basic steps to install the MySQL server on Ubuntu 24.04. Now, you can start setting up web applications or managing existing SQL databases.
Other Articles: