Install Secure File Transfer Protocol SFTPGO on Ubuntu 22.04 LTS Jammy JellyFish server or desktop to get HTTP, WebDAV, and FTP/S support.
Transferring files is one of the most important tasks in the administration of a server or a web space. Of course, there are many different tools and protocols available for these – one of them is the Secure File Transport (SFTP). Compared to other methods such as the frequently used File Transport Protocol (FTP) or the Server Message Block or Common Internet File System (SMB/CIFS, Samba), it has specific advantages and disadvantages that do not share with any other standard.
What is SFTP?
SFTP is an extension of the Secure Shell (SSH), which is a tool for accessing and administering computers over the network. SSH is a server service that waits for connections from a client and, after successful authentication, provides it with a terminal – a text-based command line for entering commands. It is probably the most commonly used protocol on the Internet for server management and running programs on a remote machine.
One of the disadvantages of SSH is that the client does not offer a direct way to transfer files. After logging in, the user uses an input that offers virtually the same functions that he would have with local access via a screen and a keyboard. SFTP eliminates this disadvantage by using its separate program for communication. However, some clients such as the very popular program PuTTY integrate the standard in their interface and offer the possibility to use SSH and SFTP in parallel via a separate connection.
However, there is an easy-to-use program called SftpGo written in the Go programming language. It is a fully-featured and highly configurable SFTP server with optional HTTP/S, FTP/S, and WebDAV support. We can install it on all popular Linux systems. It also supports several storage backends such as local filesystem, encrypted local filesystem, S3 (compatible) Object Storage, Google Cloud Storage, Azure Blob Storage, and SFTP. More information about the software can be achieved from its GitHub page.
Steps to install SFTPGo on Ubuntu 22.04 LTS
There are two ways to install SFTPGo software on Ubuntu, one is using the PPA repository and the other with the help of its Debian binary. Here we show both.
#1st method using PPA repo
1. Update Ubuntu
It is good practice in Linux to run a system update command before installing any application. This will install all the latest available updates on our system.
sudo apt update && sudo apt upgrade
Also, install an extra required package to add PPA repositories.
sudo apt install software-properties-common
2. Add SFTPGo PPA repo on Ubuntu 22.04
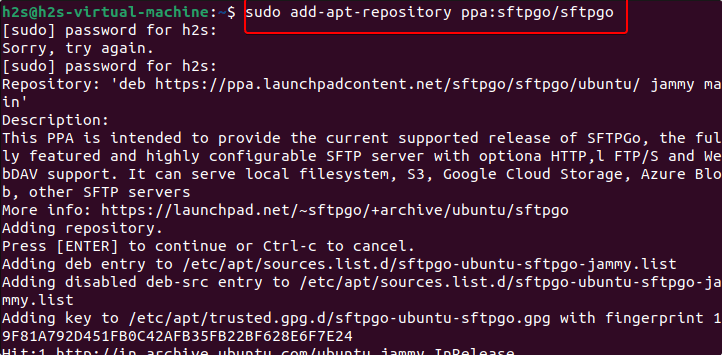
Now, use the given command to add the PPA repository of SFTPGo on Ubuntu 22.04, so that we can install this software using the system’s APT package manager like any other common software.
sudo add-apt-repository ppa:sftpgo/sftpgo
Update system to refresh APT package index cache:
sudo apt update
3. Install SFTPGo on Ubuntu 22.04
Finally, install the software on your system to easily access it on your Ubuntu like any other app.
sudo apt install sftpgo
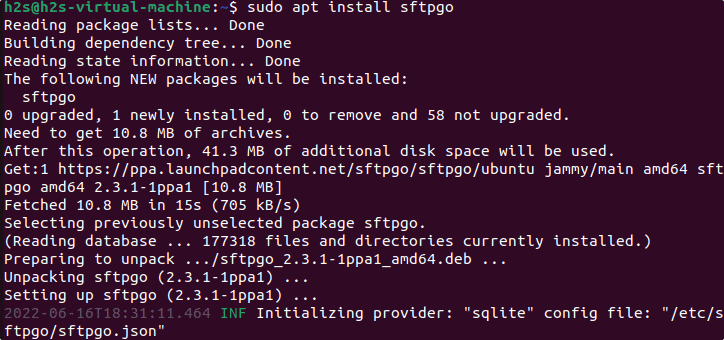
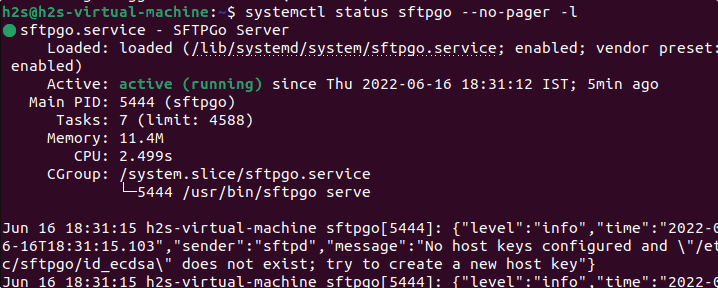
Once the installation is completed, we can check whether it is running properly in the background as a service or not.
systemctl status sftpgo --no-pager -l
#2nd Method using Debian binary
4. Download SFTPGo Deb binary
Those who don’t want to add an extra PPA repository to their system can directly download the executable Debian binary.
Here we are using the command line to download it, you can directly visit the GitHub release page of this tool to get it.
Set VER value to the latest version of the SFTPgo –
VER=$(curl -s https://api.github.com/repos/drakkan/sftpgo/releases/latest|grep tag_name | cut -d '"' -f 4 |sed 's/v//g')
Now download it:
wget https://github.com/drakkan/sftpgo/releases/download/v$VER/sftpgo_$VER-1_amd64.deb
5. Install SFTPGo on On Debian/Ubuntu
The previous and the below-given commands to get & install SFTPGo will be the same for all Ubuntu or Debian-based Linux systems.
sudo dpkg -i sftpgo_*_amd64.deb
6. Open ports in Ubuntu 22.04’s firewall
We require a few ports to be opened in our system or any other firewall you are using so that we can access them from any other network.
sudo ufw allow 8080
sudo ufw allow 2022
sudo ufw allow 8090
6. Access the Web GUI
After using any of the above-given methods SFTPGo will be on your system, now we can access its web GUI. For that simply open your local system browser and point it to the server or desktop IP address where you have installed SFTPGo following port number 8080.
For example:
http://server-ip-addres:8080
Create Admin User
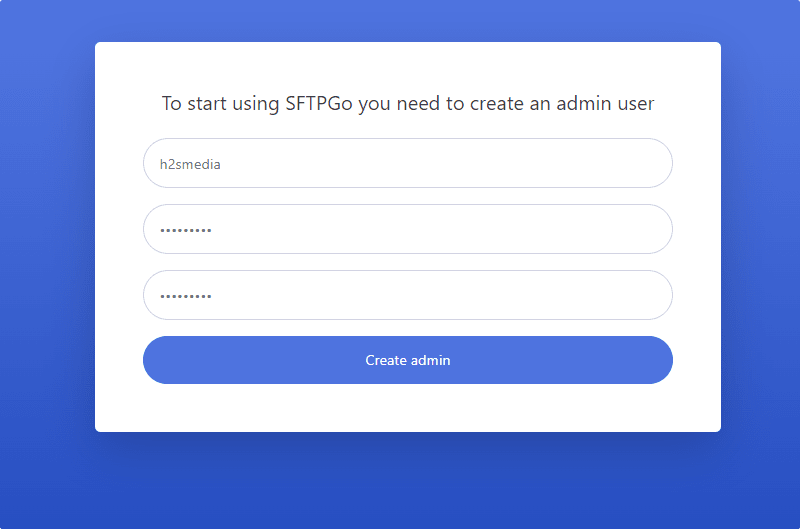
After accessing the Web GUI, the first thing it will ask you is to create an Admin account on it.
7. Create a new user
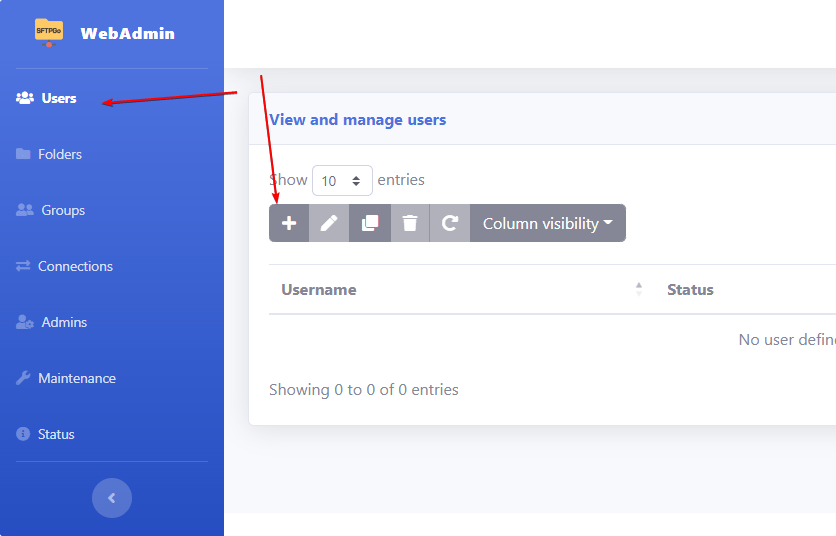
Once you have the Dashboard of SFTPGo, let’s create a new user to access storage data using any web or local client such as Filezilla.
For that click on the “Users” option. After that on the + icon.
Add the username and password you want to use. If you want, can also add a Public key.
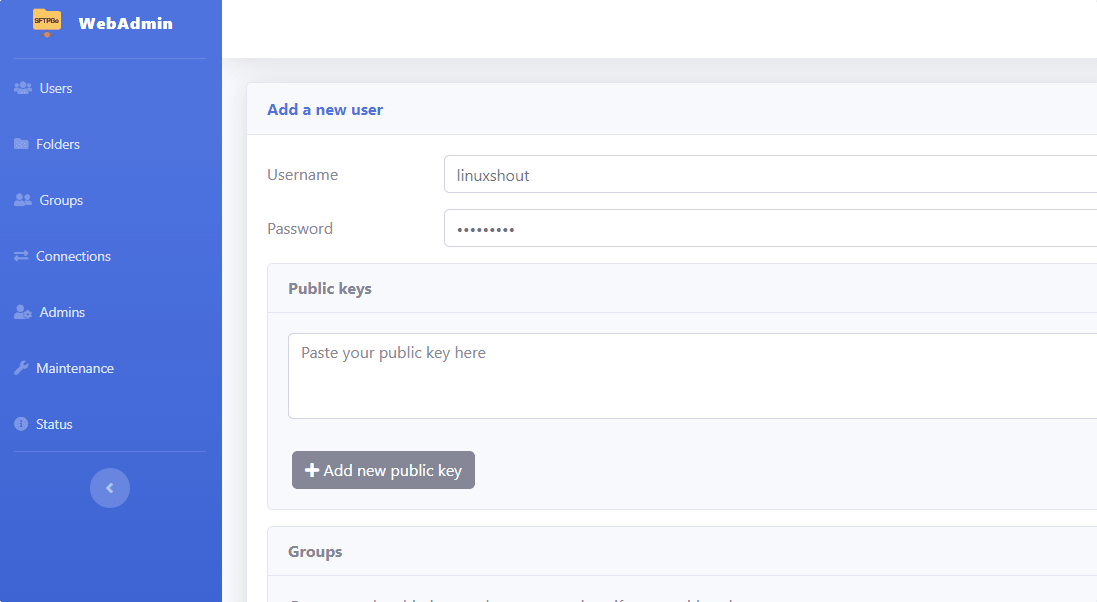
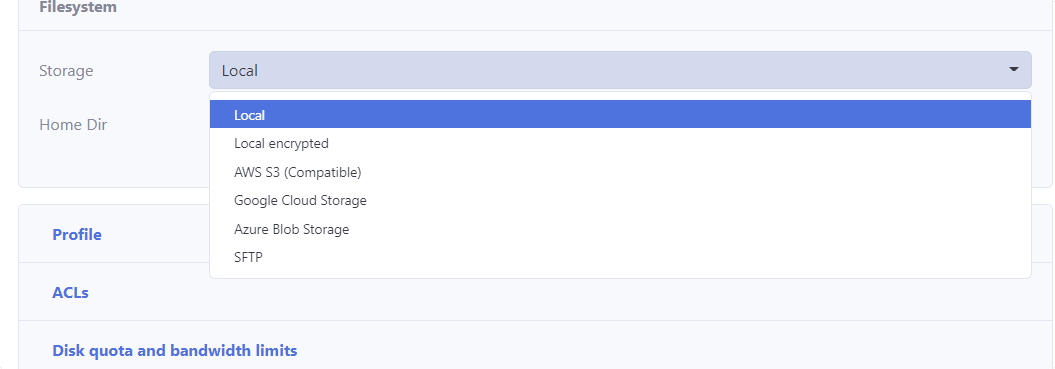
Those who want to access the local filesystem select that whereas other options such as AWS S3, and Google Cloud storage are also available, however for then first we need to configure them from the Folders option.
8. Connect to your SFTPGo using the client
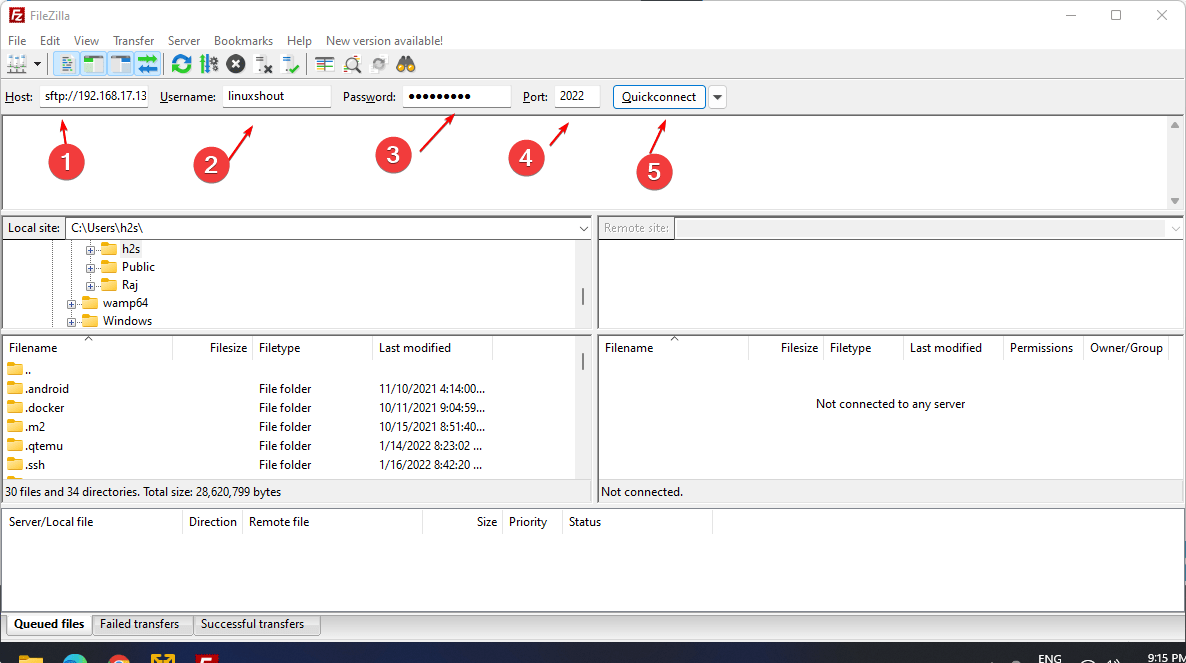
Here we are using the FileZilla client you can use any other if you want. Open it and type your server IP-address along with SFTP protocol:
Example:
sftp://server-ip-address
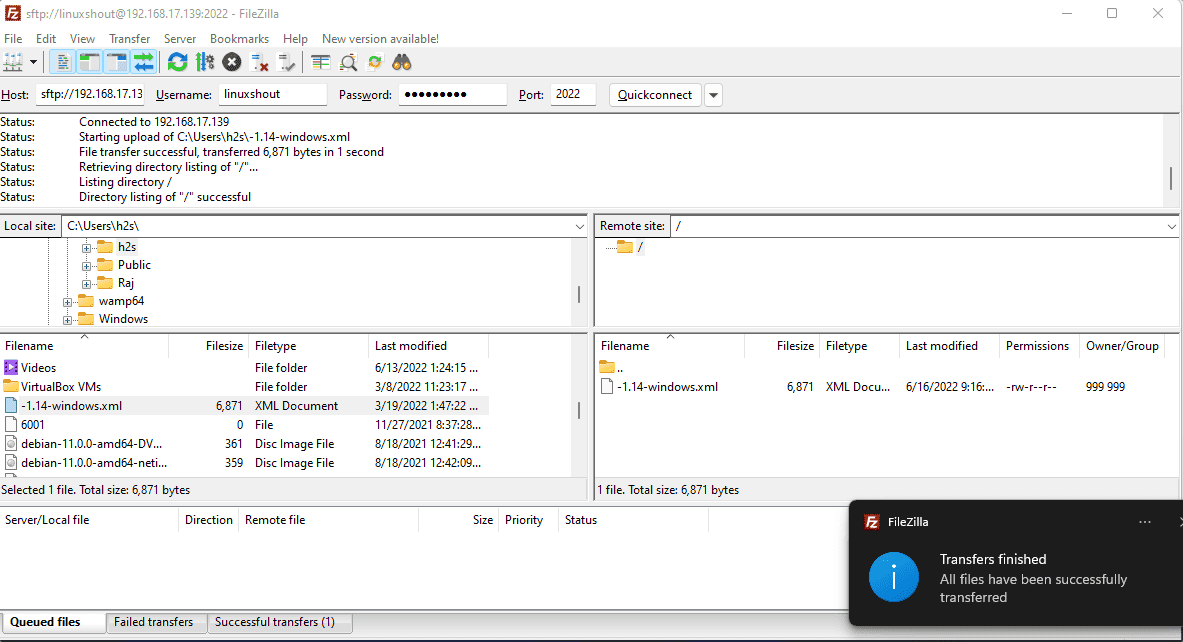
After that enter the username and password you have created on SFTPGo and in the port use 2022. Finally, click on the “Quick Connet” button to check whether our SFTPGo server is working accurately or not.
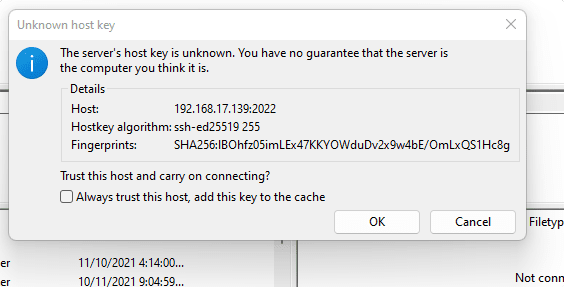
Accept the keys
9. Mount SFTPGo as WebDav
Those who want to use their remote server storage file system like any other local disk can mount it as WebDav with the help of SFTPGo.
First Enable WebDav:
Edit the SFTPGo configuration file and set the port for WebDav.
sudo su -
nano /etc/sftpgo/sftpgo.json
Find WebDav sections and set port from 0 to 8090.
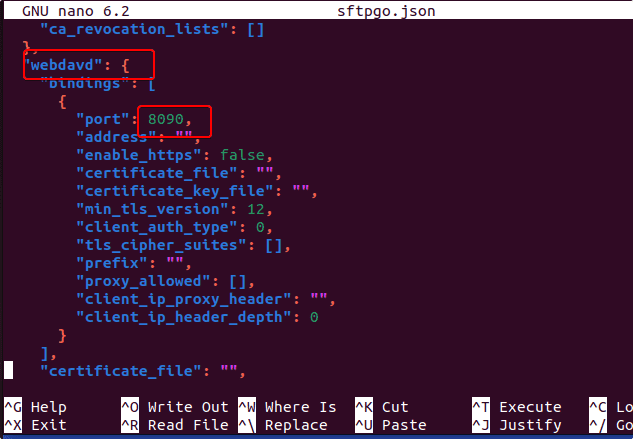
Save the file by pressing Ctrl+O, hitting the Enter key, and then using Ctrl+X to exit.
Mount WebDav on Windows
First, perform some changes in the system registry. Press the Win+R key and type regedit to open Registry.
Go to:
Computer\HKEY_LOCAL_MACHINE\SYSTEM\CurrentControlSet\Services\WebClient\Parameters
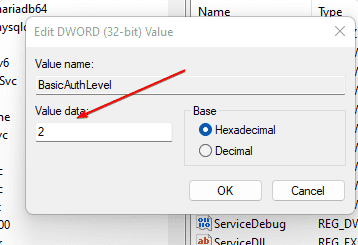
Now, double click on “BasicAuthLevel”
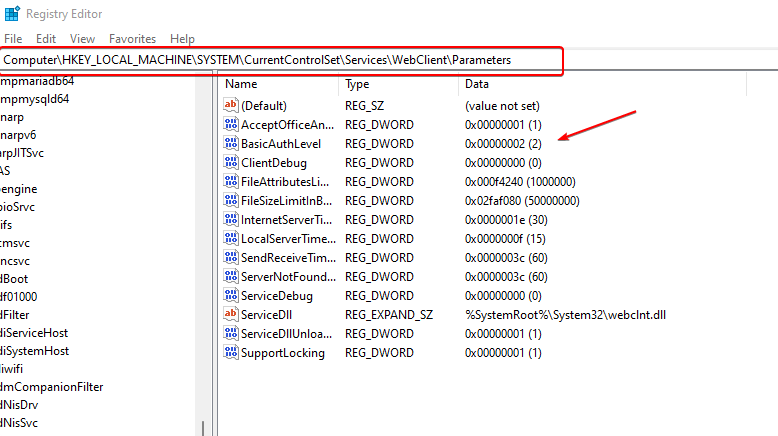
Change value 1 to 2. Press the Ok button.
Restart WebDav service:
Run PowerShell as Admin and type given commands one by one.
net stop webclient
net start webclient
Go to This PC or MyComputer on Windows and from Menu select “Map Network Drive”.
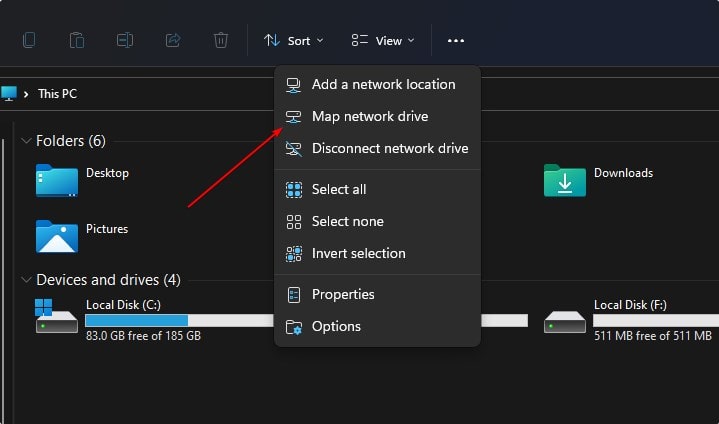
Enter the address of your SFTPGo along with a port number in the following format.
http://server-ip:8090
When it asks for entering the username and password do that.
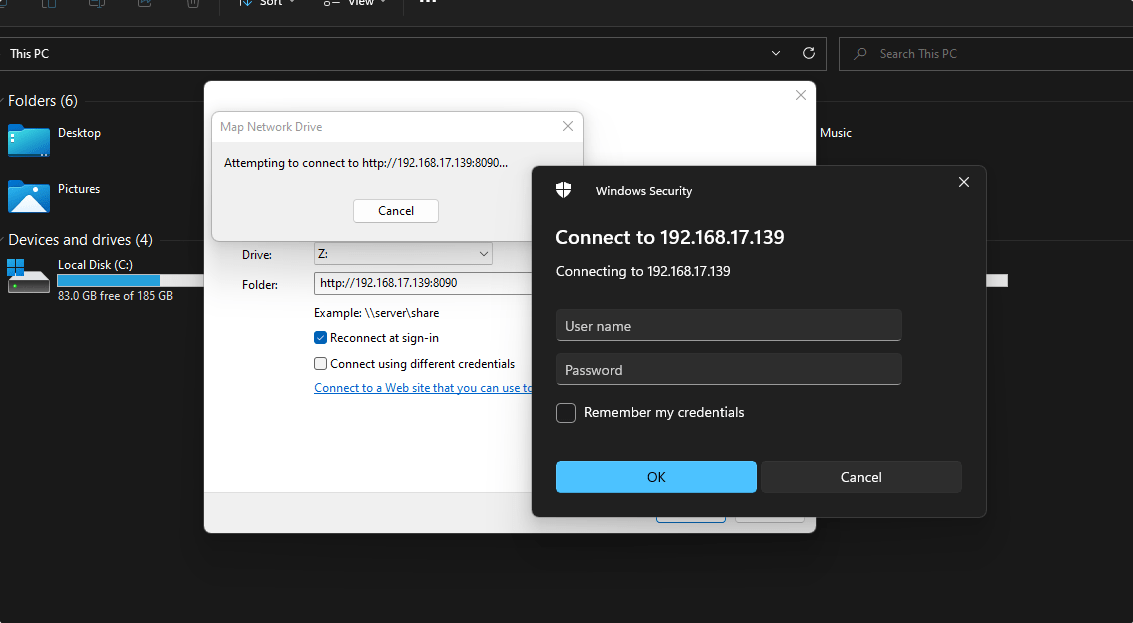
Soon you will have the Drive mounted like any local one on your system.
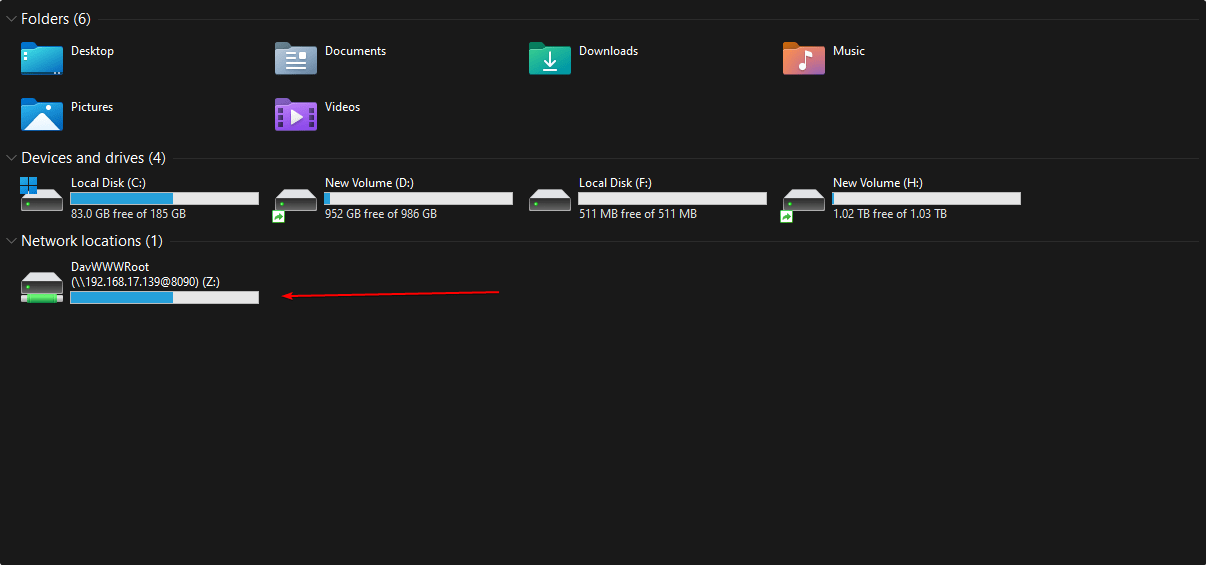
For Linux such as Ubuntu
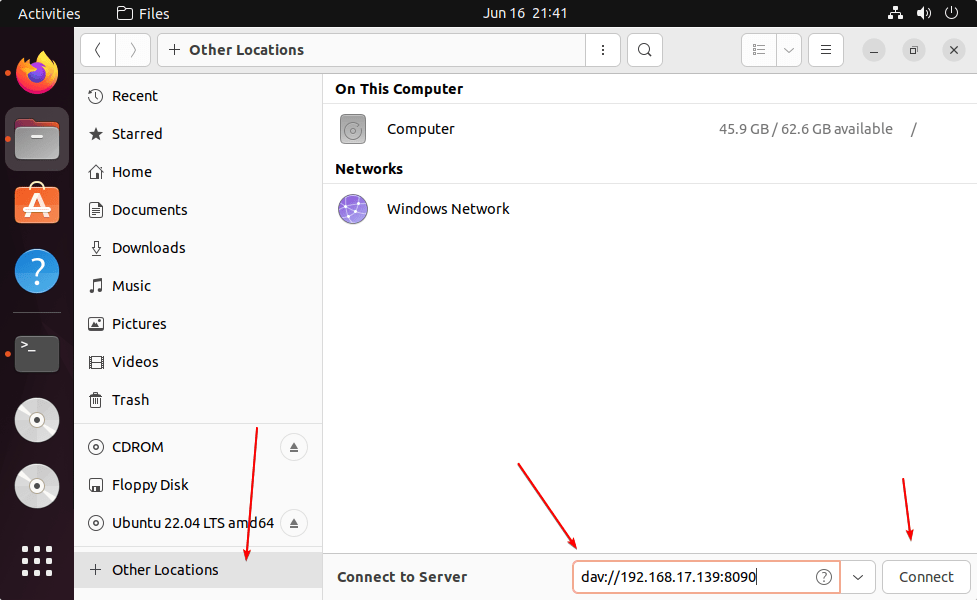
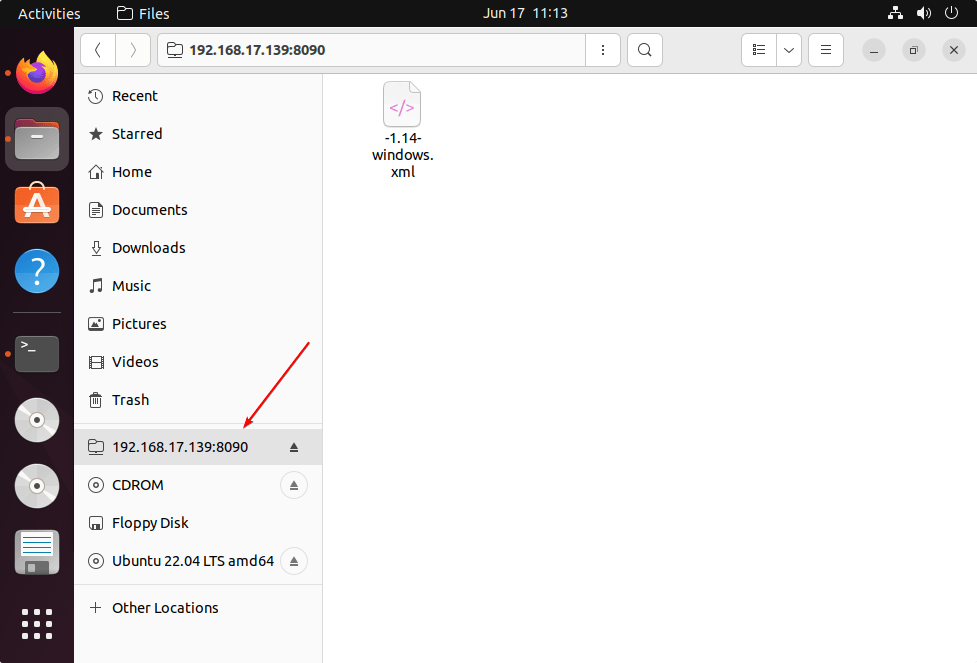
Open File Manager on Ubuntu, go to Other locations, and enter the server-ip-address along with port as shown in the screenshot.
For example:
dav://server-ip-address:8090
Hit the Connect button.
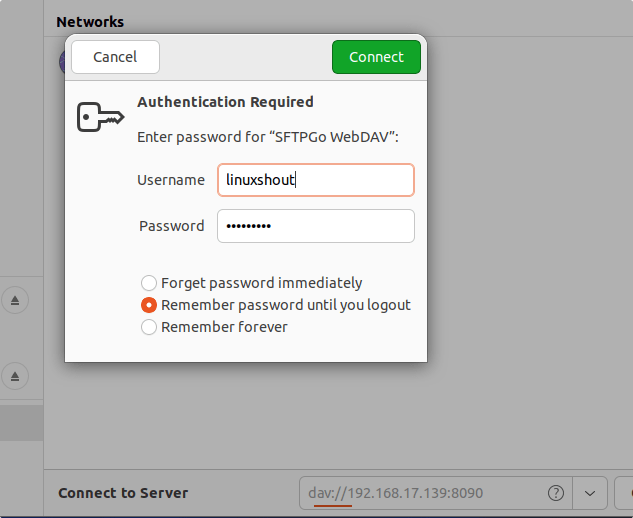
Give the username and password you have created on SFTPGo
Finally, you will have the mounted drive.
10. How to Update
Those who have used the PPA to install SFTPGo just need to run the system’s update and upgrade command, here is that:
sudo apt update && sudo apt upgrade
Whereas, the one who has used the Debian binary needs to download the latest binary of SFTPGo, manually as we did in this article, and install the same using the DPKG tool.
11. Uninstall or Remove SFTPGo – Ubuntu 22.04
If you don’t this SFTP program on your Ubuntu 22.04 system anymore then remove it using the given command:
sudo apt autoremove --purge sftpgo
To remove, PPA if you are using it:
sudo add-apt-repository --remove ppa:sftpgo/sftpgo
Other Articles:
♦ How to access remote MySQL database in local phpMyAdmin
♦ How to install FileZilla Client on Ubuntu 22.04 | 20.04 LTS Linux
♦ How to install WPS Office on Ubuntu 22.04
♦ How to Install Ntopng on Ubuntu 22.04 LTS


