In this tutorial, we are providing the steps to install WordPress with Apache web server on ALamLinux or Rocky Linux 8 running VPS, Cloud Hosting, or local Server using the command line.
WordPress doesn’t need any introduction whosoever is in blogging or web development would already know about this opens source content management system. Millions of websites are currently running on it with the help of Apache-webserver. And if you have recently purchased some cloud or virtual private hosting server where you are running Alamlinux or Rocky Linux 8 and want to install your WordPress along with LAMP (Linux, Apache, MySQL, PHP) stack then here are the steps to follow.
Note: We recommend using any Web hosting control panel to install and manage WordPress such as Cpanel or any open source, here is the list of best open source hosting control panels.
Steps to install WordPress on Rocky Linux 8 | AlmaLinux 8
The user can follow the given steps for CentOS 8 as well however as it has not been an LTS supported version anymore, hence, you must opt for Alma, Rocky or any other Long term supported Linux.
Update DNF repository cache
Run the system update command that will refresh the system repository cache to build a new one with an updated list of packages available for installation from the system repositories.
sudo dnf update
Also, install:
sudo dnf install wget nano -y
Install Apache HTTPd on Almalinux or Rocky linux 8
To serve WordPress webpages over a local or internet network using a browser we need a web server. And here we are going to install a popular Apache webserver.
sudo dnf install httpd -y
Start and enable Apache system service
sudo systemctl enable --now httpd
Check it:
systemctl status httpd

Enable Rewrite module:
sudo nano /etc/httpd/conf/httpd.conf
At the end of the file add this line:
LoadModule rewrite_module modules/mod_rewrite.so
Save it using Ctrl+O, hit the Enter key, and then Ctrl+X to exit.
Install MariaDB and PHP 8.0
The next thing we need is the MySQL or MariaDB database to store data and PHP language on our AlmaLinux or Rocky 8 because WordPress has been written in PHP.
For MariaDB:
sudo dnf install mariadb
Start and enable its service
sudo systemctl enable --now mariadb
Check it:
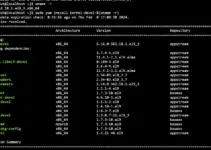
systemctl status mariadb
Secure your Database installation
sudo mysql_secure_installation
Go through the guided text-based wizard to secure the MariaDB/MySQL
For PHP 8.0 and its extensions
By default, the PHP 7.2 version is available to install from the App stream repository of Almalinux or Rocky but WordPress needs PHP 7.4 or above hence we will go for the latest version i.e PHP 8.0
For PHP 8.0 we need to enable the REMI repository.
sudo dnf install -y https://rpms.remirepo.net/enterprise/remi-release-8.rpm
sudo dnf update -y
sudo dnf module reset php -y
sudo dnf module enable php:remi-8.0 -y
sudo dnf update -y
sudo dnf install php php-{bz2,mysqli,curl,gd,intl,common,mbstring,xml}
Restart Apache server
Once PHP and its extensions are installed restart the Apache server to integrate it properly.
sudo systemctl restart httpd
Create Database
WordPress is not going to store all the data generated by the user such as webpage, user password, Plugin’s data, and others on the local storage in the plain format. It required a Database server either locally installed or on some remote server to efficiently link all the data to serve them whenever required. Here we already have installed MariaDB. So, let’s create a dedicated Database and user to use in WordPress.
sudo mysql
CREATE DATABASE yourdb;
CREATE USER 'user'@localhost IDENTIFIED BY 'password';
GRANT ALL PRIVILEGES ON yourdb.* TO 'user'@localhost IDENTIFIED BY 'password';
FLUSH PRIVILEGES;
exit;
Note: Replace yourdb, user, and password with whatever you want to set.
Download WordPress on Almalinux | Rocky Linux 8
WordPress is not available through the default repository. Hence, we have to download its files from its official website to install and configure this CMS manually.
wget http://WordPress.org/latest.tar.gz
Extract the file:
tar -xzvf latest.tar.gz
Move it to the Webroot directory.
sudo mv wordpress/* /var/www/html/
Assing Apache user read and write permission to the moved folder.
sudo chown -R apache:apache /var/www/html/
Sometimes Selinux may create some permission issue hence run;
sudo chcon -t httpd_sys_rw_content_t /var/www/html/ -R
To apply the change ins Selinux properly, run
sudo restorecon -Rv /var/www/html/
Open ports in the firewall:
If you are using cloud hosting then open the ports in its firewall instead of OS.
sudo firewall-cmd --permanent --zone=public --add-service=http
sudo firewall-cmd --permanent --zone=public --add-service=https
sudo systemctl reload firewalld
Configure and Install WordPress on Rocky or AlmaLinux 8
Finally, go to your web browser and enter a domain name such as http://example.com or http://server-ip- address of the server where you have installed the WordPress.
Hit the Let’s Go button.

Add the Database details you have created. Hit the Submit button.

Run Installation
After that hit the “Run Installation” button and create Username and Password. 


Hello Dear
in this tutorial that you have shown for wordpress is it possible to install more than 1 wordpress site on the same server or only onewordpress
Regards
SRVCENTOS
Yes, we can install more than one WordPress site on a single server using a subdomain, subfolder, or new Top level domain.