Learn the steps and commands to install Jenkins software on Ubuntu 22.04 LTS Jammy JellyFish or 20.04 Focal Fossa Linux.
Jenkins is a software common in the field of professional software development. When more than one developer is working on a software project, it becomes confusing when all of their changes are put together. To solve this Jenkins comes in to picture. Jenkins is a Continuous Integration System (CI system) programmed in Java, which is used in agile software development: It ensures that small code changes are always immediately tested and imported into the software. Jenkins was first known as Hudson but after some dispute, all developers involved in this (open source) project decided to rename it to Jenkins.
Hence, in a few words, Jenkins is an open-source project that helps software developers in development by automating various aspects of software app coding such as building, testing, and deploying…
Jenkins also supports Docker and Kubernetes such as technologies that run microservices. To run Jenkin 4GB of RAM and 50 GB of the hard disk would be good to go for small teams. In terms of software, it needs Java to run. While doing this article the supported version of Java was Java 8 and 11.
Steps to install Jenkins on Ubuntu 22.04 or 20.04
1. Update Ubuntu 22.04 or 20.04
The first step is to refresh the APT package repository and install any updates that are available for the system. For all this you just need to run the given command:
sudo apt update && sudo apt upgrade
2. Install OpenJDK
Although the user can go for Oracle Java, however, here we are opting for Open source Java supported by Oracle as well as its community. The default OpenJDK version available to install is Java 11.
sudo apt install default-jdk
3. Add Jenkins GPG key on Ubuntu 22.04 or 20.04
The packages to install are not available in the default repository of Ubuntu, hence to add its repository first add the GPG key used to sign its packages.
sudo mkdir -p /usr/share/keyrings
curl -fsSL https://pkg.jenkins.io/debian-stable/jenkins.io.key | sudo tee /usr/share/keyrings/jenkins-keyring.asc > /dev/null
4. Enable Jenkins repository on Bullseye
After adding the GPG key successfully, let’s integrate the Jenkins official repository using the command given below.
echo deb [signed-by=/usr/share/keyrings/jenkins-keyring.asc] \
https://pkg.jenkins.io/debian-stable binary/ | sudo tee /etc/apt/sources.list.d/jenkins.list > /dev/null
5. Run system update
Once more run the system update command using the APT package manager to refresh the cache and let the system know about the newly added repository.
sudo apt update
6. Install Jenkins on Ubuntu 22.04 | 20.04
Finally, we have configured everything we initially needed to set up Jenkins on our Linux operating system. Now, like other packages use the APT package manager to install it.
sudo apt install jenkins
7. Check the Service status
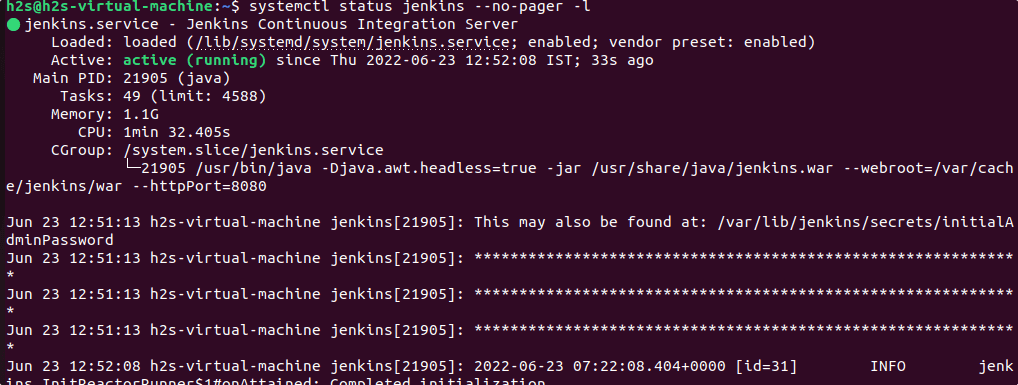
To confirm the Jenkins is working fine without throwing any error, check its service using the given command:
systemctl status jenkins --no-pager -l
If the service is not running or active, then you can use this one:
sudo systemctl enable --now jenkins
8. Find Jenkins Administrator password
By default, the setup will assign an Admin password to login to the Jenkins Dashboard for the initial setup, which of course will not require later once we create a new admin user. But initially, we need to find the same using the given command:
sudo cat /var/lib/jenkins/secrets/initialAdminPassword
Copy the string of numbers in the output.
9. Access Web Interface
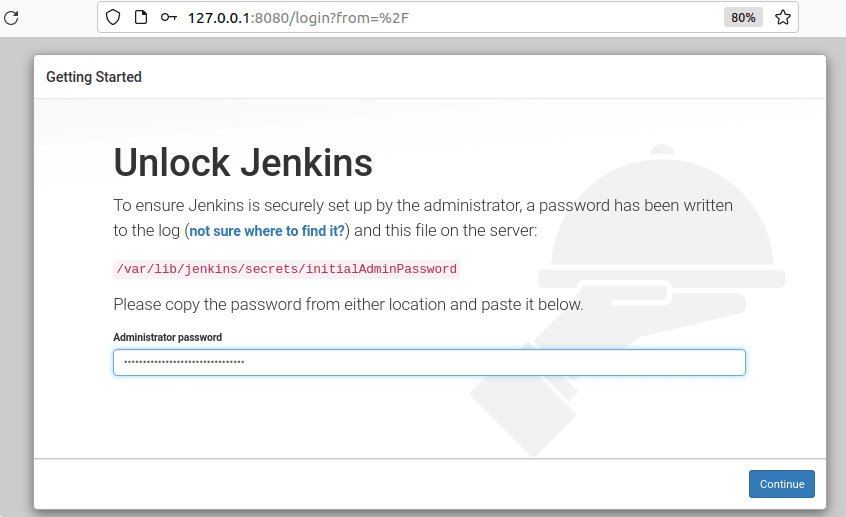
Open the browser of your local or remote system that can access the domain or IP address of the server where you have installed the Jenkins.
http://server-ip:8080
Note: Don’t forget to open port 8080 in the firewall, if you are on the remote server. In your terminal use:
sudo ufw allow 8080
Those who are on a Cloud hosting server, and need to whitelist the port in their service provider firewall.
On the Web interface, enter the password you got in the previous step to securely start the setup process.
10. Install Plugins
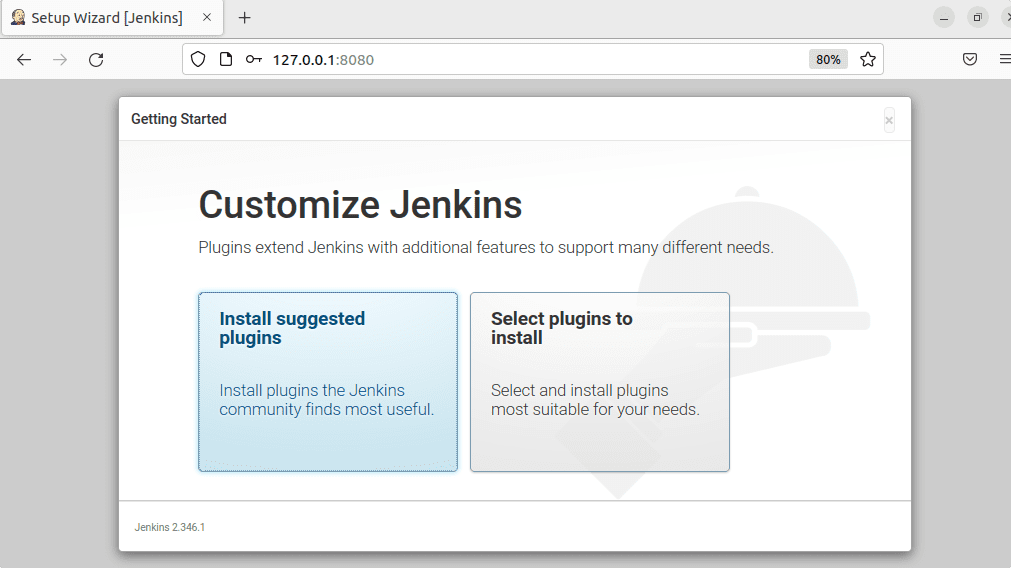
On the next screen, the setup will ask you to install plugins. You either can install all the suggested plugins or select only those you want.
11. Setup User for administration
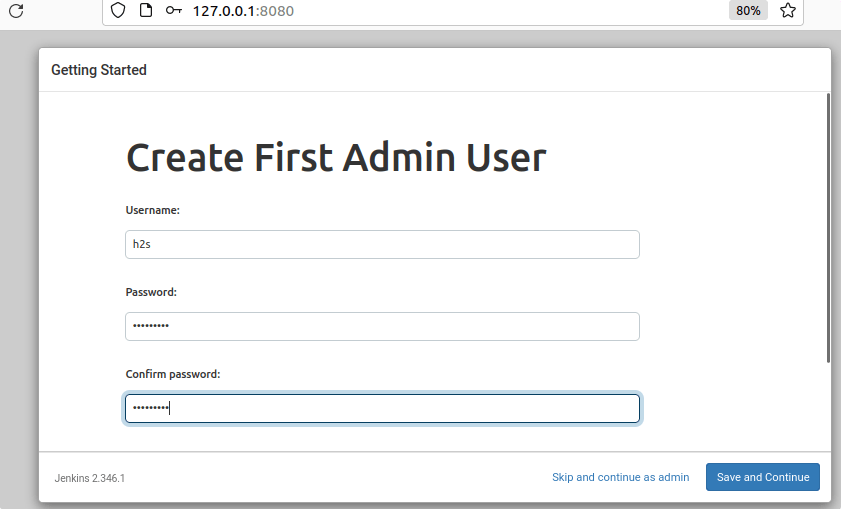
As you are done with the installation of the plugin, in the next step create your first admin user to log in and use Jenkins with in the future.
12. Jenkins Dashboard on Ubuntu 22.04
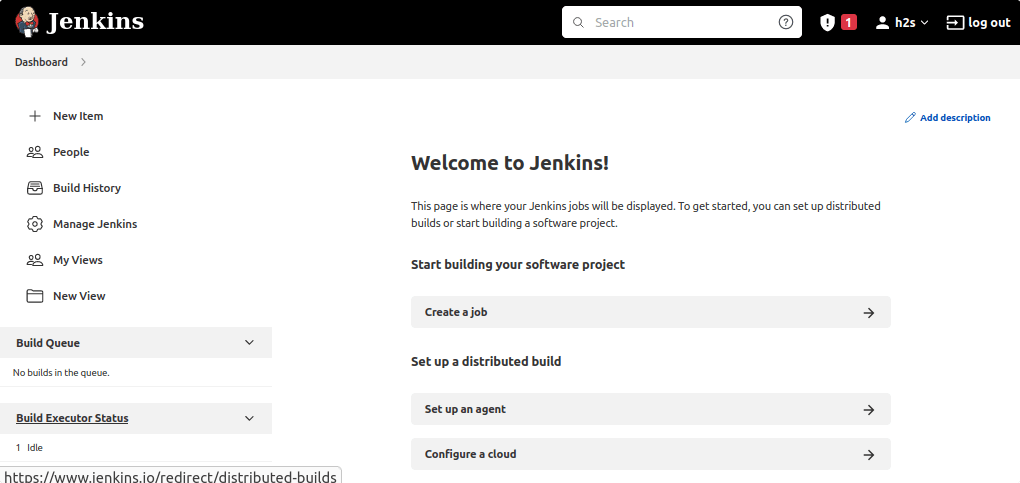
Finally, after following the other few steps you will have your Dashboard to start creating projects for testing and developing along with your developer’s Team.
There are two architectures in which Jenkins works. Controller-Agent architecture / controller-controller architecture
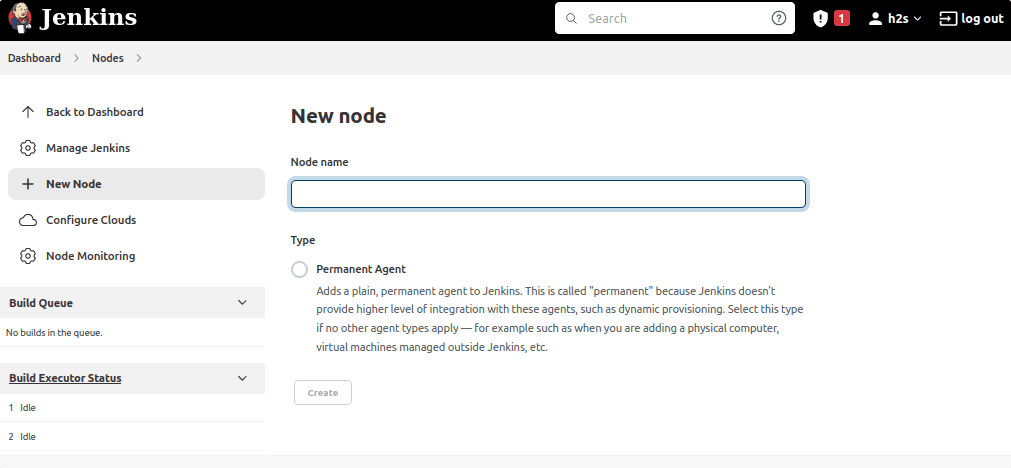
The agents can be set up on the “Nodes” page. Go there enter the nodes name, define the properties of the nodes, assign agents to the controller and then start the agent nodes. To know further, you can refer to its official documentation.
Other Articles:
How to install Oracle Java 8 64-bit Ubuntu 22.04 | 20.04 LTS
How to install Apache Tomcat 10 on Ubuntu 22.04
Increase Swap Space in Ubuntu 22.04…
How to install Opera Browser on Ubuntu 22.04 | 20.04
