File Transfer Protocol (FTP) is a widely used network protocol that operates over the TCP/IP network. It allows users to transfer files between server and client. Those dealing with a hosting server would already have used it for uploading websites or any other kind of files to a server or vice versa. Well, we can create our own FTP server by installing VSFTPD on Ubuntu 24.04 Linux; in this article, we learn how to do that.
What do we need to follow this tutorial?
- We should be on Ubuntu 24.04 LTS Noble but other versions of Ubuntu such as 22.04, 20.04, or 18.04 can also be used.
- A user with sudo rights
- Internet Connection
Step 1: Update Ubuntu 24.04 Packages
If you are using the Ubuntu 24.04 server then you already have Terminal access, however, desktop users can use the keyboard shortcut – Ctrl+Alt+T to open the terminal app. After that execute the system update command to apply the latest available security and package updates.
sudo apt update && sudo apt upgrade -yStep 2: Install vsftpd FTP server
We can easily have the FTP server feature on Ubuntu 24.04 by installing the popular “vsftpd (Very Secure FTP Daemon)“. It is available directly to install using the Ubuntu system’s default package repository, therefore just execute the given command in your terminal and you are done…
sudo apt install vsftpd -yStep 3: Add FTP user
You can use your existing user to access the FTP server, however, here we are adding a dedicated user for FTP on our Ubuntu system that will not have sudo access.
sudo adduser your-ftp-user
Note: Replace “your-ftp-user” with whatever name you want to give to your user.
Step 4: Create an FTP directory and adjust permissions
Create a directory inside the FTP user’s home directory where it will have write access. For example: Let’s say, we want to create a directory inside the FTP user’s home directory called “uploads” where we upload our files and the FTP user will have only read and write access to this directory.
Note: Replace “your-ftp-user” with whatever name you want to give to your user.
Creating a dedicated directory to upload files:
sudo mkdir -p /home/your-ftp-user/uploadsAdjust the permissions to prevent user writing entirely within the home directory while allowing full access within the “Uploads” directory.
sudo chown your-ftp-user:your-ftp-user /home/your-ftp-user/uploadssudo chmod 755 /home/your-ftp-user/uploadsSet Permissions on the Home Directory:
Modify the permissions of the home directory to prevent the FTP User from writing to it:
sudo chmod 555 /home/your-ftp-userStep 5: Configure Vsftpd FTP server
As we are done with the installation of the FTP server on Ubuntu 24.04, let’s configure it according to our requirements. Here we are setting the basic things required to have a working FTP server.
Edit the VSFTPD configuration file located at “/etc/vsftpd.conf“.
sudo nano /etc/vsftpd.confAfter opening the files, ensure the following are changed or they are as mentioned:
To allow local users to Log In:
In the file, find the line “local_enable=YES” and make sure it is uncommented.
local_enable=YESEnable Write Permissions:
Find the given line and ensure it is uncommented so that the local users can write on the server.
write_enable=YES
Allow Passive Mode:
Go to the end of the VSFTPD configuration file and add the following lines to configure passive mode settings. This will allow FTP clients to connect in environments with firewalls.
pasv_enable=YES
pasv_min_port=10000
pasv_max_port=10100
Restrict Home Directory Access
If you further want to restrict and drop the user on login only to the FTP directory for example – Uploads then add the given lines at the end of the file:
user_sub_token=$USER
local_root=/home/$USER/uploads
Enable Chroot Jail:
Now, if you want the user can only have access to its home directory not to the files outside its home then add the following line at the end of the file:
chroot_local_user=YESAlso add the following line otherwise while login the FTP server, you will see an error:
500 OOPS: vsftpd: refusing to run with writable root inside chroot()
allow_writeable_chroot=YES
Optional Settings:
Furthermore, we can also perform other settings as per the requirement, for example, if you want to enable anonymous login, set the banner message, and configure SSL for secure connections, all this can be done using the VSFTPD configuration file:
For example– to enable Anonymous user, means login to the FTP server without specifying any user. For that just edit the file and set the “anonymouse_enable=” value to YES.
Once you are done with the settings, save the file by pressing CTRL + X, then Y, and Enter.
Step 6: Allow FTP Traffic Through the Firewall
If the UFW firewall is active on your Ubuntu 24.04 then use the given command to allow them. Whereas, those who are using Ubuntu 24.04 on some cloud services need to open the given TCP ports in their service provider’s firewall.
sudo ufw allow 20/tcp
sudo ufw allow 21/tcp
sudo ufw allow 10000:10100/tcp
sudo ufw reload
Step 7: Restart Vsftpd Service
To apply the changes we have made to the VSFTPD configuration file, restart the FTP server:
Also, enable vsftpd to start automatically on boot:
sudo systemctl enable vsftpdsudo systemctl restart vsftpdStep 8: Connect and Access the FTP server
We can connect to our FTP server created on Ubuntu 24.04 either using the command terminal or GUI applications such as Filezilla or WinSCP. We show the both CLI and GUI methods to test your created FTP server.
Using Command terminal:
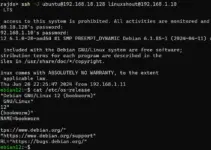
You can use the terminal of the same server where you have installed the VSFTPD, just type the given command syntax, and don’t forget to add your FTP server IP address.
ftp -p server-ip-addressTo exit, type – bye

Using GUI tools such as FileZilla:
Let’s now use the graphical FTP client such as the popular Filezilla, which is available to install for all popular operating systems including Linux. You can check our tutorial on – how to install the FileZilla client on Ubuntu 24.04 LTS Linux.
Once you have the FileZilla open, go to the Host – enter the server IP address, similarly type username, and password, and set port to 21 or 22 (Secure File Transfer Protocol (SFTP)) as per your wish. Then, click on the “QuickConnect” button.

Once the connection is established you will have the access to Uploads directory of the FTP user to upload or download the files.

Step 9: Enabling TLS encryption for the FTP server
To enable TLS (Transport Layer Security) encryption for your created FTP server so that our data transfer can be encrypted, edit the VSFTPD configuration file, however, before that let’s generate the SSL certificate using OpenSSL.
sudo openssl req -x509 -nodes -days 365 -newkey rsa:2048 -keyout /etc/ssl/private/vsftpd.pem -out /etc/ssl/private/vsftpd.pemEnter the details, the above command will ask to create the certificate.

Now, edit the VSFTPD configuration file. First find and comment on the following two lines by adding the ‘#’ in front of them:
# rsa_cert_file=/etc/ssl/certs/ssl-cert-snakeoil.pem
# rsa_private_key_file=/etc/ssl/private/ssl-cert-snakeoil.key
Now, add the following lines:
ssl_enable=YES
rsa_cert_file=/etc/ssl/private/vsftpd.pem
rsa_private_key_file=/etc/ssl/private/vsftpd.pem

allow_anon_ssl=NO
force_local_data_ssl=YES
force_local_logins_ssl=YES

ssl_tlsv1=YES
ssl_sslv2=NO
ssl_sslv3=NO

require_ssl_reuse=NO
ssl_ciphers=HIGH
Save the file by pressing Ctrl+O, hit the Enter key, and exit using Ctrl+X.

Now, restart the VSFTPD server:
sudo systemctl restart vsftpdStep 10: Connecting FTP server using TLS
Create a new connection, in this example, we will show how you can save the FTP connection on FileZilla as well. So, click on the “File” option and then “Site Manager”.

Click on the New Site and then enter the host i.e. IP address or FQDN of the FTP server, select Encryption type “Require explicit FTP over TLS“, User, and password. Finally press the OK button to establish the connection.

Accept the Certificate, when Filezilla prompt for that.

Conclusion
We have not only covered the way to install the FTP server using VSFTPD on Ubuntu 24.04. Using the steps of this tutorial, we not only covered the installation process for the FTP server but also the basic configuration to share files securely within your network or with remote users over TLS.
Other Articles: