A tutorial to learn the steps and commands to install FreeIPA on CentOS 8, AlmaLinux, or Rocky Linux 8 Server distros to get a centralized authentication, authorization, and account information system.
FreeIPA stands for Free Identity, Policy, Audit, and it is an open-source identity management solution based on an LDAP directory and Kerberos with optional components such as a DNS server, certification authority, and more. It can manage a domain with users, computers, policies, and trust relationships. Doesn’t it sound like Microsoft Active Directory? Yes, it is exactly what it is all about. FreeIPA can also set up a forest-to-forest trust with existing Active Directory forests and even live in a DNS zone below a zone managed by Active Directory, as long as they do not overlap. It consists of a web interface and command-line administration tools.
Requirements:
- The hostname must be fully qualified and can be resolved. Here we are using a subdomain i.e. demo.how2shout.com
- At least 1GB of RAM and 10GB of free disk
Steps to install FreeIPA on AlmaLinux or Rocky Linux 8
The commands below can also be used on CentOS 8, Oracle Linux, VzLinux, and other RPM-based operating systems.
1. Set hostname in AlmaLinux or Rocky
To access and use FreeIPA properly, we need a fully qualified domain name, so we must set the FQDN hostname we want to use. For example, we are using demo.how2shout.com, which can be resolved using our DNS server. However, if you don’t have a DNS server, we need to manually add entries in the Alma Linux server’s host file to resolve the system IP address for our fully qualified hostname.
sudo hostnamectl set-hostname demo.example.com
Replace demo.example.com with the one you want to set for your server’s hostname.
The domain used for the hostname must resolve the IP address to reach the server. Next, point your server IP address to the hostname, i.e., a fully qualified Domain name, in the Host file.
echo "192.168.0.110 demo.example.com demo" | sudo tee -a /etc/hosts
Replace– 192.168.0.110 with your server IP address and demo.example.com with your FQDN hostname.
Note: If you want to test FreeIPA locally, using reserved TLDs such as .local is recommended. .test or even .home can be used; for example, a demo.IPA.local
Once done, confirm that the system can ping the host.
ping -c 2 demo.example.com
Now, reboot:
sudo reboot
2. Run system update
Before moving further, let’s run the system update command once to ensure all the system packages are current. This will also rebuild the system’s repo cache.
sudo dnf update
3. Enable the Red Hat Enterprise Linux Identity Management system module
FreeIPA Server and client packages are available through the default App stream repository; however, to get them, we need to enable the IDM—Identity Management system module on the AlmaLinux or Rocky Linux we use.
sudo dnf install @idm:DL1

4. Install FreeIPA on AlmaLinux or Rocky Linux 8
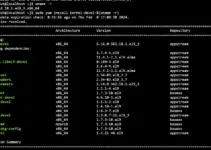
Once the IDM module has been enabled on your server system, it’s time to install all the required packages for FreeIPA on our system.
sudo dnf install ipa-server
If you want to install the FreeIPA DNS server as well, then also run the following command as well:
sudo dnf install ipa-server-dns bind-dyndb-ldap
5. Set up the FreeIPA Server
So far, we have downloaded and installed all the key things required to set up the FreeIPA server on AlmaLinux or Rocky, so let’s start with it.
sudo ipa-server-install
The above command will start the text-based wizard. It will ask you some common questions. The initial ones will be about the integration of BIND DNS. By default, it will be set to ‘NO’. Thus, press the Enter key to continue without it. However, to set a BIND DNS on your Alma or Rocky to resolve domain names, type’ yes‘ and hit Enter.
After that, the script will automatically detect the server hostname and the domain you have set for the hostname.
Thus, press the Enter key for both options.

After setting up the above entries, the setup will ask you to set up a directory manager password and IPA admin password for the web interface. Next, it will ask you to configure the NTP server with chronic. Accept the default (no) or type yes as per your choice.
Remember, when it asks you to continue configuring the system with these values, type yes and hit Enter.
6. Configure Linux Firewalld
If you are using your server on some cloud service, then use its firewall to whitelist the following ports:
You must make sure these network ports are open:
TCP Ports:
80, 443: HTTP/HTTPS
389, 636: LDAP/LDAPS
88, 464: Kerberos
UDP Ports:
88, 464: Kerberos
123: NTP
Whereas, if you are using Firewalld in your server system, then run the following two commands:
sudo firewall-cmd --add-service={http,https,dns,ntp,freeipa-ldap,freeipa-ldaps} --permanent
sudo firewall-cmd --reload
7. Access FreeIPA GUI Web Interface
Once the installation is completed by the script, open your system browser and point it to the FQDN hostname you set for the system in the beginning, e.g https://demo.example.com Or even if you type https://your-server-ip This will automatically redirect it to the FQDN.

8. Login
The default username for logging into FreeIPA is admin, and the password is the same one you set for it while installing the FreeIPA server in Step 5 of this article.

FreeIPA Command-line
Those who don’t want to use the FreeIPA web GUI interface can use the command line to perform various operations, such as creating users, testing SSH logins for users, and more.
To start using CLI, type-
sudo kinit admin
First, enter the system user password, then enter the one you set for FreeIPA during installation.
Once you log in, you can start using the ipa commands. To get all the details on this command, see the man page:
man ipa
For example, to create a user-
sudo ipa user-add testuser --first=Test --last=User --email=testuser@example.com --password
Once the user-added, you can authenticate it with:
You can now authenticate as a new user with
kinit <user>
To list user accounts
sudo ipa user-find
To log in with the created user:
ssh test@localhost
For more information, see the official documentation.
FreeIPA Uninstallation from AlmaLinux or rocky
If you are having trouble with the open-source identity management system or no longer need it, use the below command to remove FreeIPA from CentOS, AlmaLinux, Rocky, or any similar Linux system you are using.
sudo ipa-server-install --uninstall
Other articles:
- Install Dig on AlmaLinux 8 / Rocky Linux
- How to change the Computer name in Ubuntu 20.04 Linux
- How to install Pi-hole on Docker – Network-wide Ad Blocking