Have a look at the quick steps given in the tutorial to install Cacti on Debian 11 Bullseye server for monitoring network devices.
Cacti is an open-source tool for monitoring hosts in larger networks using SNMP (Simple Network Management Protocol). It comes with numerous ready-made scripts and data templates. Cacti is just as suitable for a server running under Linux that queries the remotely maintainable network switch as it is for recording and visualizing any other measurement data that occurs on a regular basis. It offers itself as a framework that can be easily configured via a browser. Cacti uses the MySQL database to save its settings and the Apache webserver for interactive configuration and display of the graphics.
Cacti manage templates for graphics, hosts, and data sources that can be created using a browser. You save a lot of work if the same values have to be monitored on several hosts. The visualization tool comes with ready-made templates for many systems (Linux/Unix computers, various router models).
Steps to Install Cacti Server on Debian 11 Bullseye
1. Requirements
To perform this tutorial, we need the following things:
• Debian Server
• RRDTool
• MySQL, PHP
• Web Server that supports PHP e.g. Apache, Nginx, or IIS
• A non-root user with sudo rights
• Internet Connection
2. Update your Debian 11 Server
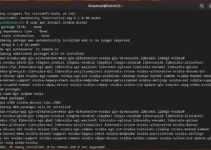
Before moving further in this tutorial let’s first update our Debian 11 server to make sure all the packages available on it are up to date. This will also regenerate the APT package manager’s cache.
sudo apt update && sudo apt upgrade
3. Install Apache for Cacti
To access the web interface of the Cacti monitoring server, we must have a web server installed on our Debian 11. Here we are choosing popular open-source Apache.
sudo apt install apache2
Start and enable Apache Web server:
sudo systemctl enable --now apache2
4. Install PHP and MariaDB
To store data we are using MySQL/MariaDB, whereas Cacti web UI is PHP based, hence we need this programming language installed on our system along with some extensions required by the Cacti to work properly…
First, set up PHP:
sudo apt install php php-{mysql,curl,net-socket,gd,intl,pear,imap,memcache,pspell,tidy,xmlrpc,snmp,mbstring,gmp,json,xml,common,ldap}
sudo apt install libapache2-mod-php
Configure PHP memory and execution time:
Edit the php.ini file:
sudo nano /etc/php/*/apache2/php.ini
Press Ctrl+W and type- memory_limit
And change its value from 128 to 512M
memory_limit = 512M
In the same way, search for max_execution_time and change its value from 30 to 300.
max_execution_time = 300
Find: date.timezone and set the PHP time zone according to your country. If you don’t know about your country’s time zone format you can visit the PHP Timezones page to find out.
date.timezone = Asia/Kolkata
Save the file by pressing Ctrl+O after that hit the Enter key and use Ctrl+X to exit.
Now, also edit the PHP CLI php.ini file and set the time zone there as well.
sudo nano /etc/php/*/cli/php.ini
Fins and Set time zone again:
date.timezone = Asia/Kolkata
Save the file by pressing Ctrl+O after that hit the Enter key and use Ctrl+X to exit.
Install MariaDB
Once the PHP is on our system, let’s install MySQL fork MariaDB Server available on Debian 11 Bullseye via its official repository using the APT package manager.
sudo apt install mariadb-server -y
Start and enable the Database server:
sudo systemctl enable --now mariadb
To check its status:
sudo systemctl status mariadb
Create MariaDB Database for Cacti
sudo mysql -u root -p
CREATE DATABASE cacti DEFAULT CHARACTER SET utf8 COLLATE utf8_unicode_ci ;
GRANT ALL PRIVILEGES ON cacti.* TO 'cacti_user'@'localhost' IDENTIFIED BY 'strongpassword';
GRANT SELECT ON mysql.time_zone_name TO cacti_user@localhost;
ALTER DATABASE cacti CHARACTER SET utf8mb4 COLLATE utf8mb4_unicode_ci;
FLUSH PRIVILEGES;
EXIT;
5. Configure MariaDB for Cacti:
sudo nano /etc/mysql/mariadb.conf.d/50-server.cnf
Copy and Add the following given line under– [mariadb]
innodb_file_format=Barracuda
innodb_large_prefix=1
collation-server=utf8mb4_unicode_ci
character-set-server=utf8mb4
innodb_doublewrite=OFF
max_heap_table_size=128M
tmp_table_size=128M
join_buffer_size=128M
innodb_buffer_pool_size=1G
innodb_flush_log_at_timeout=3
innodb_read_io_threads=32
innodb_write_io_threads=16
innodb_io_capacity=5000
innodb_io_capacity_max=10000
innodb_buffer_pool_instances=9
Also, add # tag in front of these two lines available in the same file to make them unreadable:
#character-set-server = utf8mb4
#collation-server = utf8mb4_general_ci
Save the file: Ctrl+O, hit the Enter Key, and then Ctrl+X to exit.

Now, set the timezone in MySQL
sudo mysql_tzinfo_to_sql /usr/share/zoneinfo | mysql -u root -p mysql
6. Install SNMP and other tools for Cacti
We need some key tools for the proper working of Cacti monitoring systems such as SNMP and rrdtool. Therefore, in this step, we will install them.
sudo apt install snmp snmpd rrdtool
7. Configure Cacti Software on Debian 11
Although Cacti can be installed using the APT package manager and Bullseye official repository, however, the version available through it will not be the latest one.
Therefore, clone the latest one available on Github:
sudo apt install git
git clone -b 1.2.x https://github.com/Cacti/cacti.git
Move the cloned Cacti files to your Web directory:
sudo mv cacti /var/www/html
Use the Cacti SQL configuration file to pre-populate the database created for it.
sudo mysql -u root cacti < /var/www/html/cacti/cacti.sql
Create PHP configuration file for Cacti:
Well, the Configuration file is already present inside the copied Cacti folder, we just rename it.
cd /var/www/html/cacti/include
cp config.php.dist config.php
Now, edit the config.php and add the Database details you have created for Cacti.
sudo nano config.php
Change the Database values – Database name, username, and password.
Save the file Ctrl+O, hit the Enter key, and exit: Ctrl+x.
Give Apache user permission to access the Cacti folder in the Web root directory.
sudo chown -R www-data:www-data /var/www/html/cacti
8. Create Cacti Systemd service
To run the Cacti poller service in the background, create a Cacti system service using the given commands.
sudo nano /etc/systemd/system/cactid.service
Add the following lines:
[Unit]
Description=Cacti Daemon Main Poller Service
After=network.target

[Service]
Type=forking
User=www-data
Group=www-data
EnvironmentFile=/etc/default/cactid
ExecStart=/var/www/html/cacti/cactid.php
Restart=always
RestartSec=5s

[Install]
WantedBy=multi-user.target
Save the file Ctrl+O, press Enter key, and then exit Ctrl+X.
Create an environment file:
sudo touch /etc/default/cactid
Start and enable Cacti Service
sudo systemctl daemon-reload
sudo systemctl enable cactid
sudo systemctl restart cactid

Also restart Mariadb and Apache services:
sudo systemctl restart apache2 mariadb
9. Login Cacti monitoring on Debian 11
Once the installation is completed, go to your system browser and then enter the IP address of your server where you have installed the Cacti Monitoring software.
Point your browser to:
http://your-server-IP-address/cacti/
Login Cacti with default username – admin and password – admin.

10. Start Cacti web installation
In the first step, the installation wizard will check that all the required things for Cacti working are in place. If any of the requirements are not met the same will reflect on your screen. And we have to fulfill the same then only we will be able to move forward.

In the next step, the system will ensure all the necessary permissions required by Cacti to access files are set.

By default let the “New Primary Server” be selected because it is an initial server that is going to monitor other devices.


Finally, you will have the Cacti Dashboard installed on your Debian 11 Bullseye


Ending Notes:
This was the quick tutorial to set up Cacti Monitoring Service on Debian 11 Bullseye, for more information on this tool and how to use it, refer to the official documentation.
Other Articles:
• 4 Ways to Check MySQL or MariaDB version on Linux
• 3 Ways to Install DBeaver on Debian 11
• 2 ways to install XFCE Desktop on Debian 11 Bullseye
• How to Install and use Rust on Debian 11 Linux
• How to install Prometheus in Debian 11

And the cron.d poller string ?
And spine?
I run into a problem setting the timezone for mysql as the system was requesting a password for ‘root’
I was able to fix it by setting a new root password using the following:
sudo mysql
ALTER USER ‘root’@’localhost’ IDENTIFIED VIA mysql_native_password USING PASSWORD(‘root’);
EXIT;