Let’s learn the steps to install the Ubuntu-Make tool to quickly download and set up standard tools that developers need to work on Ubuntu Linux.
Ubuntu-Make is a tool that is listed on the official website of Ubuntu Linux. The key purpose of it is to let developers install the popular IDEs and other developing tools without leaving the command terminal such as PyCharm. Because these tools are not available to download and set up using the default APT package manager of Ubuntu.
This command line not only installs the tool but also all the required dependencies, of course, root or sudo access is required.
Further to help the developers easily install the tools required by their project, the developers of Ubuntu-Make have listed them in categories, for example- Android (java and native) development to games, frontend web (javascript and dart), backend (go and dart), and various IDE (python, C++ java…).
Steps to install and use Ubuntu-Make on Linux
There are two ways to install the Ubuntu-Make tool on Ubuntu Linux one is using the SNAP and the other with the help of PPA. Yes, these are the two simple ways to get it because it is not available to install using the APT package manager.
#Using Snap command
1. Perform a system update
Before running the Snap let’s first update our system to ensure it is in its latest state and all the security updates are on our Ubuntu.
sudo apt update && sudo apt upgrade
2. Install Ubuntu-make using SNAP
Well, as we have apprised already, we cannot find the package to install this tool using the standard package manager, however, it is possible with SNAP. It is a default universal package manager on all the latest Ubuntu operating systems. Hence, run the given command:
sudo snap install ubuntu-make --classic
#Install using the PPA repository
3. Add PPA repository
Those who don’t want to use the Snap can go for the PPA repository. In this way, we can install the Ubuntu-make using the system’s default APT package manager.
sudo add-apt-repository ppa:lyzardking/ubuntu-make
Run the system update command:
sudo apt update
4. Install Ubuntu-Make via APT
Use the APT to install this command line tool that help the developers.
sudo apt install ubuntu-make
5. Use the Ubuntu-Make
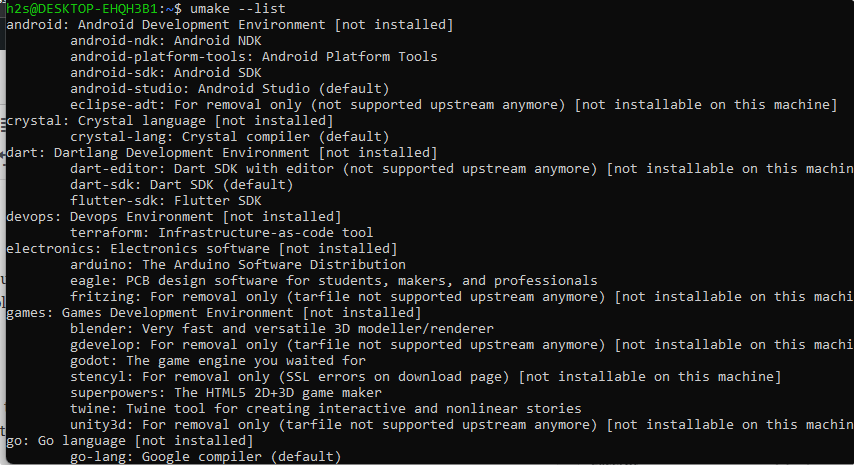
If you know the name of the package that you want to install using the Umake command then you are good to go. Otherwise, we can list the tools available to install for developers…
Umake has three listing options:
–list: to show all the tools
–list-available: to show the available tools
–list-installed: to show the installed tools

6. How to install the Install developers tool
Now, if we want to use the Ubuntu-Make to install any developing framework using its command line tool called umake, here is the syntax.
For example, we want to install Android Studio and other its dependencies. Here is the command to follow:
umake package-name
umake android
7. Uninstall developer tools
Later if you want to uninstall or remove any tool installed using umake command, then here is the syntax to follow:
umake -r package-name
for example:
umake -r android
To Remove Ubuntu Make
Well, after some time you may not want Ubuntu Make anymore on your system, then removing it is also very straightforward.
For Snap users:
sudo snap remove ubuntu-make
For APT users:
sudo apt autoremove --purge ubuntu-make
To remove PPA as well:
sudo add-apt-repository --remove ppa:lyzardking/ubuntu-make
Other Articles:
⇒ Command to install Vmware tools on Ubuntu using terminal
⇒ 4 Best Linux Distros for Android Studio Developers
⇒ How to install Supertuxkart Game on Ubuntu
⇒ How to Use Google cloud pricing calculator
⇒ Install Miniconda on Ubuntu 22.04 LTS Jammy Linux


