NoMachine on Linux (Ubuntu) and other supported operating systems is a remote desktop application that allows users to control computers using local or remote systems from anywhere in the world. It can work on low-bandwidth connections and is used by professionals and home users.
Key Features of NoMachine
- High-Performance Remote Access
- Cross-Platform Compatibility
- Easy to Use because of the user-friendly interface
- Offers robust encryption protocols such as SSH, SSL, and other security standards.
- Supports remote File Transfer and Printing services
- Allows audio and video streaming from the remote computer.
- It supports multiple users’ connections to a single computer
- Offers various configuration and customization options.
Common Use Cases
- Remote Work and Telecommuting
- System Administration
- Education and Training
- Technical Support
To follow this tutorial, we need:
- Ubuntu 24.04, 22.04, or newer
- Root or a user with sudo access
- Internet connection
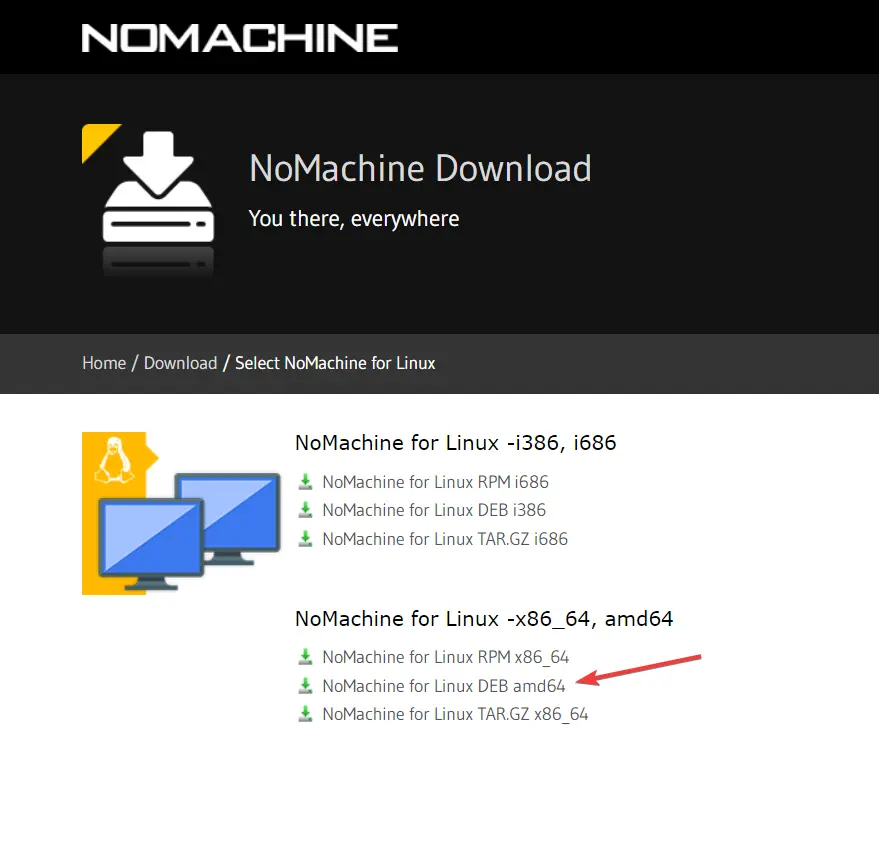
Step 1: Download NoMachine for Ubuntu
Like any proprietary software, NoMachines cannot be installed using the default system repository of Ubuntu 24.04 or any other version. Therefore, visit the official website of NoMachine and download the 64-bit or 32-bit Debian version of this remote software for Linux.
Step 2: Install NoMachine on Ubuntu 24.04
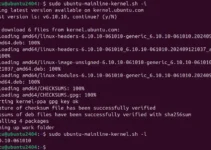
Once you have the Debian package of the NoMachine on your Ubuntu system, go to your command terminal and first switch to the directory where you saved it; generally, it will be “Downloads.”
cd DownloadsAfter switching the directory, first ensure the downloaded file is there by using:
ls Now, execute the given DPKG command to install the downloaded NoMachine Debian package
sudo dpkg -i nomachine_*_amd64.debIf you encounter any dependency issues, resolve them by running:
sudo apt install -fStep 3: Start NoMachine Service
Although the service of NoMachine starts automatically after completing the installation, to confirm, we can use the given command to check its service status:
sudo systemctl status nxserver -no-pager -l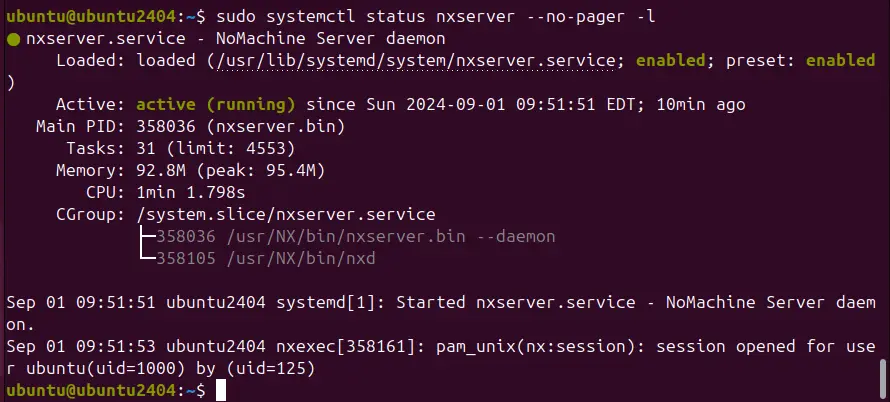
If the service is not running, you can start it with:
sudo systemctl start nxserverStep 4: Access Remote Machine with NoMachine
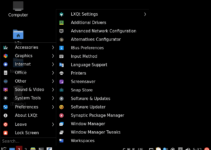
To access the remote machine, first, open the NoMachine app on your Ubuntu system either from the applications menu or type the following command in the terminal:
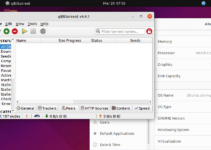
/usr/NX/bin/nxplayerWhen we run NoMachine the first time, it will guide us through the setup process. You will have two instances of NoMachine: one Client and the other Server.
Note: The server part must be active on the remote machine if we want to connect to it. On the other hand, the local machine we use to connect to the remote machine must use the Client app.
So, on your Ubuntu, open the NoMachine client app, and it will automatically detect the machines running the Nomachine service (server) if they are on the same network. If your remote machine is not on the same network, enter the IP address given on the NoMachine server (installed on the remote system) in the client to connect.
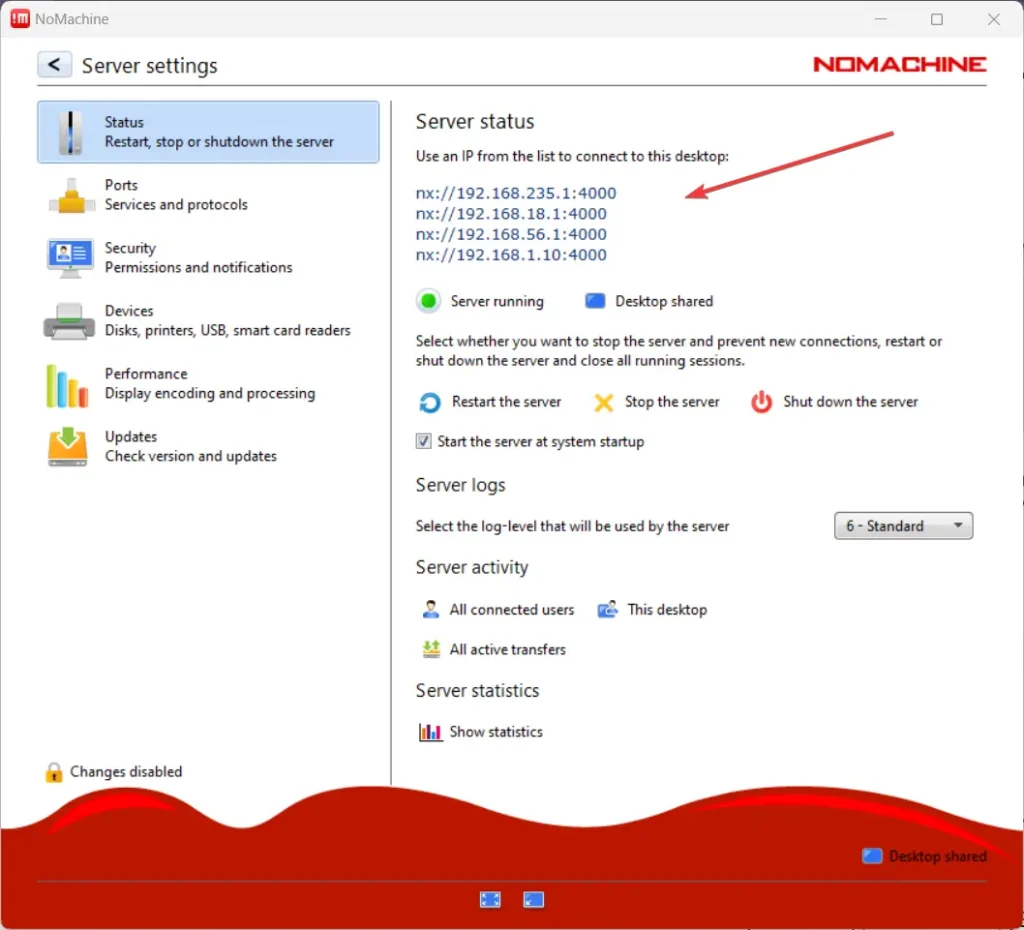
For example, we want to connect our remote Windows 11 machine using Ubuntu 24.04. First, we open the NoMachine Service app on Windows to check that the server is active and to note the IP address.
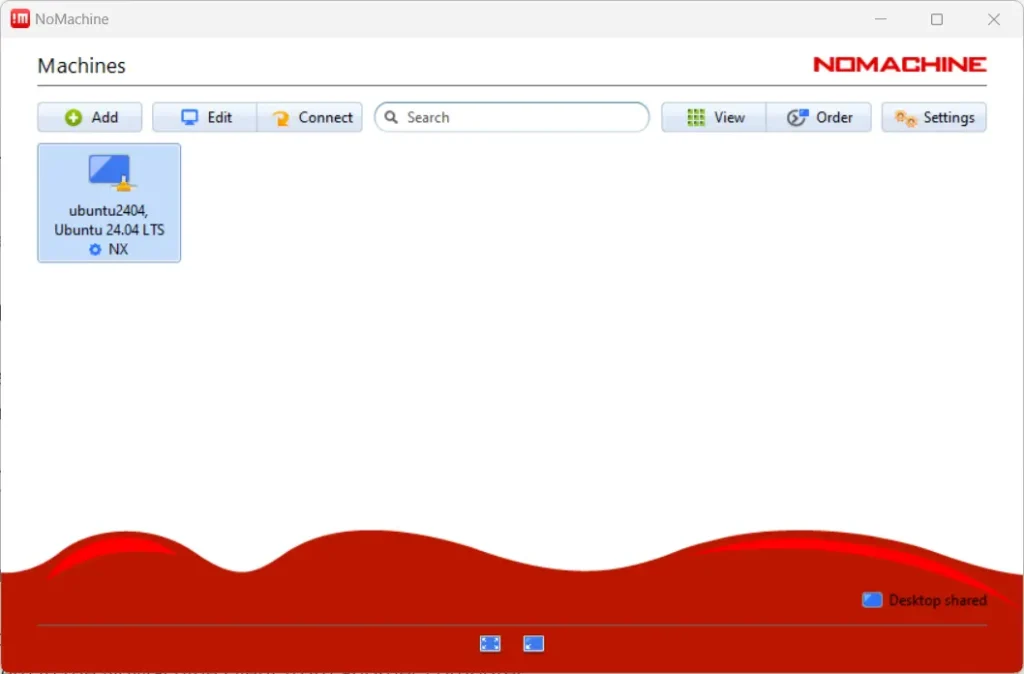
After confirming the remote machine server IP address and its status, let’s go to our Ubuntu system, from where we will connect it. On Linux, open the NoMachine app. It will automatically detect the system available on the same network, while other network machines’ addresses need to be added or searched manually to connect.
Step 5: Configure NoMachine
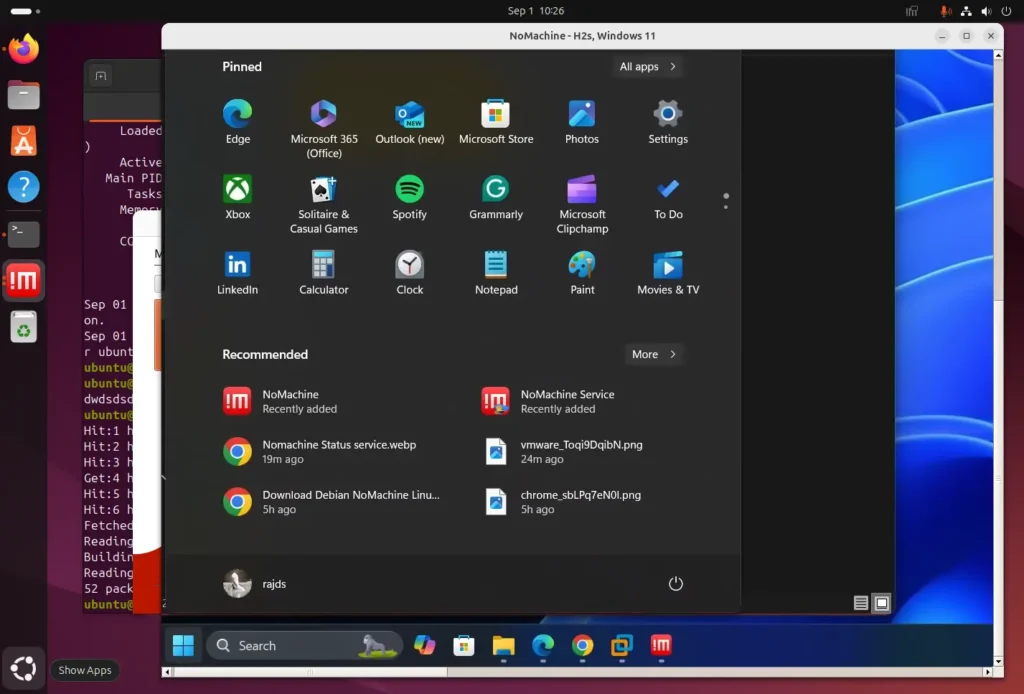
Click the “Connect” button to establish the remote connection. After that, enter the Username and password. Leave the other settings default or configure them according to your requirements, such as remote PC Display resolution.
You can also adjust security settings, display quality, and configurations via the NoMachine settings interface.
Step 6: Uninstall NoMachine (Optional)
In case you don’t require the NoMachine on your Ubuntu 24.04 anymore and want to uninstall it completely, then here is the command to follow:
sudo apt autoremove --purge nomachineConclusion
NoMachine is a relatively easy-to-use tool for establishing remote desktop connections across different operating systems. It is a free app, so it is a good option for individuals and professionals. Although the installation of this tool is easy, you may see some lagging issues while accessing the remote system.
Other Articles:
- How to install Schwab Thinkorswim on Ubuntu 24.04 or 20.04 LTS Linux
- Install AnyDesk on Ubuntu 24.04 or 22.04 LTS via Command terminal
- How to Install Webmin Control Panel on Ubuntu 24.04 Linux
- How to use Remote Desktop from Kali to access Windows 10 or 11
- Ubuntu 24.04/ 22.04 Remote Desktop Access from Windows 11 or 10