Rocky Linux is one of the latest alternatives available to replace the CentOS 8 operating system from Servers. The project started by the CentOS founder to provide a free and open-source solution equal to RHEL with long-term support.
If you are an existing user of CentOS 8 then you can use the Rocky Linux conversion or migration script. Well, if you are not yet prepared for it then try out Rocky Linux on Vmware Virtual machine whereas the user of Virtualbox can see our other guide- Download Rocky Linux 8 ISO to install on Virtualbox.
Rocky Linux Installation on Vmware Workstation Player
1. Download Rocky ISO file
The first thing we require to experience this Linux operating system is its ISO image (DVD for full fledge OS with GUI and Minimal for CLI interface OS). Get the one from its official website. After that move to the next step.
2. Install VMware Workstation Player
Vmware Player is free for personal usage and available for both Windows and Linux operating systems. Although if you are following this tutorial you already have it on your system, however, if not then first install the same. The Linux users can follow- Install VMware Workstation Player on Ubuntu, Linux Mint, pop OS or Debian, or Run VMware Player on Fedora, CentOS, or Redhat.
3. Create Virtual Machine on Vmware for Rocky Linux 8
Now, run the Vmware player, click on the “Create a New Virtual Machine” option.

4. Insert Rocky Linux ISO file
On the next interface of the VMware, click on the Browse button and select the downloaded Rocky Linux ISO file. After that hit the Next button.


5. Select Guest operating system type and version
Now, let the VMware player know what kind of virtual machine operating system you are planning to install. Select Linux and then “Other Linux 4.x kernel 64-bit“.

6. Name the Virtual machine
Give some name to the VM, it could be anything you want, here we are using “Rocky Linux” as our VM’s identification name.

7. Specify Disk Capacity
As per your requirement, you can increase or decrease the Maximum disk space allocation. Here for standard use of full DVD-based Rocky Linux, we are assigning 40GB.

8. Customize hardware to set RAM (memory)
Well, by default the memory assigned to VM would be around 700MB which is less for a full-fledged GUI Linux operating system. Thus, to increase that click on the “Customize Hardware” button.

Select the Memory option from the left side panel and then on the right side use the Slider bar to increase the RAM up to 4GB. The users who are using the CLI version of Rocky Linux can assign 1GB or more. Then Close it.

Finally, click on the ‘Finish‘ button.

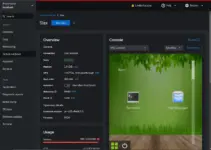
9. Start Virtual machine
Now, the created VM will appear on the left panel under the “Home” of the Vmware player. Select it and click the link given on the right-side panel “Play Virtual machine“.

10. Select Langauge for Rocky Linux 8 Installation
To get the installation wizard in your own language select the one from the given and continue.

11. Installation Destination
Click on the “Installation Destination” option and select the Virtual Disk you have created to install Rocky Linux.


12. Network & Host
To enable an internet connection or network communication for your Linux, select the Network option and then enable the toggle button.


13. Set Root Password and create a new user
In this step, first, select the Root Password option from the Installation Summary window and set the password you want to assign for your Rocky Linux root user.

After that select “User Creation“, type the username and password you want to assign to your non-root user.


Finally, click on the “Begin installation” button to start the Rocky Linux installation process on Vmware player virtual machine.

14. Install Open Vmware Tools on Rocky Linux VM
Vmware Tools allow the Virtual machine to adapt the current display resolution of the VM window size. Also, this allows Clipboard and drag & drop-like features. So, once the installation of your Virtual machine is done, reboot it. After that click on the Application launcher and open the Command terminal.
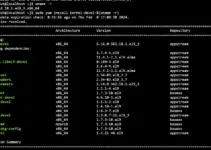
There run the following command:
su
dnf install open-vm-tools-desktop

In this way, we can configure Rocky Linux on the Vmware Player workstation Virtual machine. If you are facing any problem, let’s know, the comment section is all yours.


Clear outline.
One small mistake:
In chapter 14 you write “Install Vmware Tools on Rocky Linux VM”
You are confusing VMWare tools and open-vm-tools.
From the website of VWMARE:
Open VM Tools (open-vm-tools) is the open source implementation of VMware Tools for Linux guest operating systems.
The open-vm-tools-desktop package is optional and includes additional user programs and libraries to improve the interactive functionality of desktop operations of your virtual machines. The package enables you to resize a guest display to match its host console window or the VMware Remote Console Window for vSphere. The package also allows you to copy and paste between host and guest OSs, as well as to drag and drop between guests and a host for the VMware Workstation and VMware Fusion products.
(https://docs.vmware.com/en/VMware-Tools/11.3.0/com.vmware.vsphere.vmwaretools.doc/GUID-8B6EA5B7-453B-48AA-92E5-DB7F061341D1.html)
Thanks anyway 😉