TeamViewer is already quite a familiar software for connecting remote systems and interacting with them like they are some local computers. Although the installation of it on Windows or MacOS would not require any kind of assistance, however, for Linux, new users might be. Therefore, here we are with a detailed tutorial to learn how to install TeamViewer on Ubuntu 24.04 LTS Linux.
What is TeamViewer?
TeamViewer is an application that is available to use free of cost for connecting remote systems and using them remotely via the graphical user interface. Apart from desktop sharing, users can also use it for VoIP, video, chat during remote sessions, remote printing, file transfer, and more. However, the free version of Teamviewer is limited in terms of features, so to get more than just mere desktop sharing, users need to purchase its paid license. It is a cross-platform software that is available for Windows, macOS, and Linux, including mobile operating systems such as Android and iOS.
To follow this tutorial, you must be on Ubuntu 22.04 or any previous version such as 22.04, 20.04, or 18.04. Along with that, a user with sudo access to the system and ofcourse an active internet connection.
Step 1. Update the Ubuntu 24.04 Package list
Go to your Ubuntu command terminal, you can open it from the Applications menu or by pressing the keyboard shortcut keys – Ctrl+Alt+T. After that run the system update command to refresh the Ubuntu APT package list.
sudo apt update && sudo apt upgradeStep 2: Download the TeamViewer Deb package
TeamViewer is not an open-source software not available to install using the default system repository of Ubuntu 24.04 or any other Linux distro. Therefore, in this step, with the help command line, we will download the TeamViewer *.Deb package that is meant for Ubuntu and other Debian-based systems.
wget https://download.teamviewer.com/download/linux/teamviewer_amd64.debStep 3: Installing TeamViewer on Ubuntu 24.04
After following the previous step you will have the Debian package of TeamViewer, now let’s use the DPKG command line tool to install it.
sudo dpkg -i teamviewer_amd64.debIf you get any dependency issue such as “dpkg: dependency problems prevent configuration of teamviewer: teamviewer depends on libminizip1; however: Package libminizip1 is not installed.” then fix it by running:
sudo apt --fix-broken install After that again run the installation command – sudo dpkg -i teamviewer_amd64.deb
Step 4: Check the version
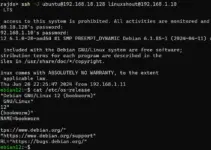
To check the version of TeamViewer you have installed and also confirm it is configured on our Ubuntu 24.04 correctly, use the given command:
teamviewer --versionThis command should display the installed version of TeamViewer, confirming that the installation was successful.
Step 5: Run TeamViewer
We can use the command terminal to launch the TeamViewer by just typing its name as shown below:
teamviewer &Alternatively, we can also use the graphical user interface of Ubuntu to launch it. Go to the Applications menu and search for TeamViewer and as its icon appears click to run this remote desktop app. After launching, the software will ask you to accept the End User License Agreement (EULA). Follow the on-screen instructions to complete the initial setup.

Step 8: Test the TeamViewer Connection
To connect any remote system and access its desktop that system must have Teamviewer already installed. Get the TeamViewer ID and password from the remote system and enter the same in your TeamViewer installed Ubuntu 24.04, you will have remote desktop access. You can also connect to your Ubuntu system from another device by entering its TeamViewer’s ‘Your ID‘ and password.

Other Articles: