With the new version of VirtualBox, we can install Ubuntu Linux VM or other OS unattended. Just configure the virtual machine and the rest of all settings will be done by the VirutaBox.
Keep monitoring the computer screen while the installation of the operating system is going on can be a time-wasting task for users, especially the one who have lots of things to do.
However, earlier we don’t have a readily available VirtualBox Unattended option instead we had to wait for the Ubuntu installation wizard to display the settings such as Keyboard, user name, etc. so that we would be able to configure them as per our requirements. But this also reduces the productivity of a person. To make things automated, the latest version of VirtualBox offers an option known as Unattended Installation. Let’s see how it works.
What is Unattended Installation?
Unattended installation as its name suggests is a way of installing an operating system in which the user pre-defines the settings and other configurations. This omits the user’s need to manually configure each step of the installation process.
Instead, all necessary pre-defined settings and configurations are automated by an external script or program. Therefore, the user can leave the system and doesn’t need to be set in front of it during the setup process.
Unattended installations are very useful when the same configuration OS needs to install on multiple machines but quickly or for setting up a new machine without having to manually answer the same questions over and over again.
Ubuntu unattended Installation in VirtualBox
1. Prerequisites
The user must have the latest VirtualBox version with an Ubuntu ISO image to perform the steps given in this tutorial. Nevertheless, even if you don’t have these two things, in this article we also let you know how to get them.
2. Installing VirtualBox
Well, it doesn’t matter if you are using Windows, macOS, or Linux, the steps to install any Guest VM will be the same for all of them. However, the installation of VirtualBox itself can be different. Simply visit the official website and download VirtualBox and install it like any other software. Whereas Linux users can see our Vbox setup guide.
3. Downloading the Ubuntu ISO Image
Another thing that we need to perform the Unattended installation of Ubuntu on VirtualBox is the ISO image of this Linux OS. Which can be downloaded from the official Ubuntu website. Follow the link and get the latest available version- while writing this article latest LTS version was Ubuntu 22.04 LTS.
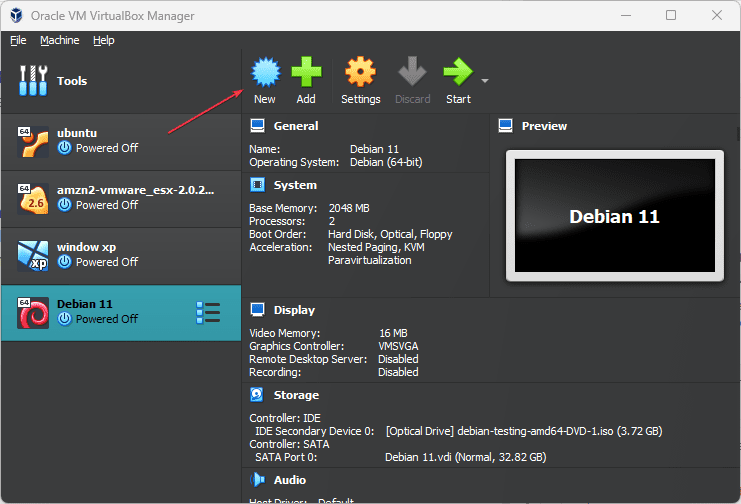
4. Create a VM on Oracle VirtualBox
Open VirtualBox on your host system which could be on Windows, macOS, or Linux, in short wherever you have installed it. After that, click on the “New” option given on the top menu of the VirtualBox.
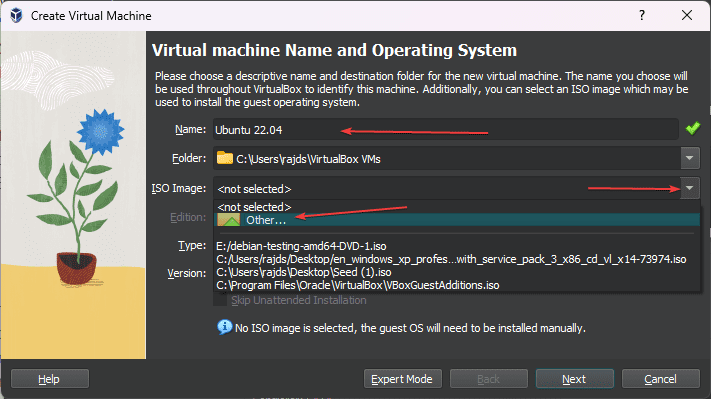
5. Name the Virtual Machine and Select Ubuntu ISO
This is the step where you will tell the VirtualBox which ISO Image you want to use. However, before that in front of ‘Name‘ give some identity to your virtual machine.
For example – here we are installing Ubuntu 22.04, so we are setting the same for its name so that later we can easily be recognized which OS is running on our virtual machine. You can give it whatever name you want.
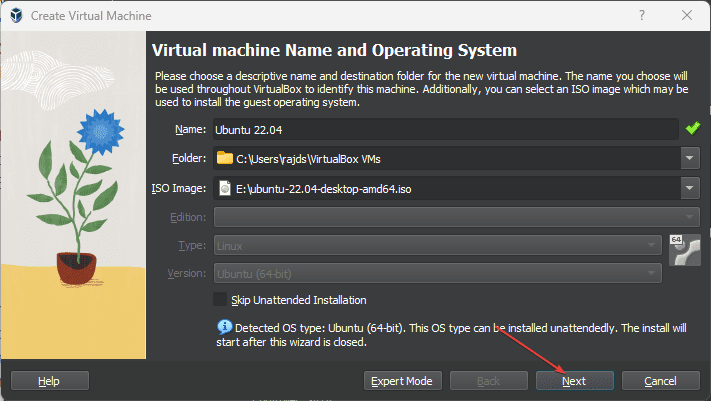
After that, click on the Arrow given in front of the ISO image to select Ubuntu.iso. Then from the drop-down select Other… and navigate to the Image of the Ubuntu version you have downloaded to select it for the VirtualBox.
VirtualBox will automatically detect the Ubuntu distro and will offer you the Unattended installation. Just hit the Next button.
Note Users who don’t want the automatic installation of Ubuntu on VirtualBox can click the “Skip Unattended installation” option.
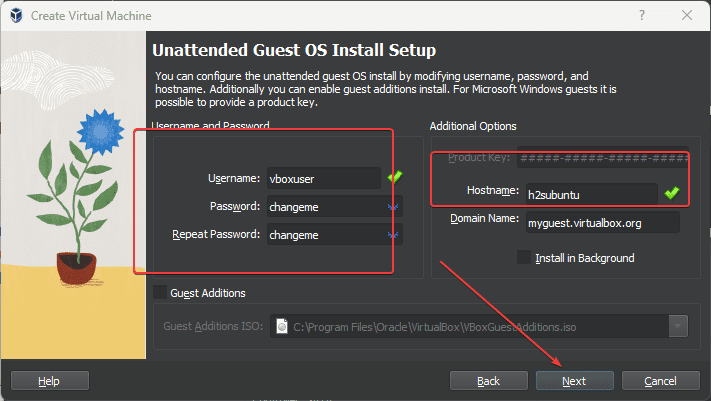
6. Unattended Guest OS Install Setup
There are a few things that we need to tell the VirtualBox before letting it install Ubuntu:
Username and Password
By default, the VirtualBox will use username – vboxuser and password- changeme for all unattended guest VM installations. You can change the default user and password with whatever you want to set. Alternatively, if you don’t have any problem then can leave the default ones.
Hostname
Also, set what hostname you want for your Virtual machine’s Guest OS, this is used for the system’s identification over the network. Well, you can set whatever you want, here we are using h2subuntu.
7. Set Hardware – base memory and processor
So far we have configured Ubuntu’s basic settings, now let’s set the hardware for it such as RAM and CPU cores.
By default, the memory will be set to 2GB and the CPU to a single core. If you are planning to perform some serious stuff on your Guest operating system then increase the RAM and CPU accordingly otherwise leave the default settings as it is.
However, we recommend setting RAM to 4GB and CPU to at least 2 cores, if your host system allows it.
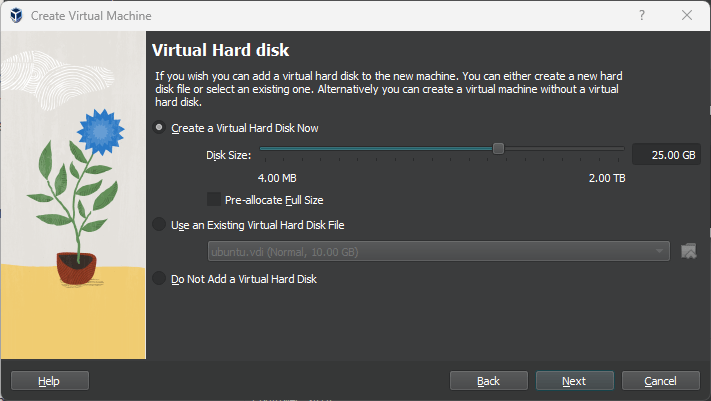
8. Creating the Guest OS Installation Medium Using Disk Image File
To store the data of the Virtual machine operating system we required some medium, here it is a virtual hard disk which is nothing but a specialized file created by VirtualBox to store the data. We can increase or decrease the size of the Virtual hard disk according to the actual space available on our host hard disk.
By default, on the VirtualBox, 25GB will be assigned to Ubuntu VM. You can increase it if you are planning to run some heavy application or decrease it accordingly. However, make sure to give at least 10 GB to install the OS.

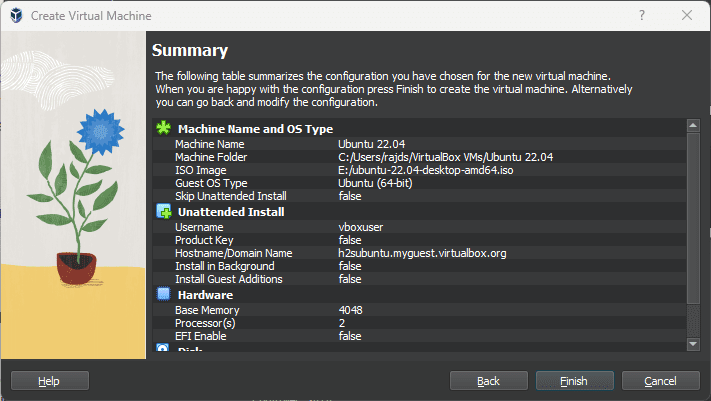
9. Summary – Unattended Ubuntu installation
Finally, the VirtualBox will give you a glimpse of the settings that have been configured by you for Ubuntu or any other OS you are planning to install. Once you are satisfied just click on the Finish button and let VirtualBox install the operating system for you.
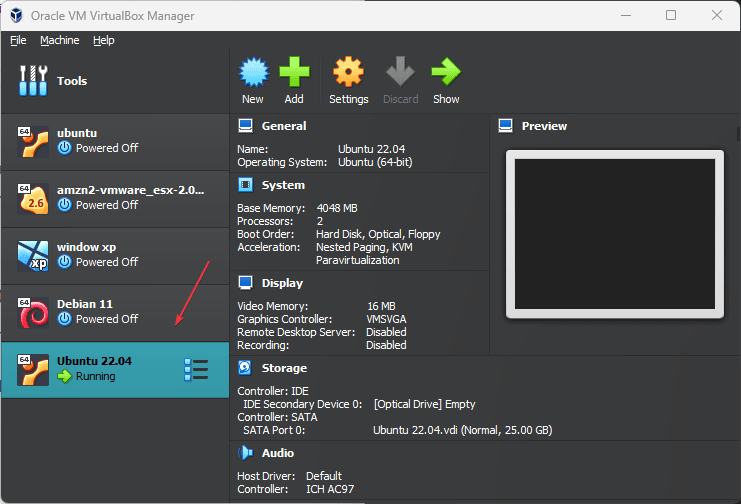
10. Start the Virtual Machine upon completion
When you come back after some time, the Virtual machine of Ubuntu OS will be installed on VirtualBox. To start it, go to the interface VBox and click on your created Ubuntu VM appears on the left side.
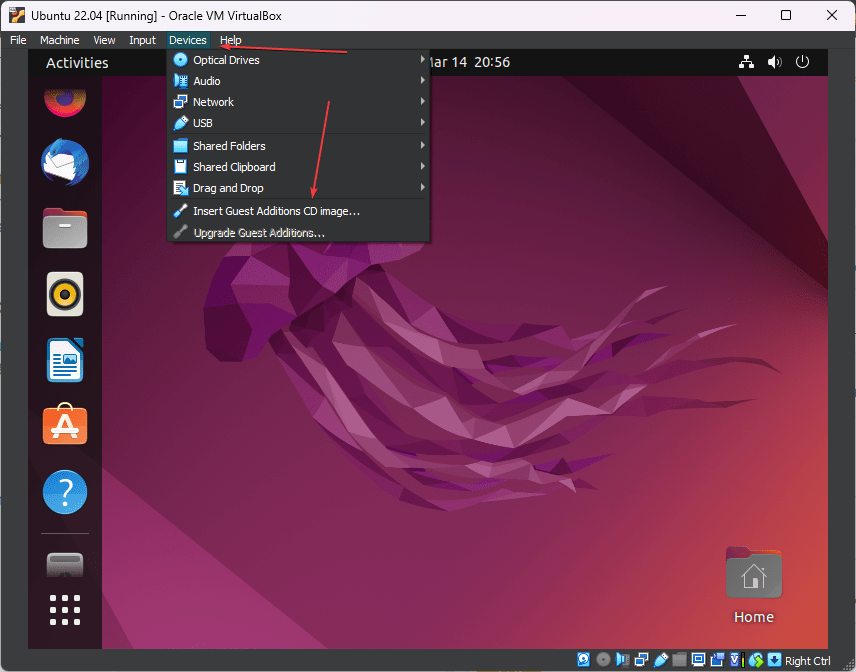
11. Guest Additions Installation
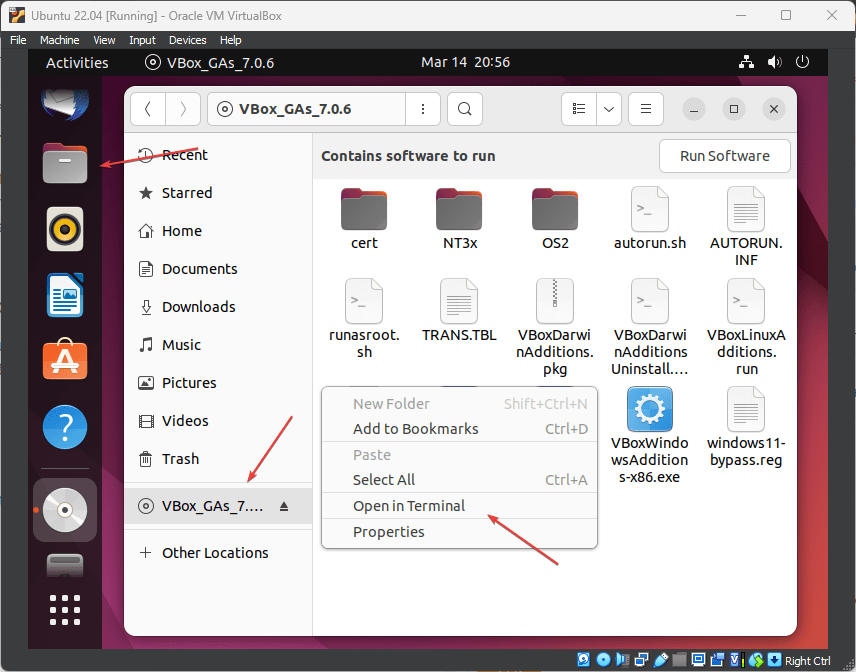
- Go to your Virtual machine Guest OS Display, click on the Devices, and select the “Insert Guest Additions CD Image…” option.
- Click on the File Manager icon to open it.
- Select VirtualBox Guest Additions CD.
- Right-click on anywhere blank space and select “Open in Terminal“.
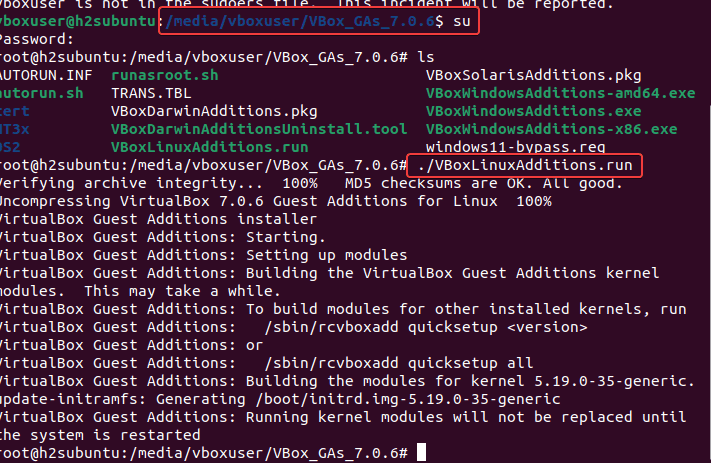
- Switch to the root user by typing
suand entering your user password. - After that type-
./VBoxLinuxAdditions.run - Wait for a few seconds, the system will install the Guest Additions on your Ubuntu Virtual Machine.
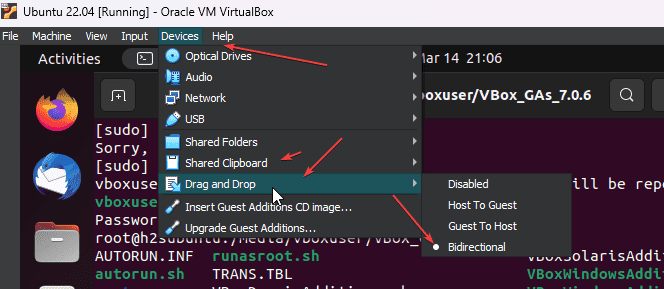
- Also, enable Drag and Drop by clicking on Devices -> Drag and Drop and selecting Bidirectional. In the same way, for Shared Clipboard select Bidirectional as well for copy-paste between host and Guest OS.
- Restart your system to apply the changes, once the installation is completed.
12. Add the current user to the sudo group
You may have seen while running some commands with your current user, the system will give a warning that “Vboxuser or your user is not in the Sudoers file. This incident will be reported“.
So to add and make your user use Sudo, type:
su -
usermod -aG sudo your-user
Replace “your-user” with the user you want to add to the sudo group.
reboot
Other Articles:


