Flameshot is a simple screenshot alternative with a wide range of features compared to the default Ubuntu screenshot tool, which is meant for the same task. It has various options to capture screenshots, annotate them, and share them easily. This article will discuss the two different methods for quickly installing Flameshot on Ubuntu 24.04 or any other version you use, such as Ubuntu 22.04 and 20.04.
Step for installing Flameshot on Ubuntu 24.04 or 22.04 Linux
1. Go to Command Terminal
The easiest way to install applications on Ubuntu Linux is to use the terminal app. Press Ctrl+Alt+T to open it and then proceed.
2. Installing Flameshot using APT (1st method)
The first method we will use for installing Flameshot is the default package manager of Ubuntu, i.e., APT. So, before starting the installation process, execute the update command once.
sudo apt updateRun the APT command with the package name, as shown below. It will download whatever latest version of Flameshot is available through the official Ubuntu repositories:
sudo apt install flameshot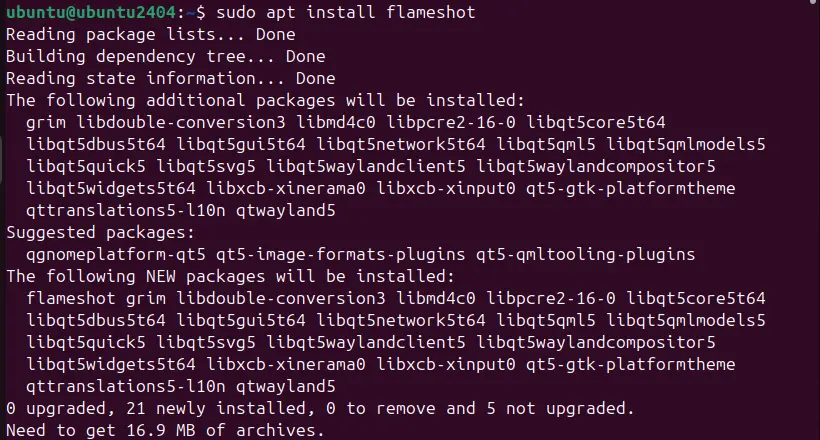
3. Installing Flaemshot via Flatpak: (2nd method)
Another method to install Flameshot on Ubuntu 24.04 is using Flatpak. Since Flatpak is not available by default on Ubuntu systems, first install it using our guide “Configure Flatpak on Ubuntu 24.04.” After that, execute the below command.
Using Flatpak ensures that you get the latest version of Flameshot, regardless of your Ubuntu version.
sudo snap install flameshot4. Launch the application
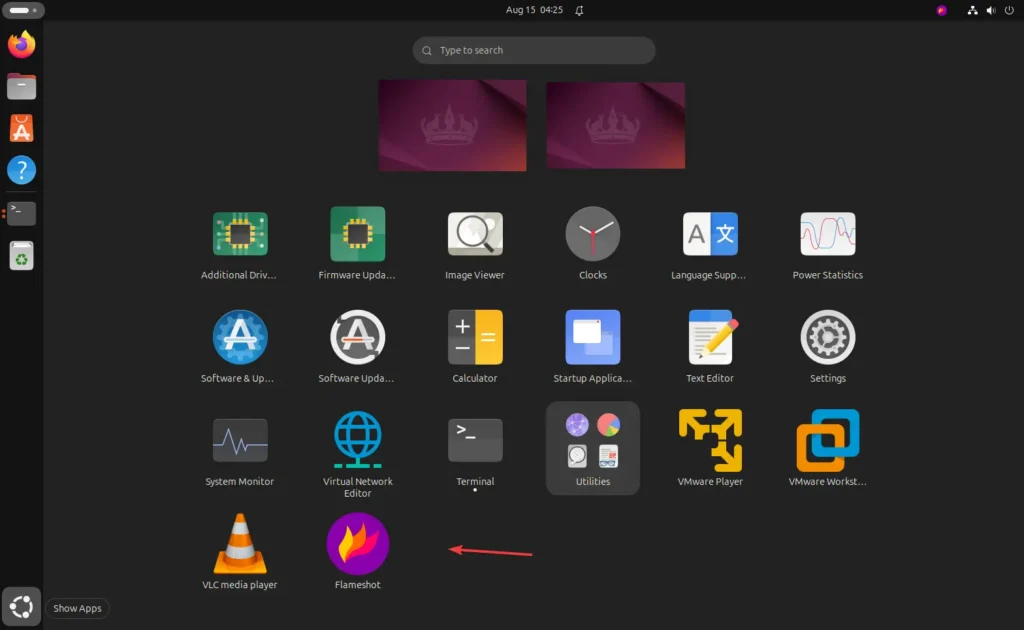
Launching the Flameshot is easy, like any other application on Ubuntu; go to the Application menu and search for it. Once you have its icon, click to run the same.
Those who use the terminal to launch it can type the given command. After launching, the Flameshot will show its icon on the Ubuntu Taskbar.
flameshot6. How to take a Screenshot:
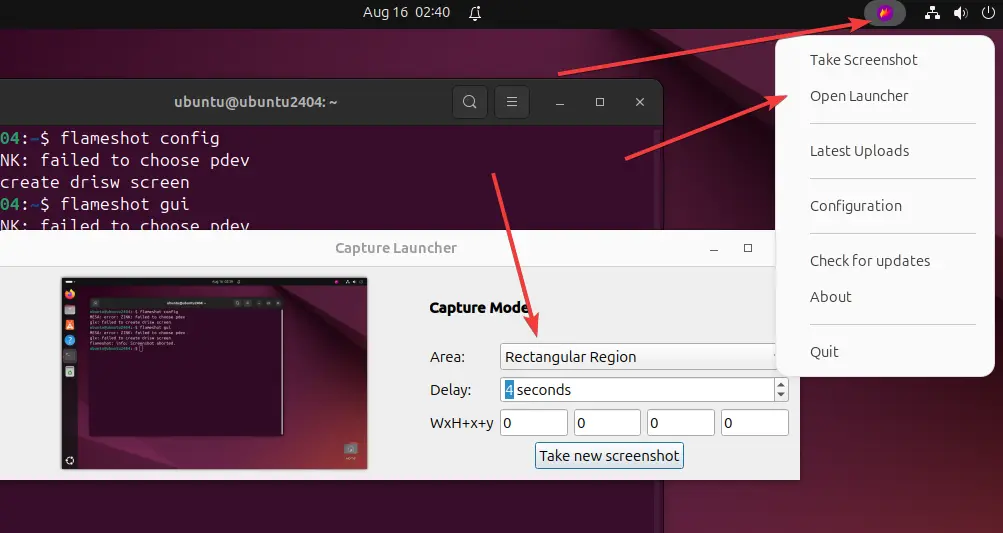
To take a screenshot, click the “Flameshot icon” on the Taskbar tray and then the “Take Screenshot” option.

Alternatively, one can use the command as well:
flameshot guiNote: If you get a Flameshot error: Unable to capture the screen.
Then, to resolve it for your current session, click on its icon in the Taskbar tray and select “Configuration” or use the command “flameshot config” to open it. After opening it, close it and click the Take screenshot option; it will work fine now.
7. Select the area to capture:
As the Flameshot gets opened and you have the screenshot tool, click and drag your mouse to select the area of the screen you want to capture.
To Annotate the screenshot, Once the area is selected, Flameshot provides several tools to annotate your screenshot:
- Pen: Draw freehand lines.
- Rectangle: Draw rectangular shapes.
- Arrow: Point out specific areas.
- Text: Add text to the screenshot.
- Blur: Blur out sensitive information.
- Save or Copy the screenshot:
Save: Click the save button or press Ctrl + S to save the screenshot to your desired location.
Copy: Click the copy button or press Ctrl + C to copy the screenshot to your clipboard.
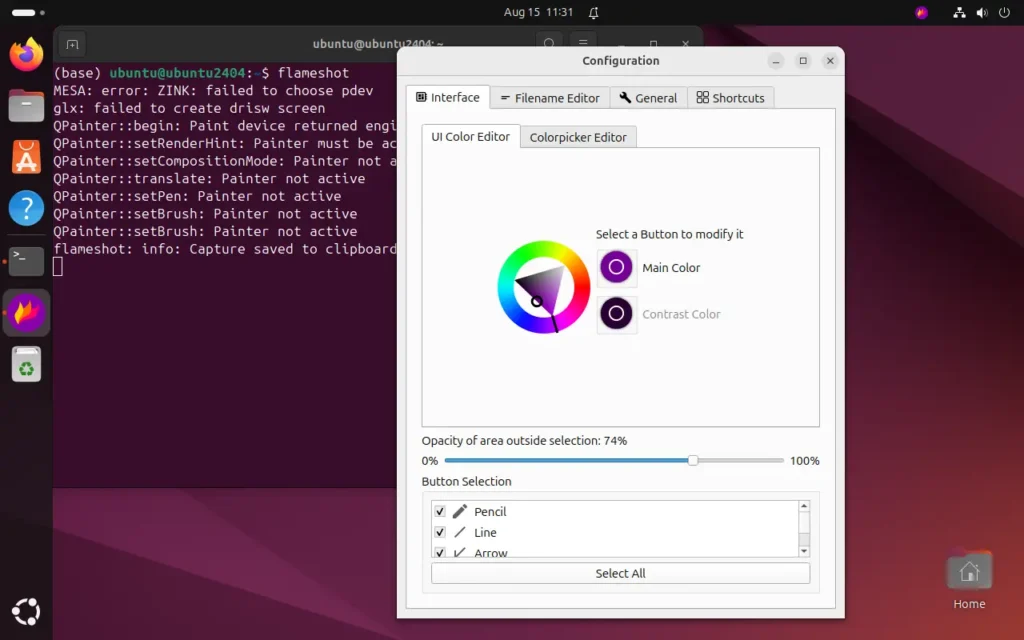
Configuring Flameshot:
Right-click on the Flameshot icon in your system tray (if available) and select “Configure” to access this setting.”
Or, use the command:
flameshot configCustomization options:
General: Set up shortcuts and basic behavior.
Interface: Customize the color scheme and appearance of the annotation tools.
Shortcuts: Configure keyboard shortcuts for various Flameshot actions.
8. Creating a Custom Shortcut for Flameshot
You can create custom keyboard shortcuts for Flameshot on Ubuntu to simplify capturing screenshots.
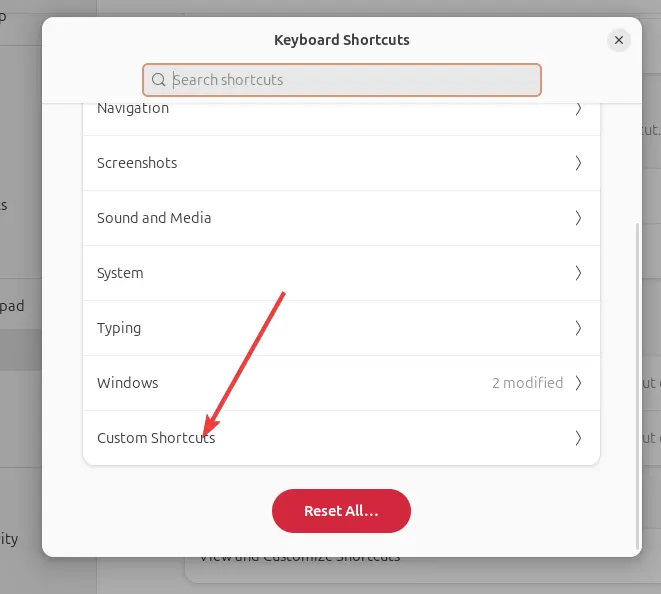
- Go to Settings -> Keyboard
- Scroll down to Keyboard Shortcuts in your Ubuntu menu.
- Click on “Customize Shortcuts“.
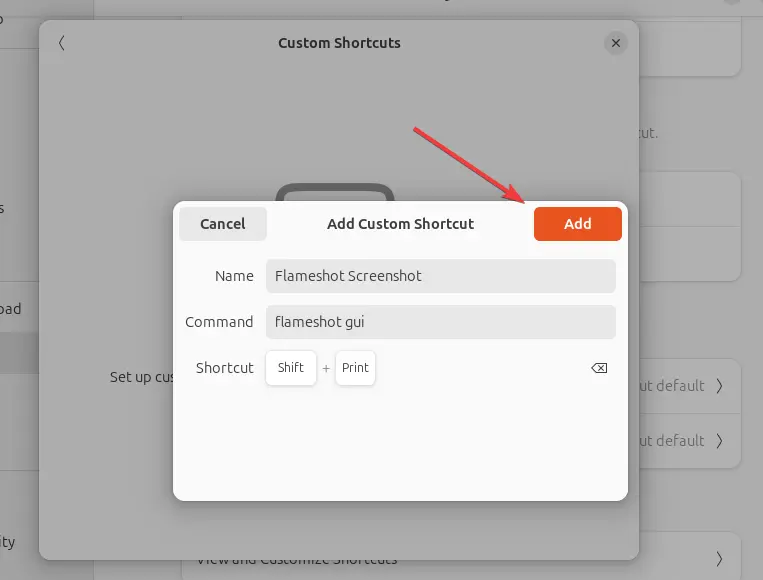
- Click on + to add a new shortcut.
- Name it “Flameshot Screenshot” or any other name you prefer.
- Set the command as:
flameshot gui. - Assign a key combination, such as Shift + PrtSc or any other you want, and click “Add” to save it.
4. Taking Delayed Screenshots
Flameshot also allows you to take delayed screenshots, giving you time to prepare your screen.
Using GUI: Click on the Flameshot tray icon and select “Open.”
Use the following command:
flameshot gui -d 5000The -d 5000 option delays the screenshot by 5 seconds (5000 milliseconds). Adjust the time as needed.
Conclusion
Although Flameshot is an open-source tool, it offers good features and a user-friendly interface for capturing screenshots. However, we did face some problems while capturing due to a bug, and we hope the developers will resolve it soon. Otherwise, if you need to capture, annotate, or share screenshots, Flameshot provides a straightforward method.