To access CentOS Linux from Windows 10 or 7 remotely is not like windows-to-windows via RDP. On Linux, we have to install a third-party software manually to easily access them remotely. For example, open-source tight VNC server, and here will show how to use it on CentOS 8.
VNC stands for Virtual Network Computing (VNC), a system that used to remotely share and access the screen of computers. This graphical desktop sharing setup comes in two parts: Vnc server and Vnc-viewer (client). Just like by default Windows uses RDP protocol, VNC supports Remote Frame Buffer protocol (RFB) to access and control remote systems.
It is platform-independent, therefore available for Windows, Linux, macOS, Chrome, and Android. VNC’s server-side applications are very adaptable in UNIX and Linux operating systems. Any computer with VNC-viewer can be easily connected to other systems in order to control it remotely, however, it should have VNC-Server installed. The graphical user interface is very friendly and looks similar to the software interface under Windows. However, unlike Windows, multiple clients can connect over it
The VNC source code is open source and so the various application built on the server-client model on it. You can choose one as per the need. However, here we are using a fork of TightVNC Server i.e TigerVNC.
Install VNC Server on CentOS 8 to access from Windows 10 remotely
Well, if you are using the CLI server version of CentOS, then use SSH or Cockpit. However, those are on GUI one, can follow the steps given below to remotely access Linux.
1. Run system update
This command is not compulsory, however, just to make sure all the repos and their installed packages are up to date. We are using it.
sudo yum install update
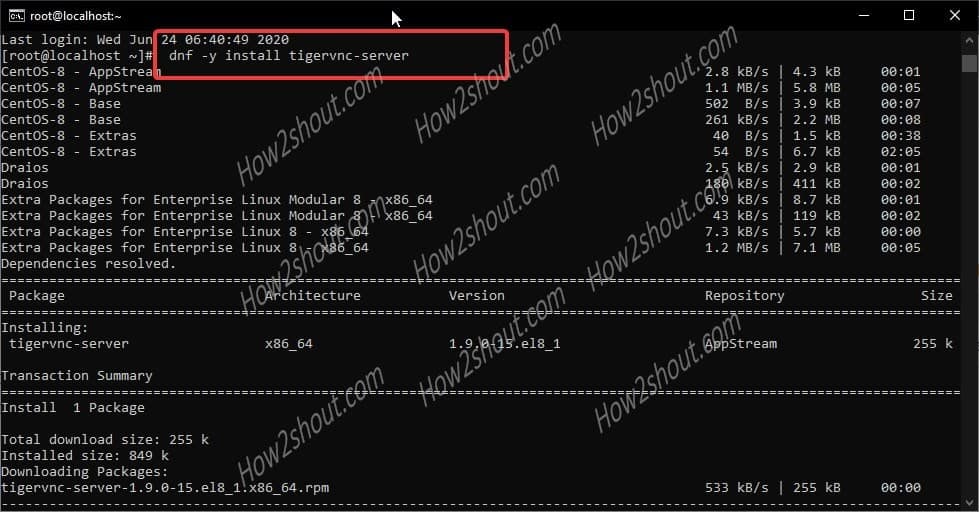
2. Install TigerVNC server on CentOS 8
As TigerVNC by default is available to create a VNCserver on the latest CentOS version, thus here we are installing the same. This also means no need to install any third-party repo, a single command will install and enable the VNC server on CentOS 8.
sudo yum -y install tigervnc-server
3. Allow VNC service in the firewalld
To access the system remotely, the VNC service should be allowed to access, from the outside world. For that, we have to whitelist its service in the default Firewalld of CentOS 8 permanently. Here is the command to enable it.
sudo firewall-cmd --add-service=vnc-server --permanent
Restart Firewall:
sudo firewall-cmd --reload
4. Set VNC Authentication
In order to securely access the CentOS from Windows or any other VNC viewer running system such as Android, Linux, or macOS; set a VNC password. This password will need to be entered every time when someone wants to connect to the server.
vncpasswd
After that, it will say do you want to set “view-only password”, press ‘n’ key, and then hit the Enter button.
5. Set Display number and resolution
Next, start the VNC server session with a display number [1]. You can enter some different numbers as well, however the same we need to enter along with the IP address or domain while accessing it. Along with it, also set the display resolution, you want to access remotely. Here we are setting the output resolution for VNC server to Full HD i.e 1920x1080p. However, you can set something low such as 800×600 or as per your requirement.
vncserver :1 -geometry 1920x1080
6. Install VNC viewer on Windows 10 or 7
Here we are taking Windows 10 for example, the steps given below will be the same for any Operating system that is running a VNC viewer.
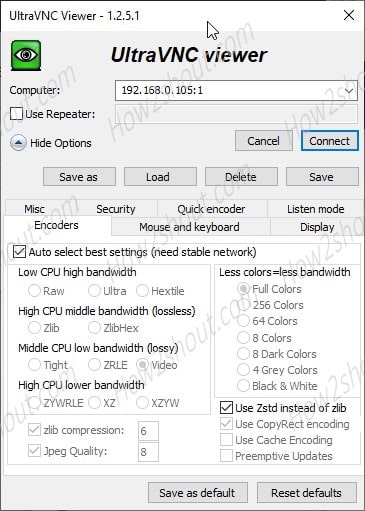
There are few popular VNC viewer software available online such as RealVNC viewer, Ultra VNC, or Tiger VNC. For the tutorial, we are using UltraVNC.
You can download any of them as per your choice. The working is similar in all.
7. Run VNC viewer
After installing, run the Ultra VNC. Enter the Ip-address of remote CentOS 8 machine along with display number. Here we have set it to [1], therefore it will be: ip-address:1
Once you entered the remote server Ip-address, select the checkbox of “Auto select best settings (need stable network)” option, and then click the Connect button.
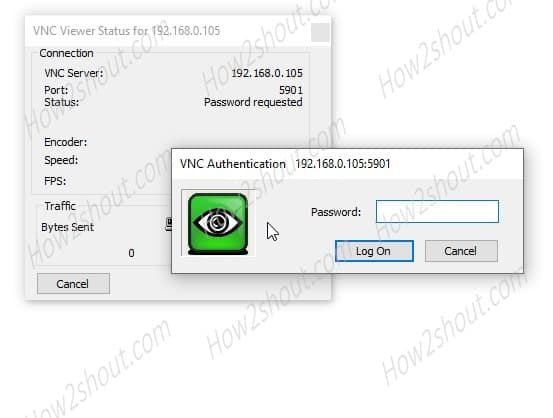
8. VNC Authentication
Enter the password you have created on the server.
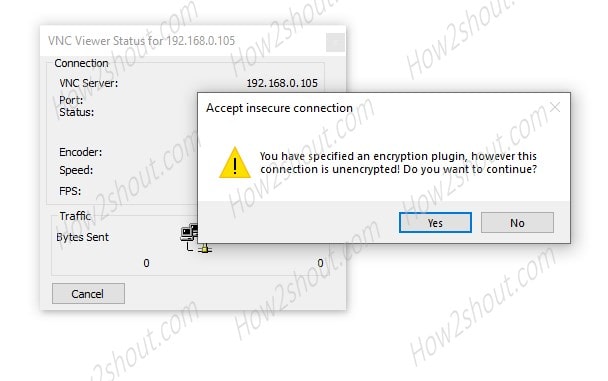
9. Accept insecure connection
Click on the Yes button. Nevertheless, if you don’t want to see it again and again, select Settings Tab ->UltraVNC viewer and uncheck the Encryption option before connecting.
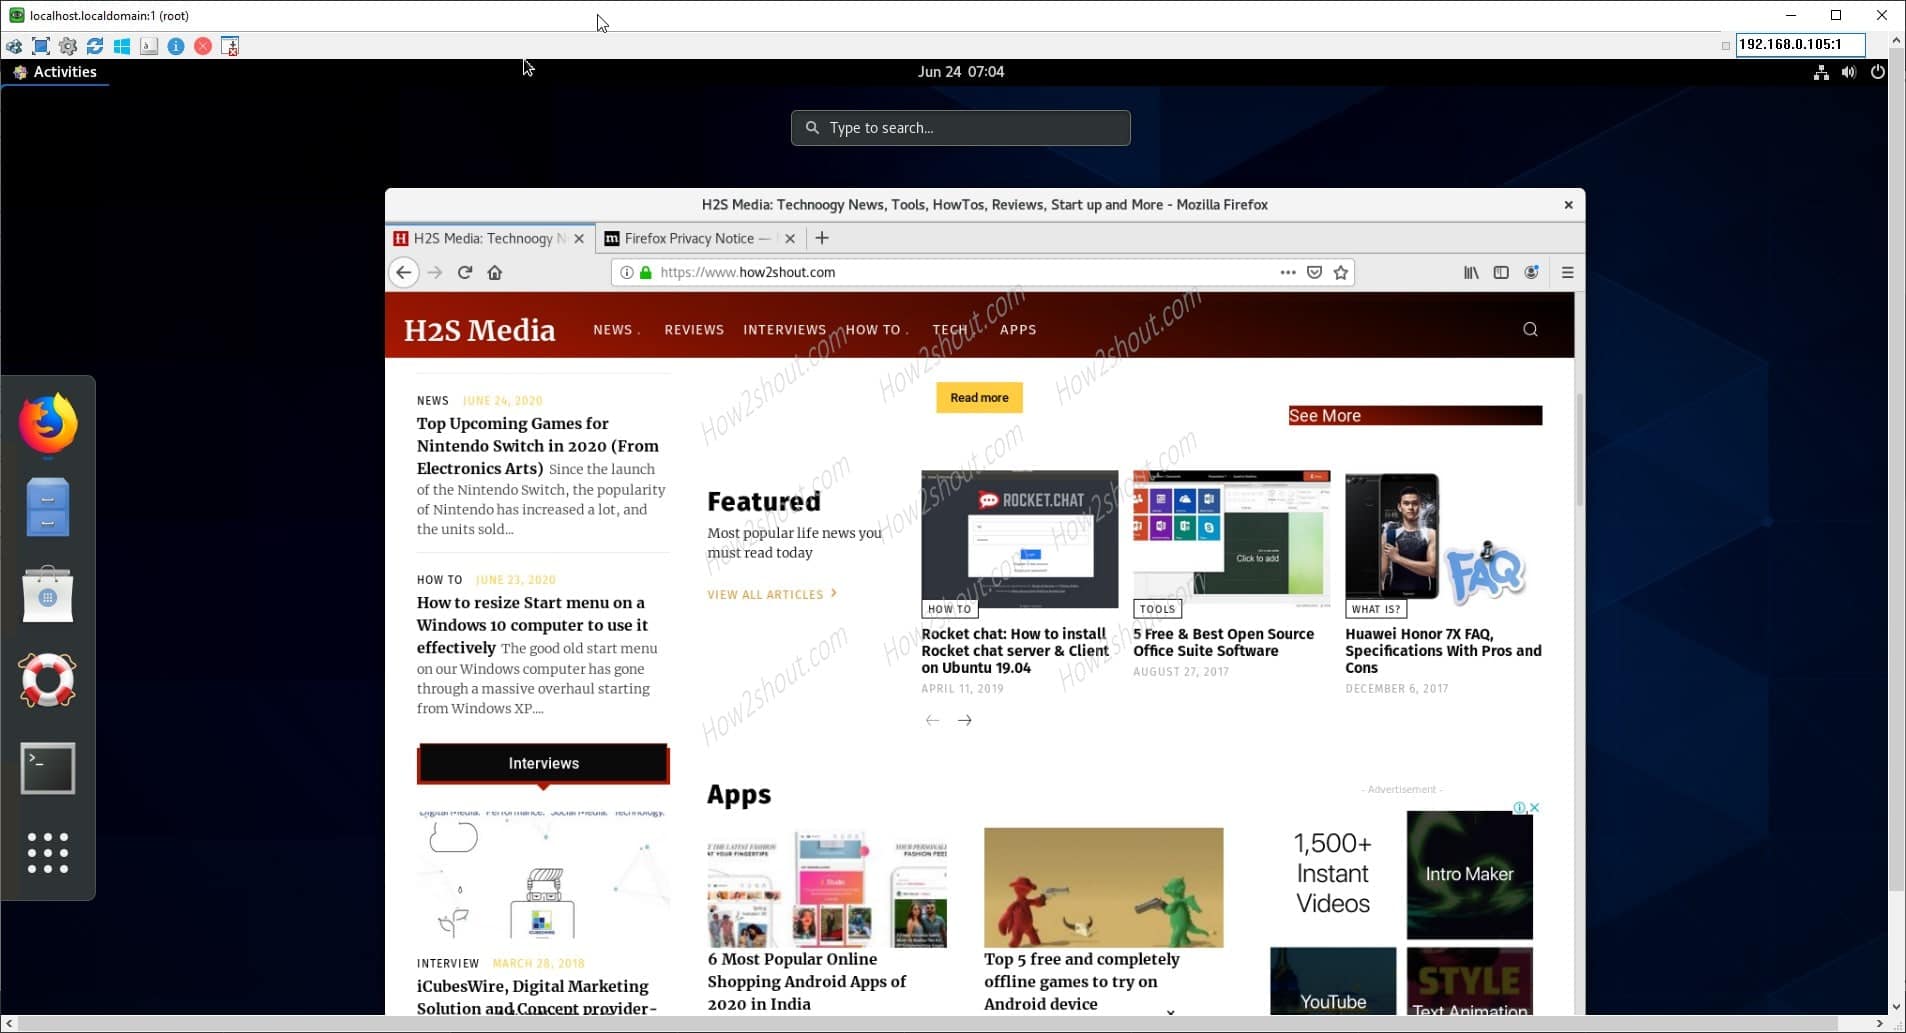
10. Remote CentOS 8 view
Finally, you will have the remote graphical window of your Linux, start using it as you are accessing it locally.
Optional Step: Stop VNC-Server
If you want to stop the service of VNC on CentOS, then run the command along with the display number as given below:
vncserver -kill :1
And to start it again, just run:
vncserver
Other Articles:
- Install Microsoft Powershell on Ubuntu 20.04 LTS
- How to install & Use WineHQ in Ubuntu 20.04 LTS
- Install GUI on CentOS 8 Minimal CLI server
- Steps to install CentOS 8 minimal server version