NAKIVO Backup & Replication is a paid data backup software solution for businesses that want to protect their data from an accidental mishap. It provides backup, replication, and recovery capabilities from various types of data loss such due to hardware failures, software issues, accidental deletions, ransomware attacks, or disasters.
The software is not just limited to a specific kind of device or source for creating backup instead it offers interaction with a wide range of virtualization platforms such as VMware vSphere, Microsoft Hyper-V, and Nutanix AHV, as well as physical servers, workstations, cloud workloads, and Microsoft Office 365 environments, making it an adaptable solution for data protection in myriad IT environments.
Commands given here to install Nakivo can be used on other Linux systems such as RedHat, Debian, Linux Mint, POP OS, Fedora, OpenSUSE and more…
1. Open the Browser
We need to download the Nakivo installer for Linux which is not available through the default system repository of Ubuntu. It is because the software is paid and does not fall in the open-source category. To open the browser app, go to Applications and search for Mozilla or any other you have on your system.
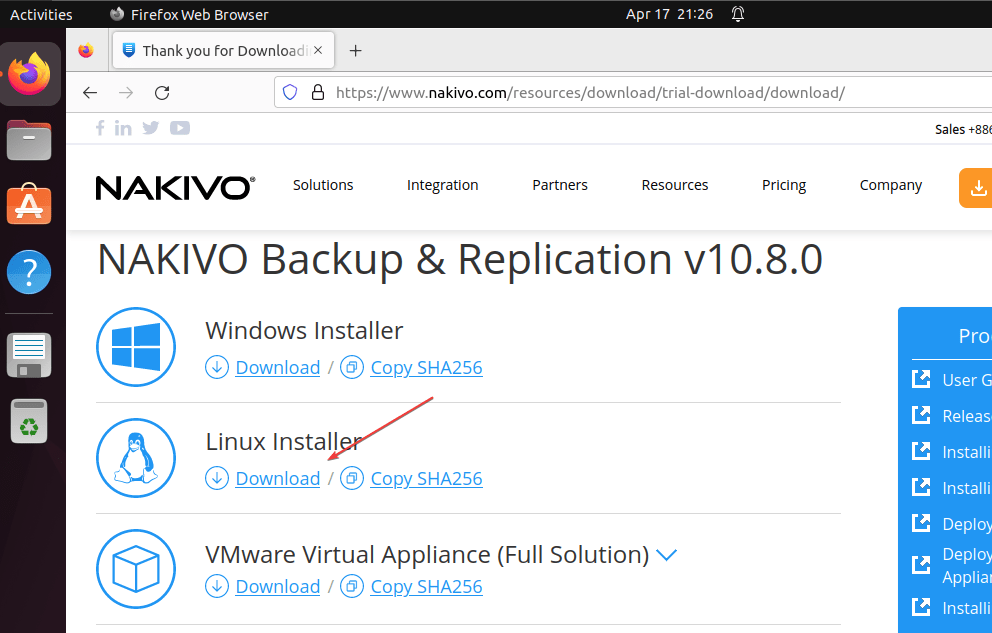
Next, visit the official website of Naviko to get the trial version of the software available for Linux users. Here is the link for that. On the webpage fill out the required form and then click on the download button for Linux.

3. Open Command Terminal
Once you have downloaded the Nakivo Linux installer, open the command terminal to start the further installation. You can use the keyboard shortcut Crtrl+Alt+T to open it.
By default, whatever we download from the browser goes into the Downloads folder. So, first, switch to that using the given command.
cd DownloadsAfter that check whether the downloaded file of Nakivo is present in the directory.
lsAs you confirm, run the script to start the installation process.
chmod +x file-name
sudo bash file-name
Example in our case:
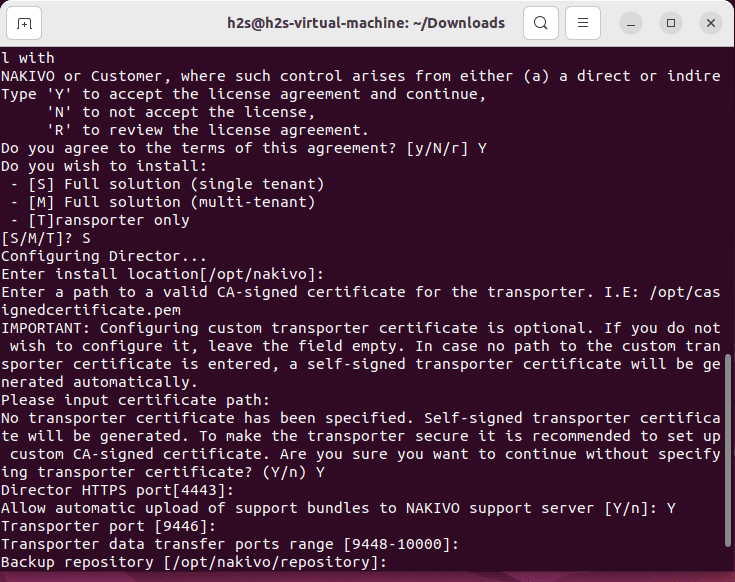
chmod +x NAKIVO_Backup_Replication_v10.8.0.73174_Installer-TRIAL.shsudo bash NAKIVO_Backup_Replication_v10.8.0.73174_Installer-TRIAL.sh
5. Open Nakivo Web Interface
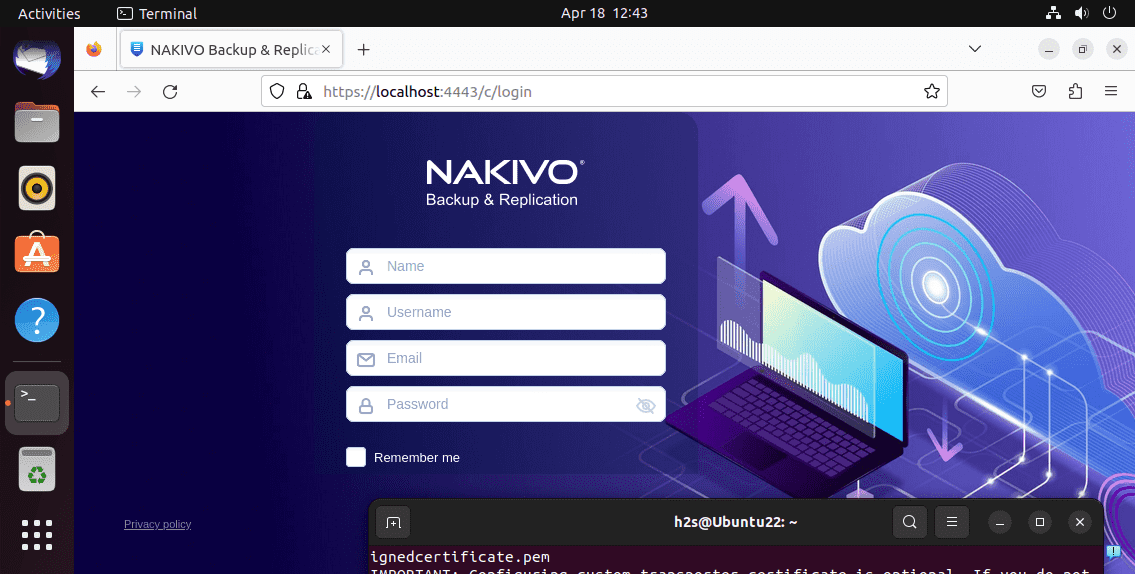
After completing the installation, in your browser open – https://localhost:4443 and you will have the interface to create a user account and add the devices to back up in the software Inventory.

6. How to Update
In the future, if some update is available for the Nakivo backup software then to do that we need to download the updater program available on the official website. Get it for Linux.
Once the updater script is on your Linux, in the command terminal switch to Downloads and run it:
lsYou will see the file there, first, allow it to execute:
chmod +x file-name and after that run it using sudo ./filename
For example:
chmod +x NAKIVO_Backup_Replication_v10.8.0.73174_Updater.shsudo ./NAKIVO_Backup_Replication_v10.8.0.73174_Updater.sh7. Uninstall Nakivo from Linux
Because of any reason, if you don’t want Nakivo anymore on your Ubuntu Linux then remove it, here is the command.
sudo /opt/nakivo/director/uninstallAs you execute the uninstallation script, press the U key to confirm.

Other Articles:


