Are you planning to upgrade your existing Linux Mint 19.3 (Tricia) PC or Laptop to Linux Mint 20.1 Ulyssa, then following the simple steps given in the tutorial…
Linux Mint is one of the popular distros among users who want a Windows-like operating system but with the benefits of Linux and a user-friendly interface. As Mint is an Ubuntu derivative, thus not only we have the access to a large number of packages to install but also stability.
The process of upgrading Mint is very easy, we can use GUI or command to do that. However, in this article, we will show you how to upgrade from Tricia (19.3) to Ulyssa (20.1) using CLI, thus first you have to make sure that your existing Mint 19.3 is on 64-bit because 20.1 doesn’t support 32-bit.
To do that simply type in command terminal-
dpkg --print-architecture
And the output will clearly tell you what architecture your current PC is using…
Note: The new Linux Mint 20 is only available as a 64-bit version – those who still use a 32-bit version cannot upgrade, hence have to perform a fresh installation to get it. For everyone else, the process is pretty straightforward as Mint has its own upgrade tool.
Create a backup or snapshot of Linux Mint 19.3
I am sure you don’t want to lose your data in case something happened wrong while upgrading your 19.3 Mint OS to 20.1, thus it will be a great idea to create a snapshot for your current state of OS. And if something goes wrong we can use that to restore the same.
For Snapshot, we will use the TimeShift tool.
sudo apt install timeshift
Now, click on the Linux Mint start button and from applications search for Timeshift, as it icon appear, click to run it.

Let the default settings selected and follow the wizard to select a destination (recommend choosing the external or internal drive with Linux partition) to save the Snapshots. Then from its interface, click on the Create button to start creating a SNAPSHOT.


Purge PPAs and 3rd party repositories
Mint itself recommends deleting package sources that have been manually set up by third parties before an upgrade, as they may create some issues.
sudo mintupdate
Thus, opens the application package sources program using the above command, clicks on Edit, selects Software sources, and deactivates the third-party software sources under Additional package sources and PPAs (private package archives).
Run System Update
Before doing anything, I would recommend running the system update and upgrade command. This will not only refresh the repository but also make sure all the packages are in their latest state.
sudo apt-get update
sudo apt-get upgrade
sudo apt-get dist-upgrade
Install Linux Mint Upgrade Tool
The developers of Mint offer an easy to upgrade method using the MintUpgrade tool. And here we use the same. However by default, it will not be on your system, thus install it.
sudo apt install mintupgrade
Check Upgrade Configuration for Mint 20.1
To check all the configuration and things we required to upgrade to Limutx 19.3 to 20.1 are at a place and to temporarily point the system’s repository to Mint 20.1 Ulyssa, we run an upgrade simulation using the tool we have installed in the previous step.
mintupgrade check
Download Linux Mint 20.1 upgrade files
Once we have pointed the repository of our OS to the latest one, the next step is to download the required files and packages we need to upgrade our Mint OS.
mintupgrade download
Install 20.1 Upgrades on Linux Mint 19.3
Finally, install the downloaded files, which will automatically change the versions of all installed packages including the OS by replacing them with newer versions and features.
mintupgrade upgrade
And once the above process is done, run update & upgrade again
sudo apt update
sudo apt upgrade
Alternatively, if you want then can use the GUI as well for the above process, type-
sudo mintupdate
Select Edit and then the “Upgrade to Linux Mint 20.1 Ulyssa” option. That’s it.

Reboot
Finally, restart your PC and let the PC apply the changes.
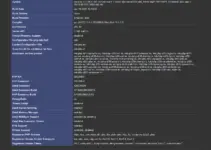
To check the version, in the command terminal run:
cat /etc/os-release

Video Tutorial