MariaDB is a popular SQL database forked from MySQL. This was developed after Oracle acquired Sun Microsystems in 2010. MariaDB is mostly compatible with MySQL and can mostly replace MySQL without problems (API compatible). The processor architectures x86 and AMD64 are supported.
MariaDB uses the “storage engine” XtraDB as a replacement for InnoDB. Alphanumeric fields in heap tables can exceed 256 characters. Support of Pool of Threads to guarantee high speed even with 200,000+ connections.
Here in this tutorial, we will learn how to install and secure MariaDB on AlmaLinux and Rocky Linux 8.
MariaDB installation on Rocky and AlmaLinux 8
Step 1: Add Repository for MariaDB
The packages available to install MariaDB from the AlmaLinux or Rocky system repository provide version 8 of it. Therefore, to get the latest 10.5, we need to add its official repository on the system manually. For that run-
sudo dnf install nano -y
sudo nano /etc/yum.repos.d/mariadb.repo
Copy-paste the following given block of text in the file.
[mariadb]
name = MariaDB
baseurl = http://yum.mariadb.org/10.5/rhel8-amd64
module_hotfixes=1
gpgkey=https://yum.mariadb.org/RPM-GPG-KEY-MariaDB
gpgcheck=1
Save the file by pressing Ctrl+X, type Y, and hit the Enter key.
Step 2: Run AlmaLinux/Rocky system update
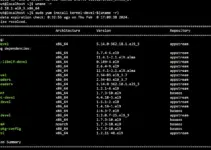
Now, to make sure all the system packages are up to date and also to refresh repository cache, run the update command-
sudo dnf update
Step 3: Command to install MariaDB on AlmaLinux 8 or Rocky
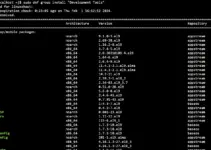
The repository we need is at its place, now we can run the regular DNF command to install the server and client package of MariaDB on our AlmaLinux. Here is the command for that:
sudo dnf install MariaDB-server
Step 4: Start and Enable MariaDB Services
Once the installation is completed, start the service of the Database server and then enable the same, so that it could start itself automatically with the system reboot.
sudo systemctl enable --now mariadb
To check everything is working as it should be, you can check the status of the MariaDB service using the command-
sudo systemctl status mariadb
Step 5: Secure the Database Server
Let’s run the command to make MariaDB secure by changing few settings such as password, removing the default database, disabling remote root access to the database, and more…
sudo mysql_secure_installation

Step 6: Add MariaDB Service in Firewall (optional)
If you want to access your Database using some other system and GUI or CLI client then, we have to first open its service or port in our system firewall.
sudo firewall-cmd --permanent --add-service=mysql
sudo firewall-cmd --reload
Step 7: Connect Database server
To connect and create databases type:
mysql -u root -p


This helped me today 🙂