Want to learn how to install Zabbix’s free and open-source network monitoring tool on Debian 11 Bullseye Linux using Apache, MySQL, and a command terminal? Then here is the step-by-step tutorial to follow.
Well, in the open-source world, Nagios is probably one of the best-known free and open-source networking monitoring software. However, slowly over the years, Zabbix is steadily taking over the market by offering features enough to compete with other players.
Zabbix offers a web interface implemented in PHP to show all information and configuration of the hosts to be monitored in the web browser. It uses either MySQL, PostgreSQL, Oracle, or SQLite to store the data.
In addition to simple “simple checks” for monitoring standard services such as SMTP or HTTP, agents are available for a large number of operating systems including Windows. With the help of that monitoring, the server can collect a wide variety of data to display it graphically in the Zabbix web interface. To alert, Zabbix sends e-mails, SMS, or IM instant messages.
If you are new to it and want to start monitoring your multiple systems using Zabbix + Debian 11 Linux, then here is the initial setup guide.
Steps to install Zabbix Monitor on Debian 11 server Linux
Requirements: Apache, MySQL, PHP version 7.2 or newer, minimum 128 MB of RAM (physical memory), and 256 MB of free disk space.
1. Update the Debian 11 APT cache repository
Let’s first run the system update command because it will rebuild the APT repository cache and also help our system to be in its latest state.
sudo apt update
2. Install LAMP- Apache, MySQL server, and PHP
As Zabbix offers a PHP-based Web interface, hence we need a web server, PHP language, and a Database server MySQL or MariaDB to store data on our Debian 11 server.
Command to setup Apache webserver
sudo apt install apache2
Start and enable it:
sudo systemctl enable --now apache2
To check the Web server service status
systemctl status apache2
Command to install MySQL or MariaDB
Now as per your preference install MySQL or MariaDB.
#For the MariaDB Database server, run:
sudo apt install mariadb-server
To start and enable its service:
sudo systemctl enable --now mariadb
#For Oracle MySQL 8.0:
By default, Oracle MySQL will not be available to install via the default repository of Debian 11, hence we have to add the official repo first.
See our article on it– How to install MySQL 8.0 Server on Debian 11 Bullseye
Once you are done with the Database server installation, secure it using:
mysql_secure_installation
The above command will give a text-based wizard to secure the Database server, just follow it.
Install PHP 7.x on Debian 11
After Apache and MySQL or MariaDB, install the default PHP version available on Debian 11 which is 7.4 along with other extensions.
Copy-paste the given command and hit the Enter key.
sudo apt install php php-{bz2,mysqli,bcmath,mbstring,ldap,net-socket,pgsql,\
curl,gd,intl,common,mbstring,xml}
3. Add Zabbix repository on Debian 11 Linux
The packages we required to install Zabbix on our Debian 11 Bullseye are not available via its default base repositories. Hence, we need to add the one offered by Zabbix for Debian-based systems.
Here are the commands to set it up on the Linux system. While doing this article the latest version available was- 5.4.1.
sudo apt install nano wget
wget https://repo.zabbix.com/zabbix/5.4/debian/pool/main/z/zabbix-release/zabbix-release_5.4-1+debian11_all.deb
sudo dpkg -i zabbix-release_5.4-1+debian11_all.deb
Run system update:
To let the system know about the latest added repo, run the update once again:
sudo apt update
4. Command to install Zabbix on Debian 11 Bullseye
Finally, use the default APT package manager of Debian to install the required packages we needed including the agent:
sudo apt install zabbix-server-mysql zabbix-frontend-php zabbix-apache-conf zabbix-sql-scripts zabbix-agent

5. Create MySQL/MariaDB Database for Zabbix server
Now, everything is almost ready, let’s create a database to configure with the Zabbix server so that whatever the data generated by it have someplace to get stored.
Login to MySQL/MariaDB:
sudo mysql
Create DB:
CREATE DATABASE mydb character set utf8 collate utf8_bin;
Database user and set a password for the same:
CREATE USER 'myuser'@'localhost' IDENTIFIED BY 'mypass';
Give all rights of created database to the user:
GRANT ALL PRIVILEGES ON `mydb`.* TO 'myuser'@'localhost';
FLUSH PRIVILEGES;
exit;
Note: Replace mydb, myuser, and mypass with whatever you want to set.
Note: if you have created a database without UTF8 support then you will face an error- ERROR 1071 (42000) at line 258: Specified key was too long; max key length is 3072 bytes
6. Import initial schema and data
Already initial schema and data are available in the Zabbix installation folder that configures how the data should be defined in the Database created for it in MySQL. Hence, just import it.
zcat /usr/share/doc/zabbix-sql-scripts/mysql/create.sql.gz | mysql -umyuser -p mydb
Replace the myuser with your Database user and mydb with the database you have created for Zabbix.
After that, the system will ask you to provide the Database user’s password you have set while creating it. Hence enter that.
Once you followed it, wait for a few seconds to let the system import the schema and data.
7. Edit the Zabbix server configuration file to set Database details
Now, we have a database ready, let’s set the database name, user, and password for it in the configuration file of the Zabbix server so that it can use the same to store data.
sudo nano /etc/zabbix/zabbix_server.conf
Comment out them: Find and add # in front of two lines:
DBName=zabbix
DBUser=zabbix
And just after that add your Database details
DBHost=localhost
DBName=mydb
DBUser=myuser
DBPassword=mypass

Scroll down further and find the line- ListenIP= 0.0.0.0 and remove the # to uncomment this line. Otherwise, you may get an error:
zabbix server is not running the information displayed.
To save the file press Crtl+O and then hit the Enter key after that exit it using Ctrl+X.

8. Restart Apache and Zabbix server
To implement the changes done in the configuration file, restart the servers and agent.
sudo systemctl restart zabbix-server zabbix-agent apache2
After that, enable the server and agent services to start with system boot.
sudo systemctl enable zabbix-server zabbix-agent
9. Setup Zabbix frontend via a Web interface
Finally, everything is done, now go to any web browser that can access the server ip-address or domain where you have installed the Zabbix network monitor.
Point the browser to the server – http://server-ip-address/zabbix or http:/your-domain/zabbix

The system will confirm all the requirements are satisfied.

Configure DB:
Enter the Database user and password details.

Once the Database connection has been established, the same will be informed.

Change the Default time zone and Default theme, if you want otherwise leave them as it is.

Give some name to your Zabbix server and let the default host and port as it is.

Congratulations! You have successfully installed the Zabbix front end.

10. The default username and login details- Zabbix
On the login screen, enter username- Admin and password- zabbix. Once logged in change the Admin user password. For more details, see the official documentation.

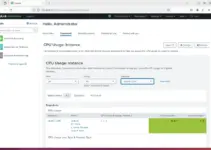
11. Dashboard

Other Articles:
• 7 Best Gnome system monitor alternative Linux applications
• 4 Ways to Check MySQL or MariaDB version on Linux