Developers of PostgreSQL call this platform “The world’s most advanced open-source database”. PostgreSQL is available for Linux including for other common operating systems such as macOS, Windows, and BSD. PostgreSQL implements the 2008 SQL standard very comprehensively. In addition to common data types, the database can also natively handle XML and version 9.2 with data in JSON format. Here we learn the steps to install PostgreSQL on Amazon Linux 2 running on an AWS ec2 instance.
What do you need to install PostgreSQL Database?
- 1GB of Hard disk space
- 2GB of Memory
- At least a single core Virtual CPU
- Connect Amazon Linux via SSH or Web Terminal
- sudo rights
Postgresql 13 installation on AWS Ec2 Amazon Linux 2
1. Add PostgreSQL Yum Repository
Packages to install the latest stable PostgreSQL 13 database server & client (while writing the article) on Amazon Linux 2 are not available via the core repository. Hence, we have to add one manually.
Just paste the below given whole block of command and hit the Enter key.
sudo tee /etc/yum.repos.d/pgdg.repo<<EOF
[pgdg13]
name=PostgreSQL 13 for RHEL/CentOS 7 - x86_64
baseurl=https://download.postgresql.org/pub/repos/yum/13/redhat/rhel-7-x86_64
enabled=1
gpgcheck=0
EOF
2. Run system update
Once you have added the repository using the command given above, just use the Yum Package manager to run the system update command. This will let Amazon Linux 2 know that we have recently added a new repo.
sudo yum update
3. Command to install PostgreSQL on Amazon Linux 2
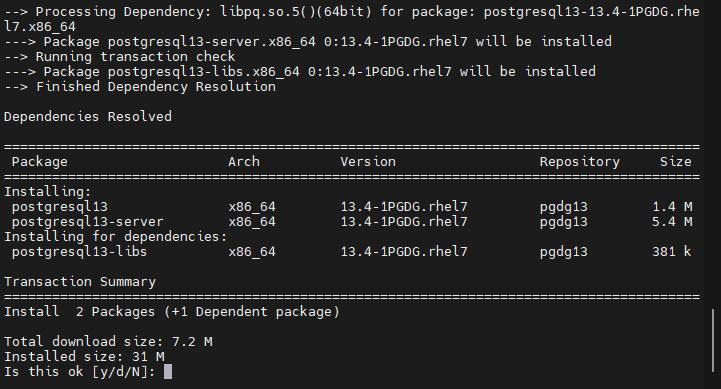
The thing we need to get this Database server’s version 13 is already in place, now it’s time to simply run the installation command to get the Server and Client packages.
sudo yum install postgresql13 postgresql13-server
4. Initial database configurations
After installation, let’s initialize the PostgreSQL Database using initdb that will create a new PostgreSQL database cluster refers to a collection of databases managed by a single server instance.
sudo /usr/pgsql-13/bin/postgresql-13-setup initdb
5. Enable and Start PostgreSQL Service
We have successfully initialized the Database, it’s time to start and enable the Database service so that it can start automatically after every system reboot.
sudo systemctl start postgresql-13
sudo systemctl enable postgresql-13
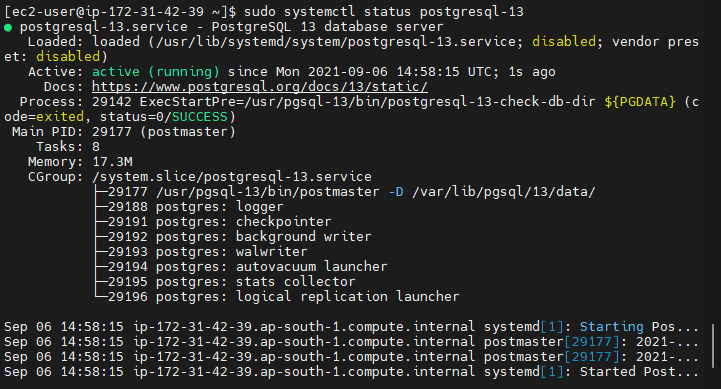
Check the status of the Service.
sudo systemctl status postgresql-13
6. Secure PostgreSQL default Database
To make sure our PostgreSQL is secured with a strong password, set a password for its system user and then default database admin user account using below given commands-
Change user password
sudo passwd postgres
Login using Postgres system account-
su - postgres
Now, change the Admin database password-
psql -c "ALTER USER postgres WITH PASSWORD 'your-password';"
Note: Replace your-password in the above with a secure password that you want to set for the admin database user.
Know more about– how to create a Database on PostgreSQL.


