Well, Debian-based Tails is not the Linux system that we can install on our PC like Windows or other Linux distros. Instead, it is a hardened Linux system meant to run in a Live environment via DVD or USB stick. So it offers extensive security. Here we learn the steps to set up, run and use Tails in VirtualBox Virtual Machine to learn and get familiar with it.
The Tails Linux distribution is designed as a live system particular for data protection and anonymity on the Internet. We can easily write in on a USB drive using software such as Rufus or Etcher; or else burn it on a DVD. This makes it a portable Linux OS that a user can use on any system without leaving a trace behind or storing any data on the computer’s hard drive.
Tails uses a hardened Debian Linux and comes with a good set of pre-installed tools. For example, you can only surf the Internet via the Tor network, e-mails can be encrypted with PGP and the system even encrypts the clipboard. Of course, to achieve security and anonymity when surfing the Internet, all Internet traffic under Tails is routed through the Tor network.
Furthermore, instead of regular browsers such as Google Chrome, Mozilla Firefox, and Opera, it comes with Tor Browser pre-installed.
Other programs that are already preinstalled in Tails are an instant messaging client, a picture editor, an audio editor, an office suite, and many more. All these programs are also designed for maximum security, for example, the clipboard is encrypted.
Let’s see the method to run Tails on VirtualBox Virtual Machine to get familiar with it and its tools. The steps given here are applicable for Windows, Linux, FreeBSD, and macOS.
Setup and Use Tails Linux OS on VirtualBox VM – Tutorial
1. Download Tails OS
The first thing you should have to install Tails Linux OS on USB or to set up on VirtualBox Virtual machine is its ISO. Therefore, go to the official website of Tails and get the ISO file. Here is the link.
2. Install VirtualBox
Although you would already have VirtualBox on your system, however, if not then simply visit virtualbox.org and download it for your system. If you are on Linux such as Ubuntu, then simply type sudo apt install virtualbox
3. Create Tails OS Virtual Machine
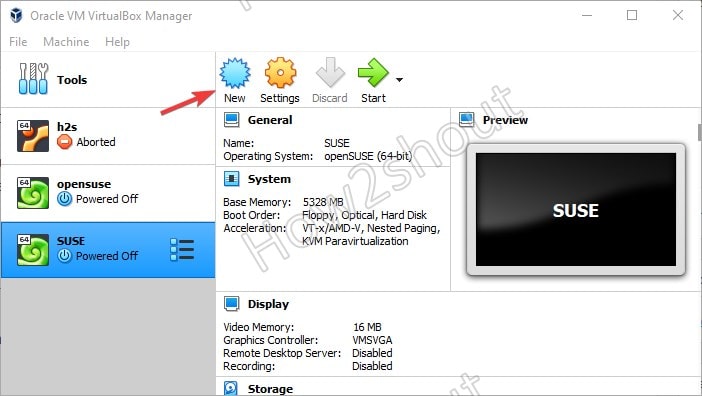
Once the VirtualBox is on your system, run it and click on the New button to create a Virtual machine.
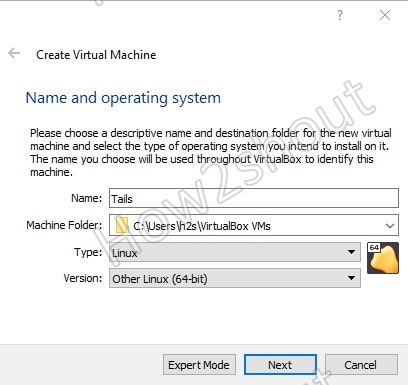
1. Name and select operating system type
In the name section, simply type – Tails and select the Linux as operating system type whereas the version will be 64-bit for the latest version of Tails OS.
2. Tails system Requirments:
- A 64-bit x86-64 compatible processor
- 2 GB of RAM to work smoothly.
3. Setup RAM in VirtualBox
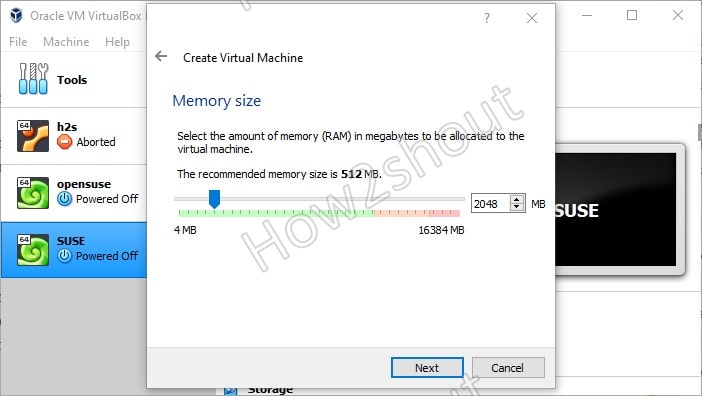
As we have seen above, the recommended RAM requirement for Tails OS is 2GB, of course, we can use lower than that, however for optimal performance two gigabytes are necessary. Therefore, on Virtualbox, when it asks to set up memory, use the slider and select 2 GB or more.
4. Create a Virtual Hard disk
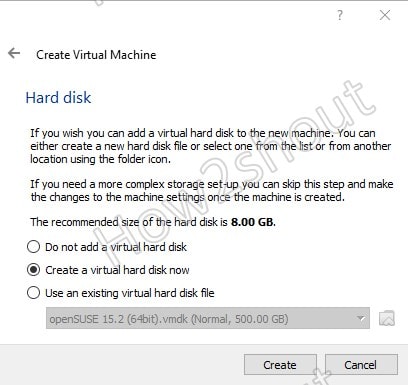
Although there is no need of creating a virtual hard drive because we cannot install Tails on a Hard disk, however, we need some storage space in case we want to download some file or software on it. Thus, let the default option selected and click on the Next button.
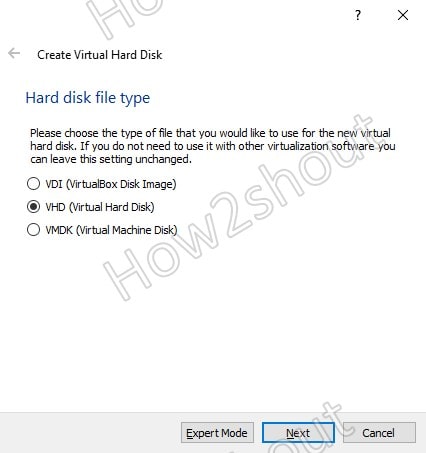
Select VHD (Virtual Hard Disk) as a file type…
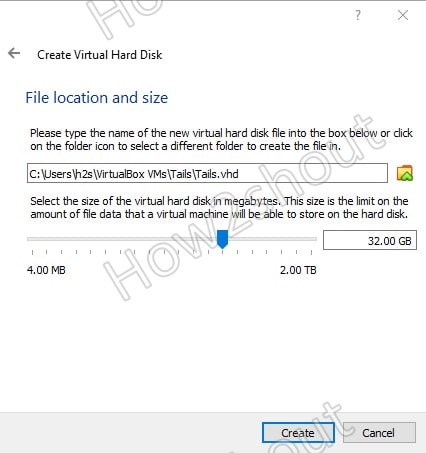
Set the amount of storage you want on your virtual hard disk, here we are assigning around 30 GB, you can set less or more as per your requirements…
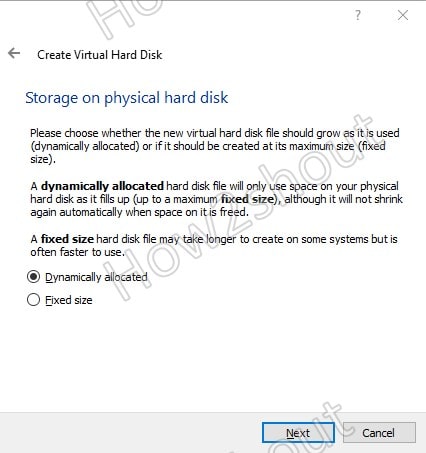
We don’t need the Virtual machine to block all assigned storage space immediately on our physical hard drive, thus select “Dynamic allocation” and move forward.
4. Add Tails ISO file as a bootable medium
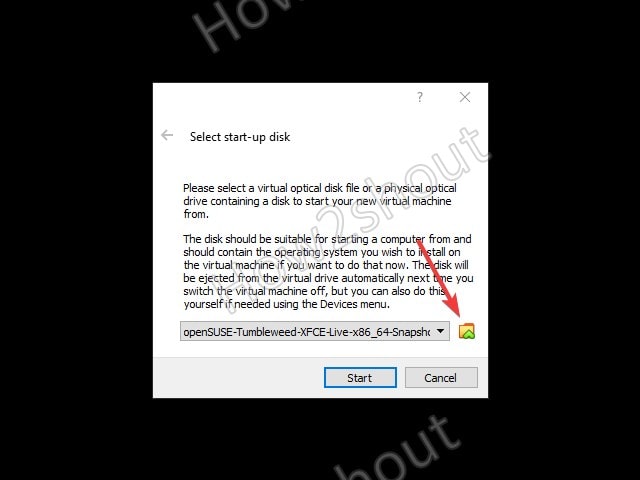
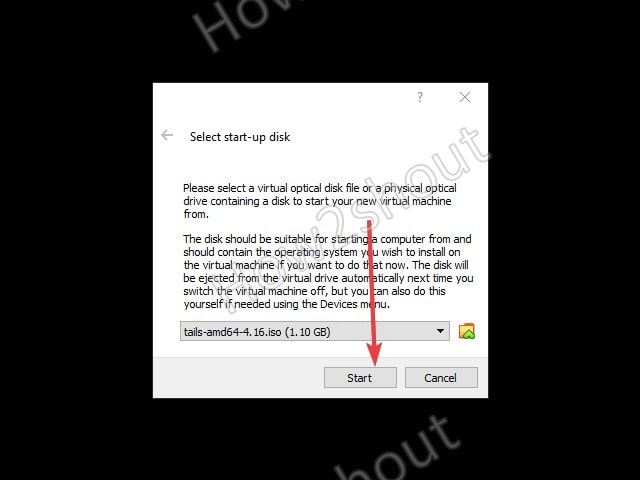
Select the created Tails virtual machine from the left panel of VirtualBox and click on the Start button. When it asks to select a startup disk, click on the Folder icon as shown in the below screenshot.
Now, click on the Add button and select the Tails ISO file you have downloaded. After that, it will show the same in the “Optical Disk Selector” area as Not Attached item, select it, and hit the Choose button.
Finally, click on the Start button to turn On your Tails virtual machine.
5. Enable Tails Administrator or root password
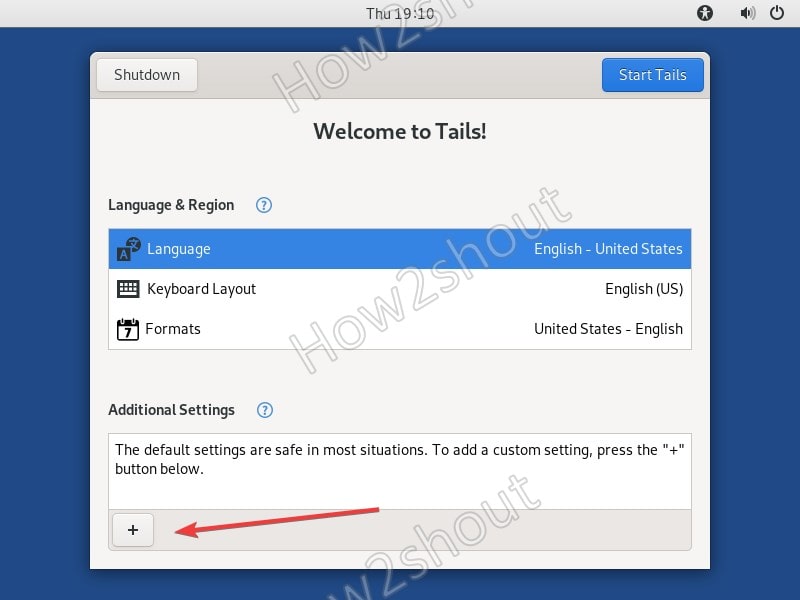
By default, the access to the root password will be disabled, thus if you want to enable then that can only be possible before starting the Tails. You will see a Welcome window after starting the virtual machine. There click on the + icon and select “Administration password“.
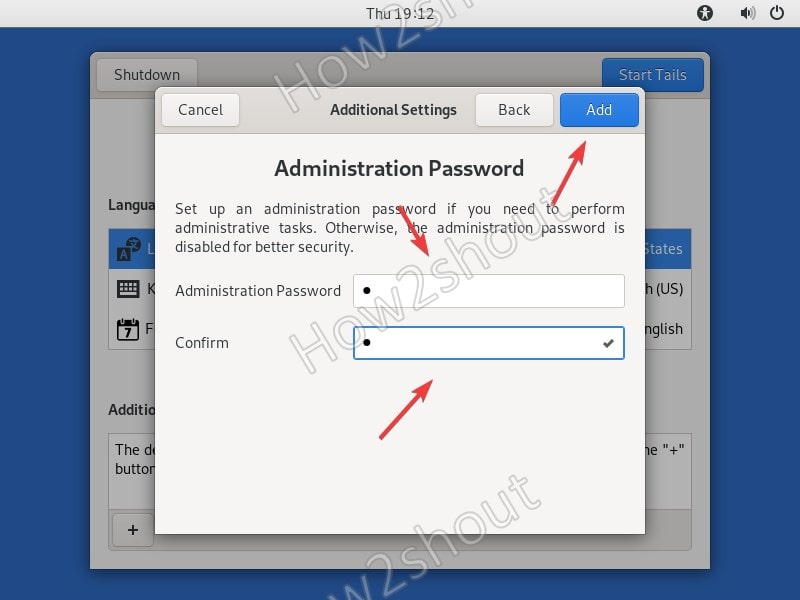
6. Set new Root Password for Tails OS
Type the password you want to use for the Administrator user and then click on the Add button.
7. Start Tails
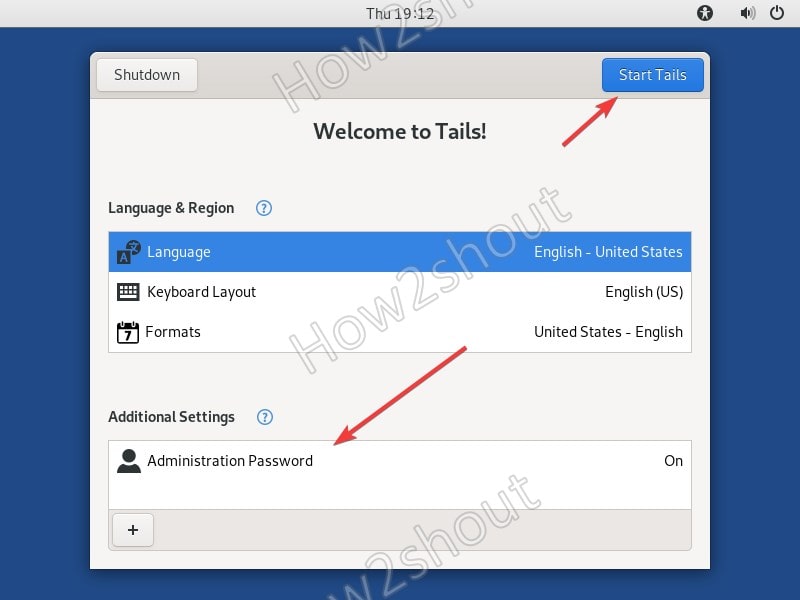
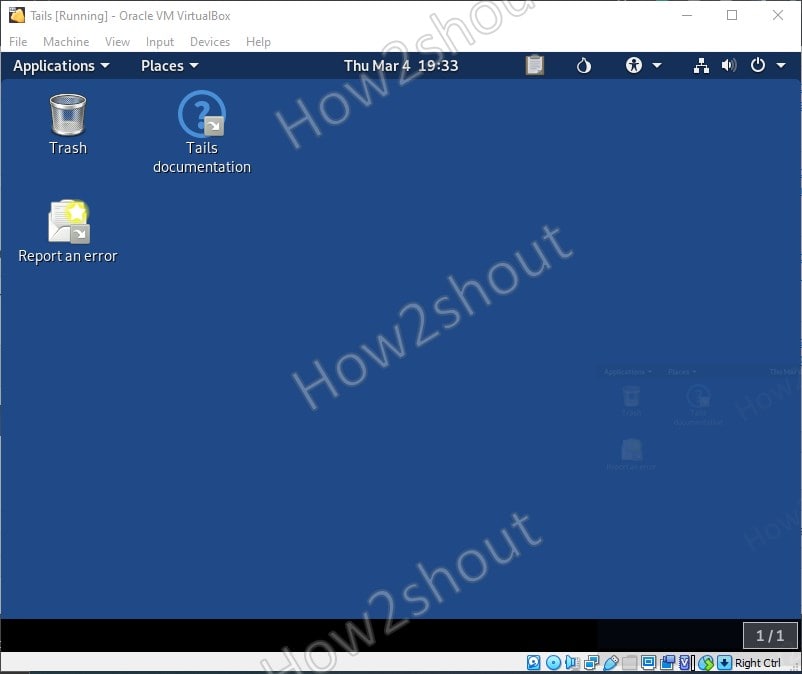
Finally, click on the Start button to get the Desktop screen of this Linux.
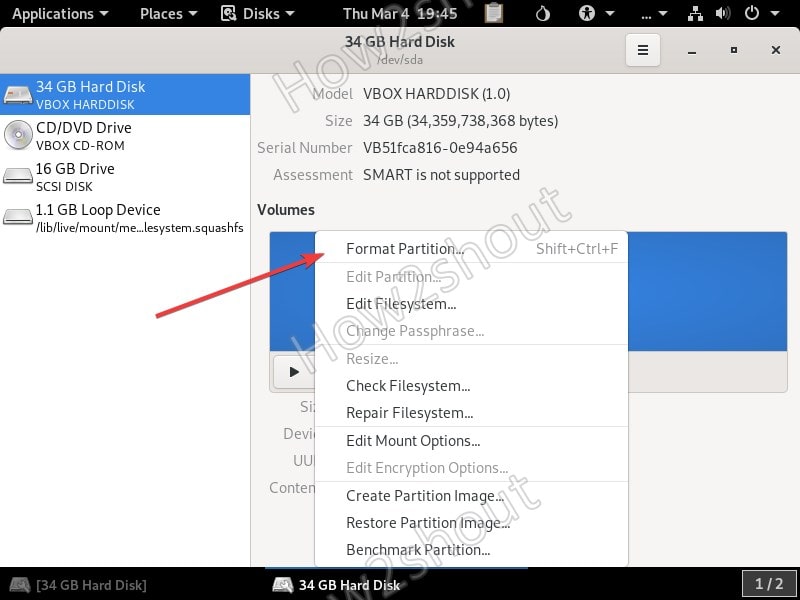
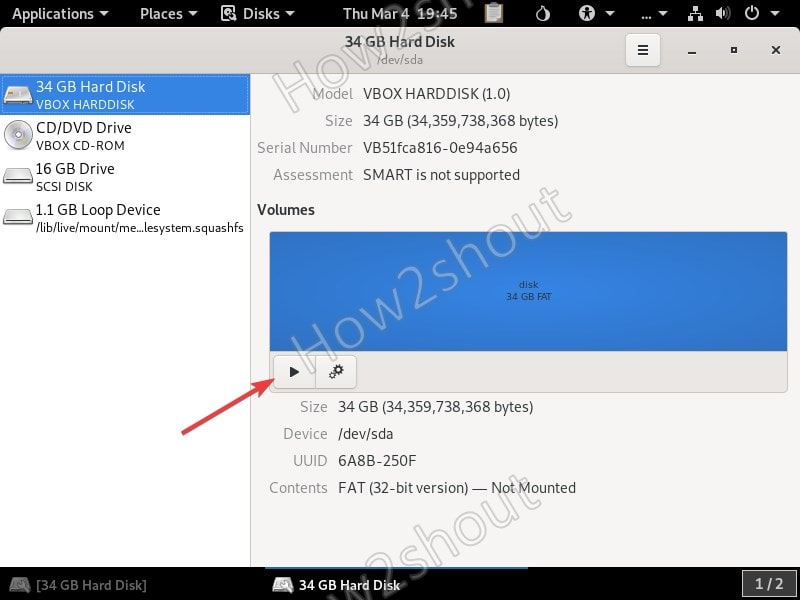
So, now you can use this Debian-based Linux operating system. However, the added virtual drive while creating the virtual machine for Tails can be accessed only after formatting and mounting. For that simply click on Applications-> Utilities-> Disks.
Here are the screenshots to format and mount the virtual hard disk of VirtualBox on Tails Linux.
Install VirtualBox Guest Additions on Tails
Open a command terminal and run the following command:
sudo apt install virtualbox-guest-additions-iso
