Learn the steps to set Alacritty emulator as the default Terminal on Ubuntu 22.04 Jammy or 20.04 Focal fossa to run commands.
Alacritty terminal is known for its fast speed. It’s written in Rust and uses OpenGL for rendering to be the fastest terminal emulator available. It is the simplest terminal emulator for Linux because the developers want to increase its performance of it. That means you won’t find things like tabs, splits, or GUI config editor. Therefore, this terminal is for those who are Linux using some old system or have limited resources or looking for a performance-centric Terminal.
It is not for those who want some fancy Terminal with dozens of features such as Tabby and Terminator instead a simple, minimal one that can use the GPU to enhance the performance. Well, it is a relatively new Terminal as compared to other popular names such as Gnome terminal or XFCE terminal.
Here in this tutorial article, where we know how to set Alacritty as the default terminal application on Ubuntu 22.04 or 20.04 Linux…
Steps to set Alacritty as the default terminal on Ubuntu 22.04 or 20.04
Run command terminal
You can use your Ubuntu default terminal or newly installed Alacritty to set the default terminal. You can use whichever you want however we have to use the Terminal. You can use the Ctlr+Alt+T keyboard shortcut.
Change the default terminal on Ubuntu to Alacritty
Well, to change the default Ubuntu Terminal and set some other, we need to have at least one more Terminal emulator app apart from the one which comes with the system. For example, Ubuntu offers Gnome Terminal but now you have installed the Alacritty and want any of them set as the default one. In such cases, an inbuilt utility of our Linux system, called update-alternatives can be used.
We can use this utility to switch between the installed Terminal applications on our system to make any of them the default one. It is not limited to the terminal apps, we can use it for browsers and other applications as well. It is because this utility is responsible for setting up default applications in Ubuntu or Debian.
Run the given command to change and select the default Ubuntu or Debian Terminal.
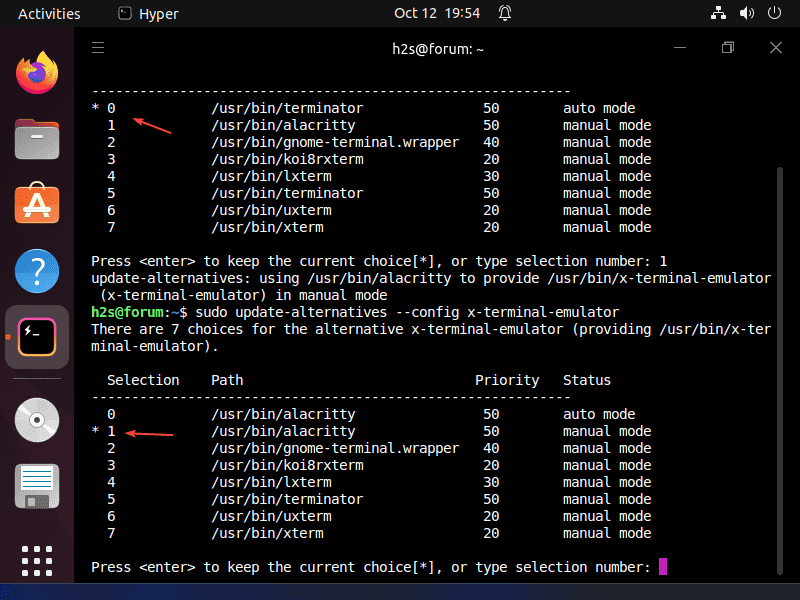
sudo update-alternatives --config x-terminal-emulatorAs you run the above command, you will get the list of all existing Terminal-emulators with a provision to select any of them.
For example:
There are 7 choices for the alternative x-terminal-emulator
(providing /usr/bin/x-terminal-emulator).
 Selection    Path                             Priority   Status
------------------------------------------------------------
* 0            /usr/bin/terminator               50        auto mode
  1            /usr/bin/alacritty                50        manual mode
  2            /usr/bin/gnome-terminal.wrapper   40        manual mode
  3            /usr/bin/koi8rxterm               20        manual mode
  4            /usr/bin/lxterm                   30        manual mode
  5            /usr/bin/terminator               50        manual mode
  6            /usr/bin/uxterm                   20        manual mode
  7            /usr/bin/xterm                    20        manual mode

Press  to keep the current choice[*], or type the selection number:
What you have to do, is first find the “Selection” number of the Terminal that you want to set as the default one. After that type it and hit the Enter key. And you are done. For example, to set Alacritty, we type – 1 and then press the Enter key. In the same way, use the Selection number assigned to Alacritty on your Ubuntu 20.04 or 22.04 system.
Check Alacritty is set as the default terminal or not
Once you are done with the previous steps, it’s time to check whether the default Terminal has been changed and set to the new one or not. For that, run the same command above given again but this time you will see the Asterik (*) in front of the Terminal you have selected. This shows the changes are done, successfully. In the same way, we can change and set any terminal on Ubuntu 20.04 or 22.04 as the default one using the update-alternatives utility. If you are facing any problems while doing this, the comment section is all yours…
Other Articles:
⇒ 12 Best Terminal Apps for Ubuntu Linux
⇒ Install the Terminator Terminal emulator in Ubuntu 22.04 LTS
⇒ How to install Tilda Terminal on Ubuntu 22.04 LTS
⇒ Install Tabby Terminal on Ubuntu 22.04 Linux


