Whether you are running Ubuntu 22.04 or 20.04 or any other version of this Linux, here we learn the commands to install XFCE GUI on Ubuntu Linux running on AWS EC2 Instance.
Amazon Web Services (AWS) is a popular cloud service that runs virtual machines and hosts various applications and services. For example, running Ubuntu Linux instances on AWS Ec2. However, the image installed on AWS Ec2 of Ubuntu uses a command line interface to attain lightweight and high speed. However, there are many users who would like to use a graphical user interface (GUI) on Ubuntu Linux as well just like Windows available on AWS Ec2. So, in this article, we have explained the steps involved in installing the Ubuntu GUI on an AWS EC2 instance. That will make it easier to manage and access their applications and data.
A step-by-step guide to install GUI on AWS Ubuntu Linux running on Ec2 Instance.
1. Launch Ubuntu AWS Instance
Well, ofcourse you must have a running Ubuntu Ec2 Instance on your Amazon cloud service. Those who don’t have it can see our step-by-step guide to creating Ubuntu AWS Ec2.
However, if you already have it, then use the web console or SSH command to connect it, so that we can run the command required to install a GUI – graphical user interface on Ubuntu AWS Linux.
2. Update the APT package list
Next, the first thing to start with once you have the command line access to your Ubuntu instance is to run the system update command. It not only installs the latest available security update but also refreshes the APT package index cache.
sudo apt update && sudo apt upgrade -y3. Install XFCE GUI on Ubuntu AWS EC2 Linux
Now, we will install the lightweight XFCE Desktop environment on Ubuntu Linux, so that we can easily access it using the internet without putting much stress on the Instance resources. Because Amazon charges according to load and usage on the hardware as well as the network.
Moreover, we can easily install XFCE using the system repository of Ubuntu Linux, so just follow the given command in your terminal.
sudo apt install xfce4 -y4. Setup XRDP for remote access
Once the installation of XFCE is completed, also download and set up XRDP which is an open-source implementation of the Microsoft Remote Desktop protocol server. Using it, we will access the GUI interface installed on Ubuntu AWS Linux.
sudo apt install xrdp5. Check the XRDP service status
To know, if our installed XRDP server is working fine as a service in the background, check its status.
systemctl status xrdpIf it is not running then start it:
sudo systemctl enable --now xrd6. Add XRDP user to SSL-Cert group
We need to add our XRDP to the SSL-cert group to access it properly otherwise it will show only a blank screen after establishing a remote desktop connection.
sudo adduser xrdp ssl-certRestart XRDP server
sudo systemctl restart xrdp7. Create a new Linux user for RDP
By default the existing users on your Ubuntu Ec2 instance will not let you access themselves using a plain password instead SSh key is required. So, create a user that we can access with a password because we need it to log in to the GUI interface and access Ubuntu over RDP.
Access the Ubuntu AWS instance command terminal and run.
sudo adduser usernameReplace the username with whatever you want to use. For example:
sudo adduser h2s
Those who wish to use it for updating the system and other files can add the created user in the sudo group.
sudo usermod sudo your-userExample:
sudo usermode sudo h2s
Refresh the session
newgrp sudoNow, log in with your newly created user. Replace h2s with your user.
su h2srun:
sudo apt updateIf it is working, exit:
exit8. Allow RDP port in AWS firewall
RDP used port number 3389 to communicate with other systems, therefore, after installing the XRDP on Ubuntu open it in the AWS security Firewall.
So, to do that, first, select your Ubuntu Ec2 Instance and then click on the Security Tab after that on the Security Group number.
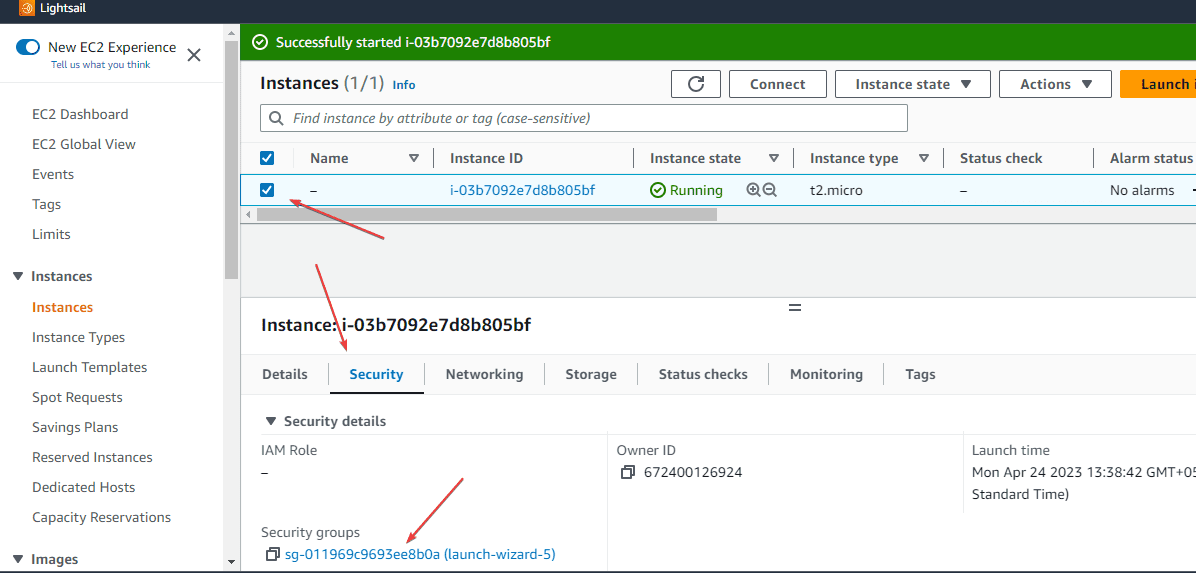
To edit the firewall rules for Instance, click on the “Edit Inbound rules” button.
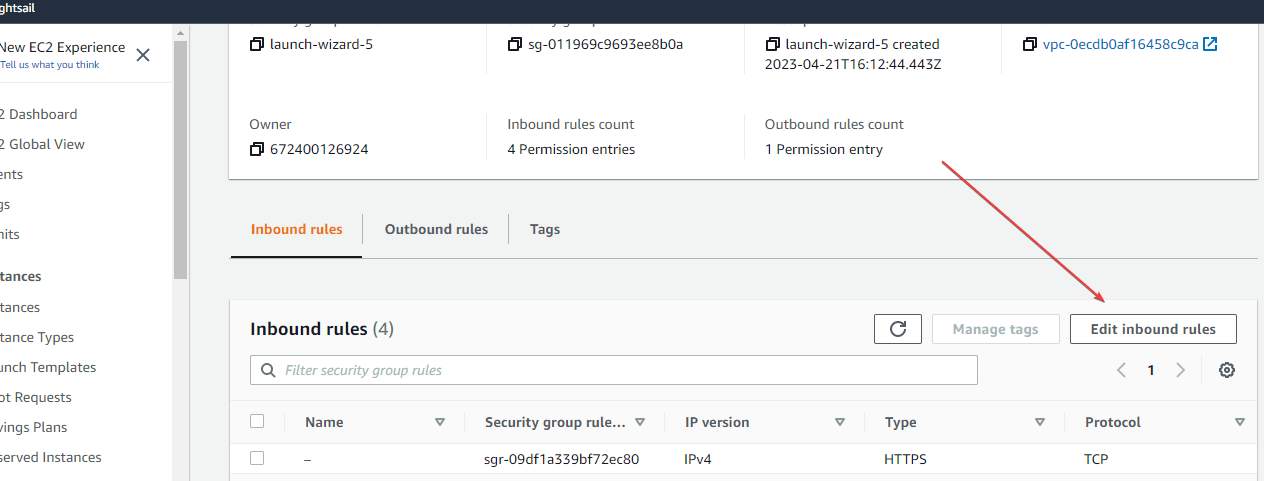
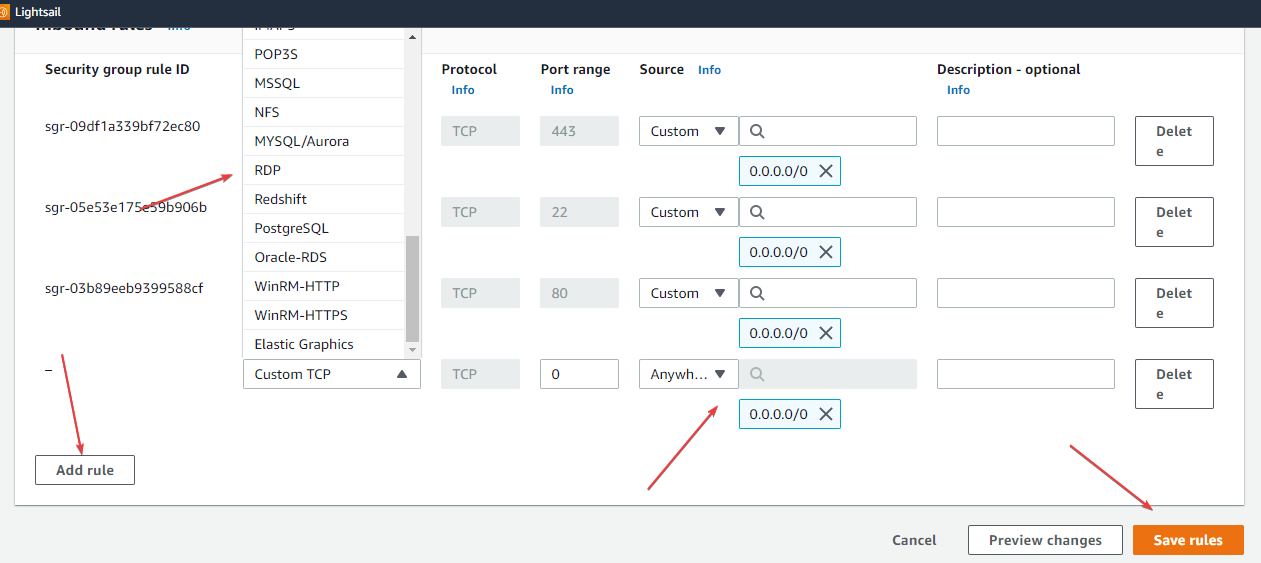
Doing that you will see another page with the option to manage port numbers. To add a new one, click on the “Add rule” button and then select RDP from the drop-down box. Then select the source Ip-addresses; to allow access to the Ubuntu AWS GUI from anywhere select 0.0.0.0/0 and press the “Save rules” button.
9. Open SSH Tunnel on your Windows or Linux
Now, it’s time to access the GUI interface of Ubuntu AWS Ec2 Linux. However, to do this securely we will use the SSH key created to access our Ubuntu EC2 instance that you downloaded while creating the instance.
In case you have lost your SSH key or want to create a new one can see our article: How to add a new key pair to your existing AWS ec2 Instances.
Open Command terminal in Windows or Linux:
Use the given command to open the SSH tunnel for AWS Ec2 Ubuntu Server.
Note: Replace “myubuntu.pem” with the path where you have saved your AWS Instance SSH Key and then 43.204.236.173 with the public Ip address of your Instance.
ssh -i "myubuntu.pem" -qnN -L 3389:127.0.0.1:3389 43.204.236.173
We have our Instance SSH key on the system’s Desktop, so we have switched to that and ran the above command. The output will ask you to accept fingerprints.

10. RDP Ubuntu AWS EC2 Linux to access GUI
Well, if you are using Windows then you will already have a remote desktop application. Whereas the Linux user can use the FreeRDP application from the internet to use.
Here we are showing the tutorial using Windows’ default RDP client application.
Open the Remote Desktop connection and enter the Ubuntu server Ec2 public IP_address.
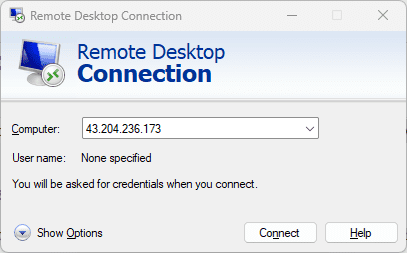
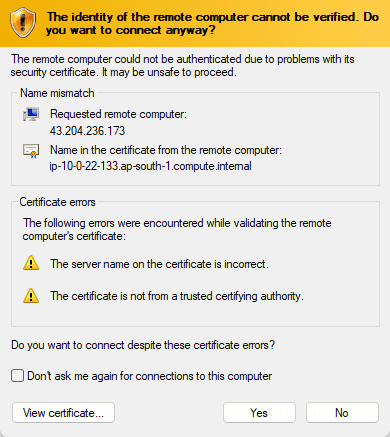
Accept the Security Certificate to continue.
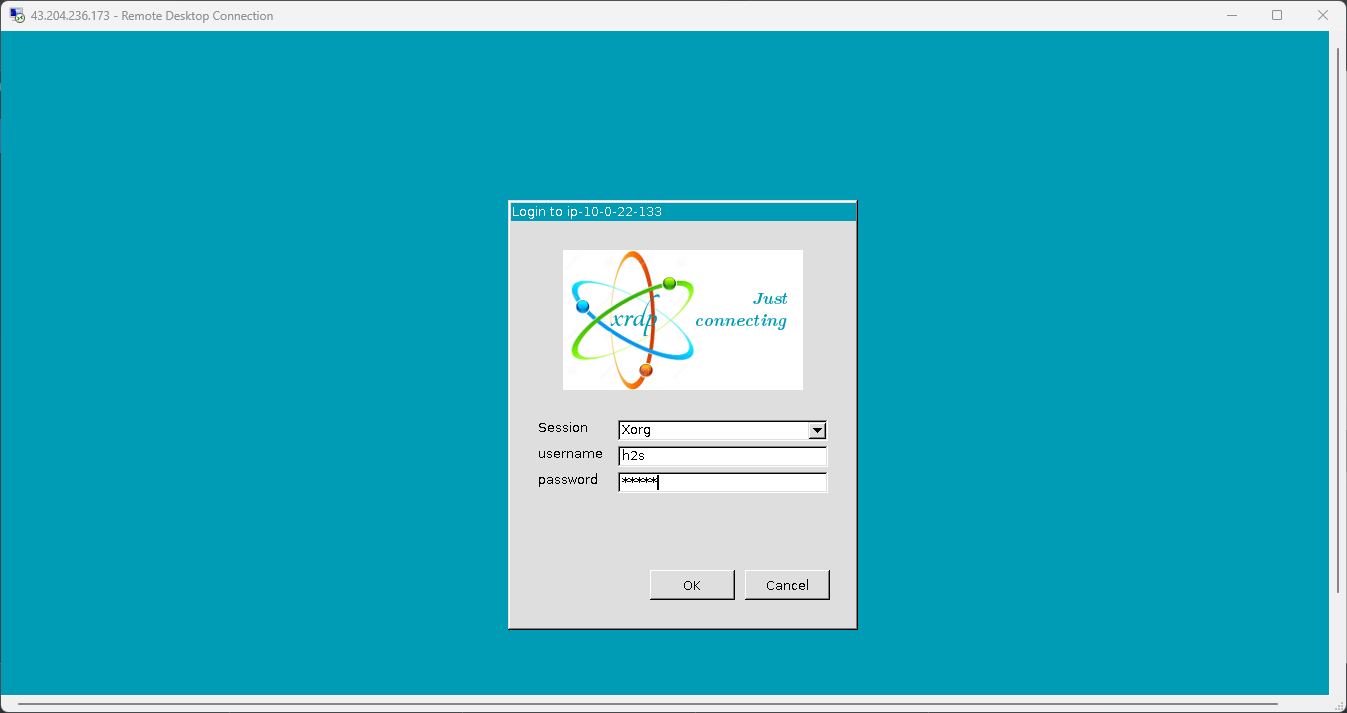
Once the connection is established you will see the XRDP login screen. Here you have to use the Username and password, we have created in Step 7 of this article.
11. Start using Ubuntu AWS EC2 GUI
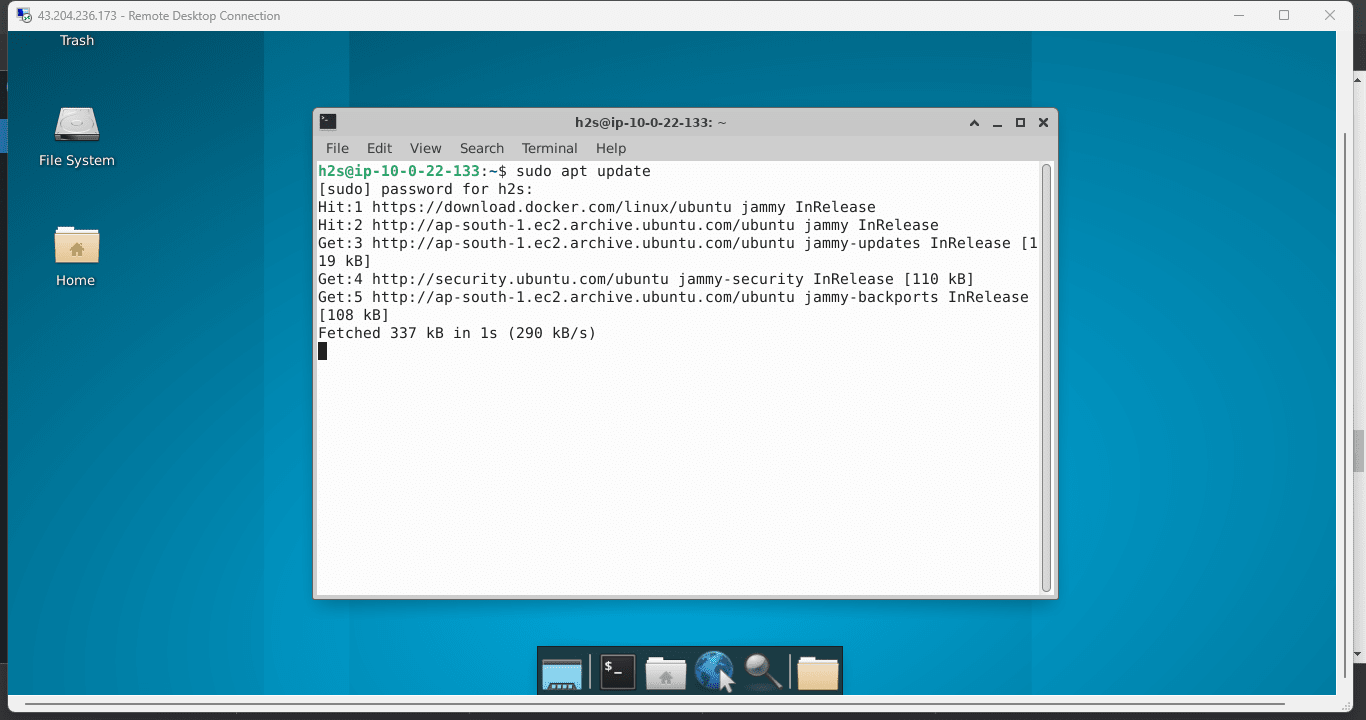
Finally, we completed the tutorial and got what we want, which is a graphical user interface to access the Ubuntu Linux running on an AWS Ec2 instance. You can start executing your required command now from your local Windows, macOS, or Linux PC.
Other Articles:


