Learn the commands to install the Vaultwarden server on Ubuntu 22.04 LTS Jammy JellyFish for creating your own safe space to store passwords, bank information, and other important keys.
Those who have heard about Bitwarden would already know how it works. However, there is an unofficial alternative to this software platform called Vaultwarden. It is written in Rust and supports Bitwarden clients as well. Also consumes fewer resources and uses Docker to get set up on your system just like Bitwarden. Here we will also use the Caddy docker container to secure and implement SSL configuration.
It offers:
♦ No synchronization via a local file on end devices
♦ No Nextcloud, OneDrive, or Dropbox required
♦ Real-time synchronization across all devices
♦ Across all common browsers in real-time
♦ Smartphones Sync
♦ Simple protocol HTTP/HTTPS
♦ Web application accessible via browser
♦ Self-hosting for digital sovereignty
♦ Easy installation and maintenance
♦ No complicated data backup
♦ No desktop installation required
Steps to install Vaultwarden on Ubuntu 22.04 LTS Jammy
The steps are given here can be used for other Ubuntu versions such as 20.4/18.04 including POP_OS, Elementary OS, Linux Mint…
1. Add Docker’s GPG Key
As we need docker to install Vaultwarden, hence, if you already have docker on your Ubuntu 22.04 then skip the steps of installing Docker and directly jump to Step 5.
First, we need the Public key used by the developers of Docker to sign its packages. Hence, here is the command to add the GPG key.
Install the commonly required packages:
sudo apt install apt-transport-https ca-certificates curl gnupg-agent software-properties-common
After that add the key:
sudo mkdir -p /etc/apt/keyrings
curl -fsSL https://download.docker.com/linux/ubuntu/gpg | sudo gpg --dearmor -o /etc/apt/keyrings/docker.gpg
2. Add the repository of Docker
Next, add the Docker repository on Ubuntu Jammy using the given command that automatically detects the system’s version and points the repo URL to the GPG key we have configured in the previous step.
echo \
"deb [arch=$(dpkg --print-architecture) signed-by=/etc/apt/keyrings/docker.gpg] https://download.docker.com/linux/ubuntu \
$(lsb_release -cs) stable" | sudo tee /etc/apt/sources.list.d/docker.list > /dev/null
3. Update your Ubuntu 22.04
After successfully adding the official repository of Docker, run the system update command that will refresh the APT package index cache, so that our system can know about the packages available to install using the newly added repository.
sudo apt update
4. Install Docker Engine
Finally, install the docker engine, CLI, and compose using the given command:
sudo apt install docker-ce docker-ce-cli containerd.io
Make sure Docker is enabled and running without any error:
sudo systemctl enable --now docker
Check status:
sudo systemctl status docker
Add your user to Docker Group
sudo usermod -aG docker $USER
Activate the changes to groups:
newgrp docker
5. Install Vaultwarden on Ubuntu 22.04
Well, technically we are not installing Vaultwarden directly on Ubuntu 22.04 but instead as a virtual container on Docker. Hence, here are the steps to follow:
Docker Valutwarden Docker Image
docker pull vaultwarden/server:latest
Create a Directory to store the data generated by the Vaultwarden
sudo mkdir /srv/vw-data/
sudo chmod go-rwx /srv/vw-data/
Create a Container running using:
First scenario:
Now, If you are using have a third-party DNS manager and SSL certificate provider such as Cloudflare then simply run the given command:
sudo docker run -d --name vaultwarden -v /srv/vw-data:/data -e -p 80:80 -p 443:443 -p 3012:3012 --restart on-failure vaultwarden/server:latest
After that, point your domain’s A record in DNS to the IP address of the Ubuntu 22.04 Server where you have installed the Docker.
2nd Scenario:
In case you don’t want to use any third-party DNS service such as Cloudflare and want to generate an SSL certificate using Let’s Encrypt then use the Caddy web server as a proxy service. In that case instead of the above command run the given one to create a Container using Vaultwarden Image.
sudo docker run -d --name vaultwarden -v /srv/vw-data:/data -e WEBSOCKET_ENABLED=true -p 127.0.0.1:8080:80 -p 127.0.0.1:3012:3012 --restart on-failure vaultwarden/server:latest
The difference between the two commands is the first one forwards the ports 80 & 443 of the Vaultwarden container to the host’s 80 & 443 ports of Ubuntu 22.04. This means, that when somebody will try to connect our Ubuntu 22.04 server’s port 80 or 443, he or she will forward to Vault container to get the Web view of this password manager.
Whereas, the second command limits the Vaultwarden to localhost and port number 8080.
6. User Caddy web server as Proxy
Those who want to generate their SSL certificate using Let’s encrypt can use the Caddy web server which by default enables HTTPS for all its domains. However, first, make sure you have pointed A record of your Fully qualified domain in DNS to the Server-Ip where you have installed the Docker, here it is Ubuntu 22.04.
Download Caddy Docker Image:
sudo docker pull caddy:latest
Now, first, create a Caddy file that holds the domain name we want to use and the ports we want to use for proxy.
sudo nano /etc/Caddyfile
Add the following lines:
Replace yourdomain.com with the one you want to use to access the Vaultwarden.
yourdomain.com {
encode gzip

# The negotiation endpoint is also proxied to Rocket
reverse_proxy /notifications/hub/negotiate 0.0.0.0:80

# Notifications redirected to the websockets server
reverse_proxy /notifications/hub 0.0.0.0:3012

# Send all other traffic to the regular Vaultwarden endpoint
reverse_proxy 0.0.0.0:80
}
Save the file using Ctrl+O, hitting the Enter key, and then exit the editor by pressing Ctrl+X.
Create a directory to store the data generated by the Caddy web server and set permission to let only the root user access it:
sudo mkdir /etc/caddy
sudo chmod go-rwx /etc/caddy
Now, Create Caddy Container using the file we have created for it. Also, open forwards its port 80 and 443 to host.
sudo docker run -d -p 80:80 -p 443:443 --name caddy -v /etc/Caddyfile:/etc/caddy/Caddyfile -v /etc/caddy:/root/.local/share/caddy --restart on-failure caddy:latest
To confirm you have successfully got an SSL certificate, look for Logs:
sudo docker logs caddy
7. Vaultwarden Web interface
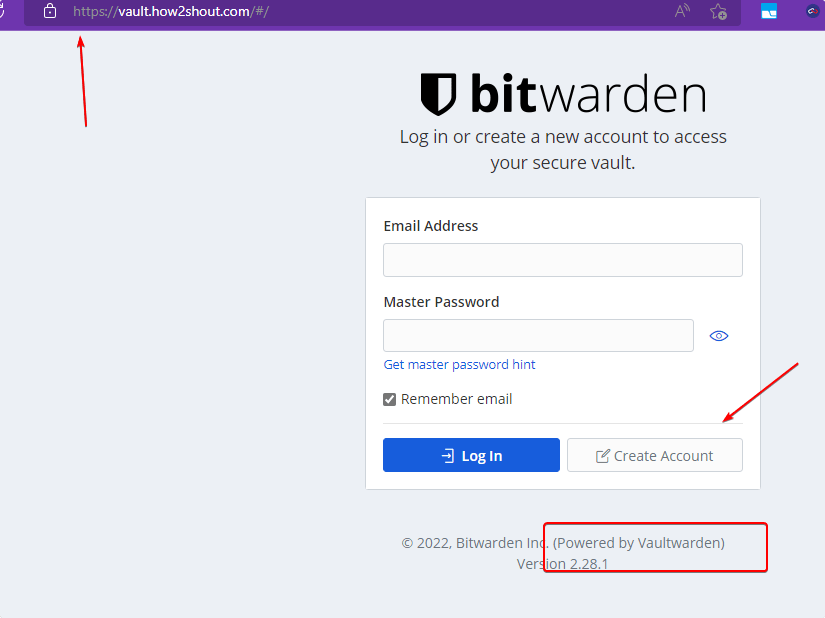
Once all the above steps are completed, open your local browser and point it to the domain name you have used to set up in Caddy for Vaultwarden, for example: here we are using vault.how2shout.com.
Once you have the Web interface, click on the “Create Account“.
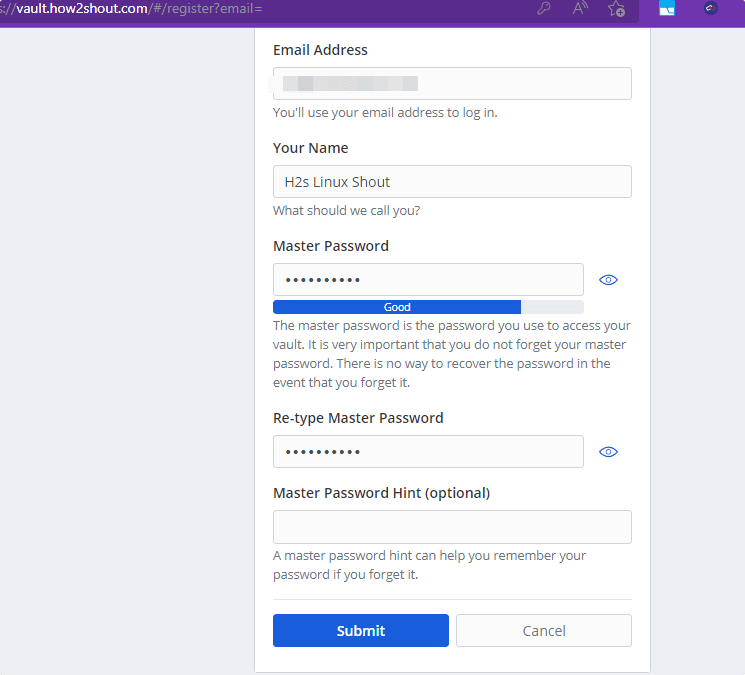
Add the details asked by the setup wizard of Vaultwarden to create a Master account.
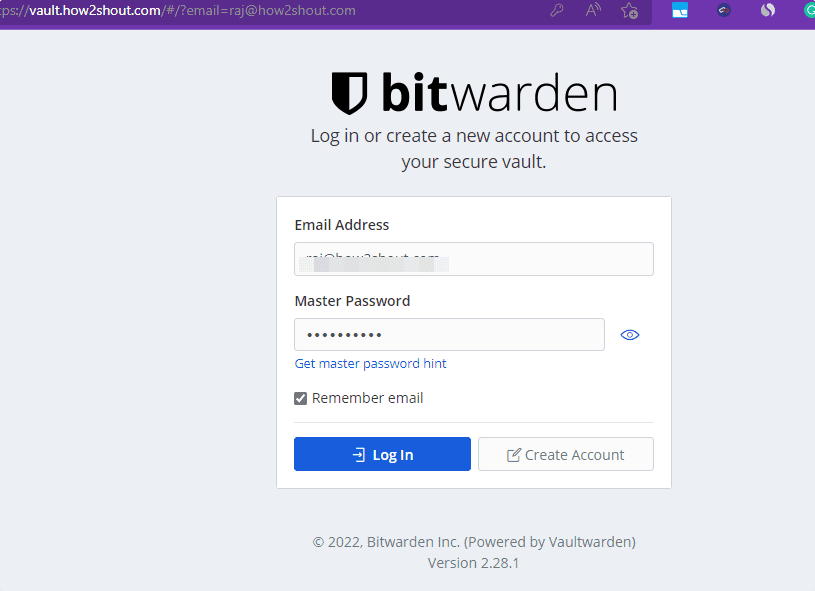
Now use the login credential you have used for creating a Master account.
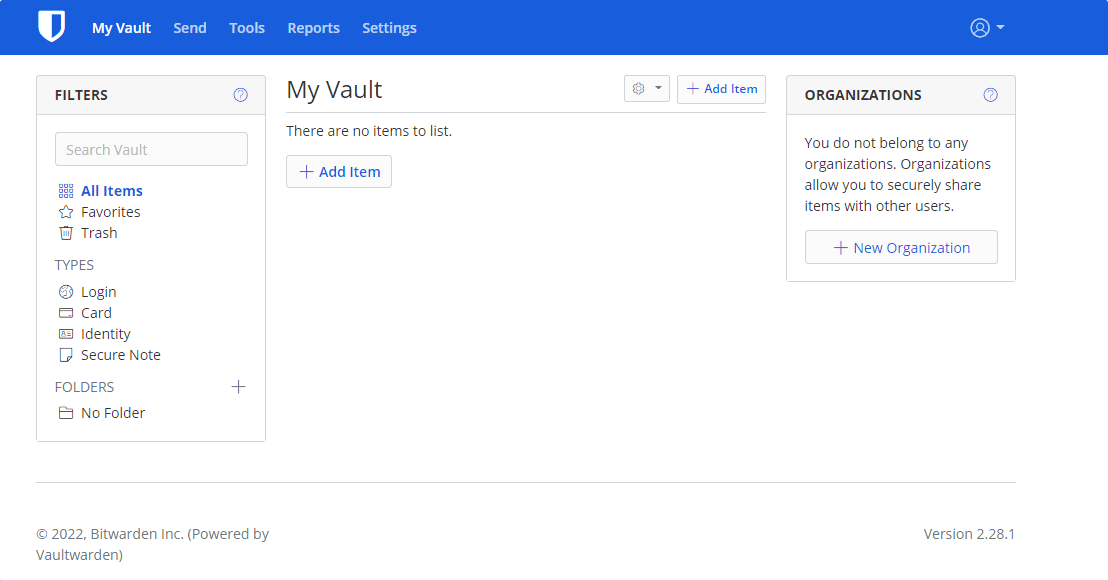
8. Ubuntu 22.04 – Vaultwarden Dashboard
Finally, you will have the Vaultwarden Dashboard to create and manage your passwords. If you want, then you can use the Bitwarden client app on your Desktop or smartphone to remotely upload and sync the passwords.
9. Disable new user sign up
By default, anyone can create a new account to store their passwords on the Vaultwarden server, if your server is accessible publically by everyone and you don’t want new users to sign up then after creating your own Master account you can disable the new account creation by following the given commands.
Stop Vaultwarden container:
sudo docker stop vaultwarden
Remove it
sudo docker rm vaultwarden
Note: don’t worry it will not delete the data of Vaultwarden because we have saved it on our host under the directory /srv/vw-data/
Again create a container with the same command we have used earlier but with an additional variable i.e SIGNUPS_ALLOWED=false
For Caddy users
sudo docker run -d --name vaultwarden -v /srv/vw-data:/data -e WEBSOCKET_ENABLED=true -e SIGNUPS_ALLOWED=false -p 127.0.0.1:8080:80 -p 127.0.0.1:3012:3012 --restart on-failure vaultwarden/server:latest
For those who want direct access to Vaultwarden without any proxy server and are using third-party DNS and SSL providers such as Cloudflare.
sudo docker run -d --name vaultwarden -v /srv/vw-data:/data -e WEBSOCKET_ENABLED=true -e SIGNUPS_ALLOWED=false -p 80:80 -p 443:443 -p 3012:3012 --restart on-failure vaultwarden/server:latest
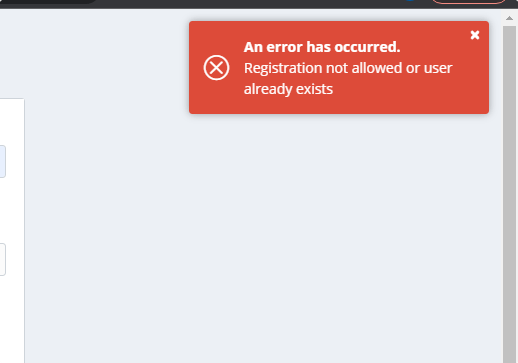
After disabling the new user signup, when anybody will try to create a new account, an error will appear:
“Registration not allowed or user already exists”.
10. Automatic Backup Vaultwarden Database
If you want to ensure that you never lose your crucial password database stored using the Vaultwarden on your Ubuntu 22.04 system, then create a service file that will automatically backup your data after a set interval of time.
Vaultwarden stores data in a flat-file sqlite3 database but in an encrypted format. Hence, we will install the sqlite3 database package on your Ubuntu 22.04 to use its command for creating a regular backup of our Vaultwarden database.
sudo apt install sqlite3
Create a directory where you want to store the Database backup of Vaultwarden, let’s say you want it under /srv the directory inside a folder called backup.
So first create that directory:
sudo mkdir /srv/backup
Change its permission:
sudo chmod go-rwx /srv/backup
Create a service file that will run in the background to take the backup:
sudo nano /etc/systemd/system/vaultwarden-backup.service
Copy-paste the given lines:
[Unit]
Description=Vault backup

[Service]
Type=oneshot
WorkingDirectory=/srv/backup
ExecStart=/usr/bin/env sh -c 'sqlite3 /srv/vw-data/db.sqlite3 ".backup backup-$(date -Is | tr : _).sq3"'
ExecStart=/usr/bin/find . -type f -mtime +30 -name 'backup*' -delete
Save the file by using Ctrl+O, hitting the Enter key, and then exit the editor by pressing Ctrl+X.
The above will create the backup and also deletes the one older than 30 days.
Take your first backup by starting the created service:
sudo systemctl start vaultwarden-backup.service
To schedule the backup as per your requirement you can create a timer service unit. That will let us control – how frequently the above service unit should run to take backup.
Create a timer unit:
sudo nano /etc/systemd/system/vaultwarden-backup.timer
Add the following lines:
[Unit]
Description= Vault backup timer

[Timer]
OnCalendar=06:00
Persistent=true

[Install]
WantedBy=multi-user.target
Save and exit the Editor.
Note:06:00 can be changed in the above command to tell the system when the backup should run daily.
Start the Timer service and enable it to run in the background:
sudo systemctl enable --now vaultwarden-backup.timer
To check the status of the service:
sudo systemctl status vaultwarden-backup.timer

Other Articles:
• 3 ways to install Nodejs & NPM on Ubuntu 22.04
• How to Download Youtube videos on Ubuntu…
• Install VMware Workstation Player on Ubuntu 22.04…


