Do you want your own personal music server on Ubuntu 20.04 Linux just like Soundcloud? Then try our Subsonic, a free open source music server to stream music using the internet or local network.
Subsonic is a friendly solution to create a streaming media content server on Windows, Linux, or macOS systems. The installation is easy and its support for various media types is also vast. Not only audio files, but they can also be used to stream videos or movies (premium). Just like Google Music and Spotify, Subsonic provides built-in support for your Sonos player to access a personal music library. However, you can use the Subsonic app on your PC or smartphone to stream media content as well. Furthermore, one can also use its web interface to set up the music server according to needs and define, among other things, the desired music folder, the appearance of the web interface, and individual playlists.
The premium features can also be tried out in the first 30 days after the installation of this media server.
Steps to install Subsonic music server on Ubuntu 20.04 Linux
The process of installing and configuring Subsonic will also be the same for other versions of Debian or Ubuntu such as Ubuntu 19.4/18.04/16.04 including Linux Mint, Elementary OS, Zorin OS, and other similar kinds of Linux distros.
Update your system
Before moving forwards let’s make sure all the installed packages on Ubuntu 20.04 or in the previous version you are using are up to date.
sudo apt update
Install Java JRE-8
Subsonic needs Java & its based Jetty web server to run, thus first we install that on our Ubuntu Linux. Thus, to install Java run the following command:
sudo apt-get install openjdk-8-jre
Download Subsonic
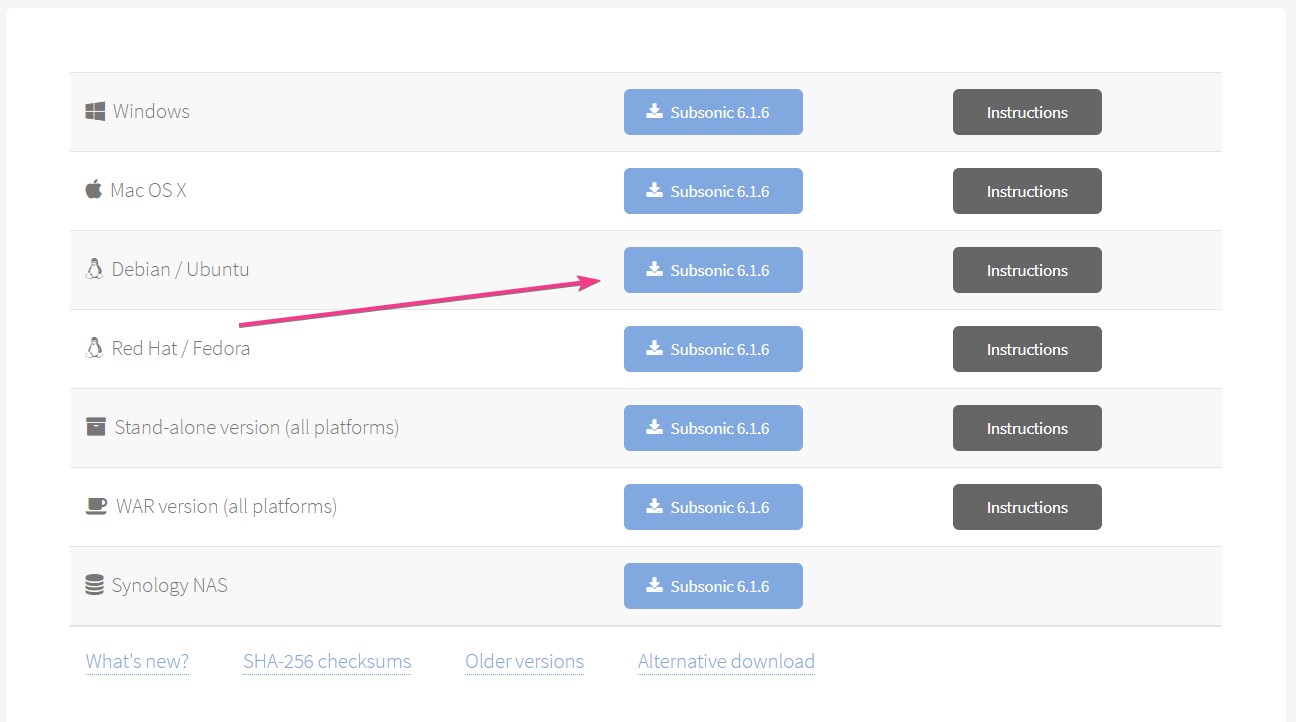
There are various kinds of executable files available for different platforms such as Windows, Mac OS X, Debian / Ubuntu, Red Hat / Fedora, Stand-alone version (all platforms), WAR version (all platforms), and Synology NAS. However, here we are using the Debina one. The best thing we don’t need to set up any additional web server such as apache to run the SubSonic. So, let’s first download the deb package of it.
Go to the official website download page of this open-source music server and click on the package you want to install. If you are on Ubuntu or Debian then get the available corresponding to that.
Those are on the command line server, they can use the wget utility to download the file. However, while writing this tutorial the latest version of Subsonic was 6.1.6. In case you are performing, if the Subsonic music server got some update, then simply first confirm the version number and then change the same in the below-given command.
wget https://s3-eu-west-1.amazonaws.com/subsonic-public/download/subsonic-6.1.6.deb
Install Subsonic Music server on Ubuntu 20.04 LTS
Finally, the Java and Debian packages of Subsonic both are your system, now it’s time to install the Subsonic. Again go to your Command terminal and type the following commands:
If you have downloaded the Subsonic package using the browser then by default it will go to the Downloads folder. Therefore, first switch to that;
cd Downloads
Now, use the dpkg to install the Debian package:
ls
sudo dpkg -i subsonic-6.1.6.deb
Note: In case you have a different version of this music server then change the file name “subsonic-6.1.6.deb” with the version you have downloaded.
Add non-root user for Subsonic
by default the media server will run under the root user, therefore to improve the security, we will create a user that would not have the root access to run Subsonic.
Note: You can change the user name “subsonic” in the below command as per your choice.
Create a system user:
sudo useradd --system subsonic

sudo gpasswd --a subsonic subsonic
Specify the user in the config file
Open the configuration file using the text editor:
cd etc/default/
sudo nano subsonic
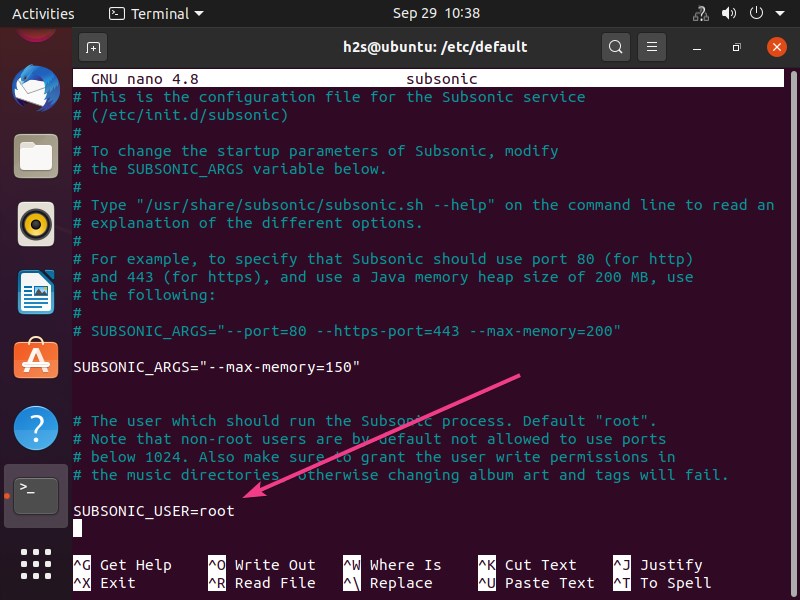
In the file change the SUBSONIC_USER=root to SUBSONIC_USER=subsonic
You can also change the port number, increase Subsonic Memory, and enable SSL support here. However, right now we are just changing the user name.
Save the file by pressing Ctl+X , type Y and hitting the Enter button.
Restart eh Subsonic server
After committing the changes, restart the server to make the change into effect.
sudo service subsonic restart
To enable the subsonic automatically start with system boot:
sudo systemctl enable subsonic
Create a Music folder
Now, create a Music folder using the given command and after that give its access permission to the Subsonic user we have created above:
sudo mkdir /var/music

#For those want to steam videos as well...

sudo mkdir /var/movie

#Give Subsonic, the permission of these folder

sudo chown subsonic:subsonic /var/music
sudo chown subsonic:subsonic /var/movie
Note: You can change the Music folder path as per your requirement. It could be in a NAS box or an external drive.
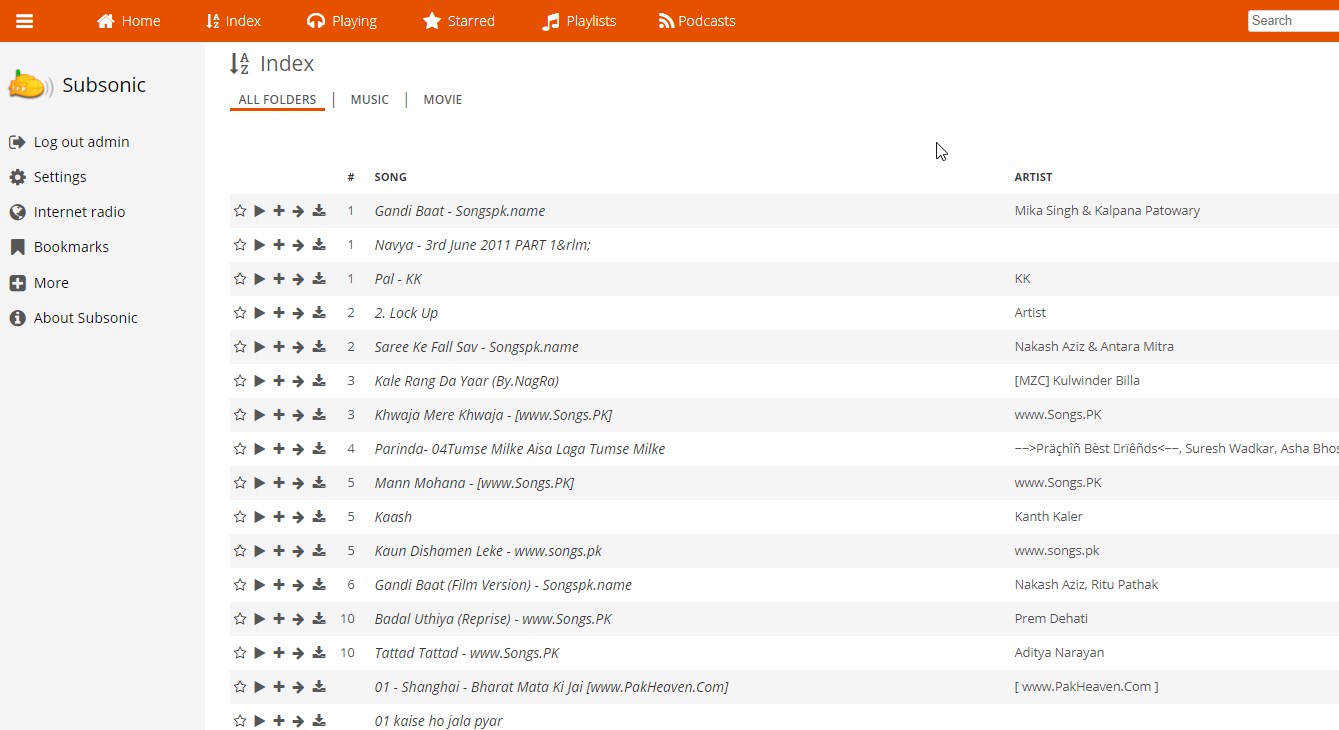
After this, add all your music files to the folder you created above.
Open Subsonic in a web browser
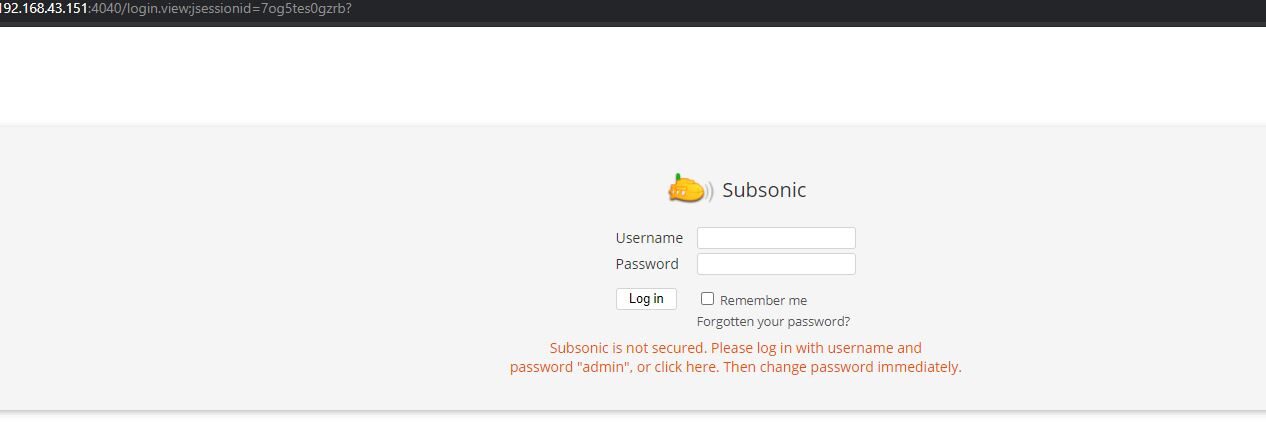
If you are using the local system browser then to access the Subsonic Admin web page, type: localhost:4040 in the browser. However, on other systems in the same network use the system or server IP address where this music server has been installed. The port number is 4040.
By default, the password and username of Subsonic is admin
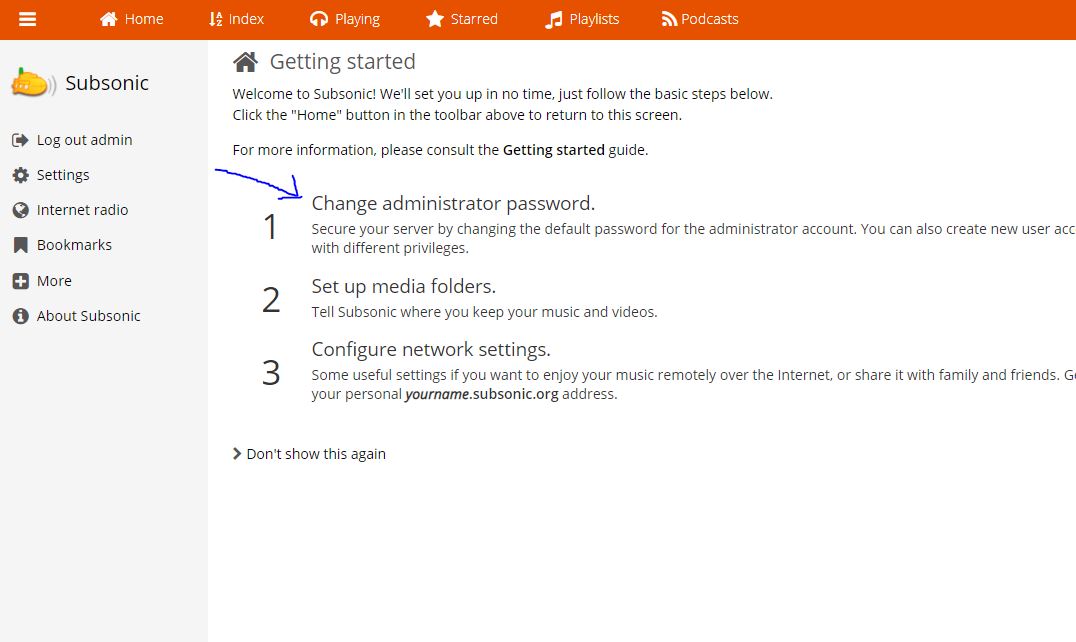
Change Administrator Password
The first thing you will see after login is the suggestion to change the Administrator password. Click on the link given there and change it to ensure better security from preparators.
Setup Music folder
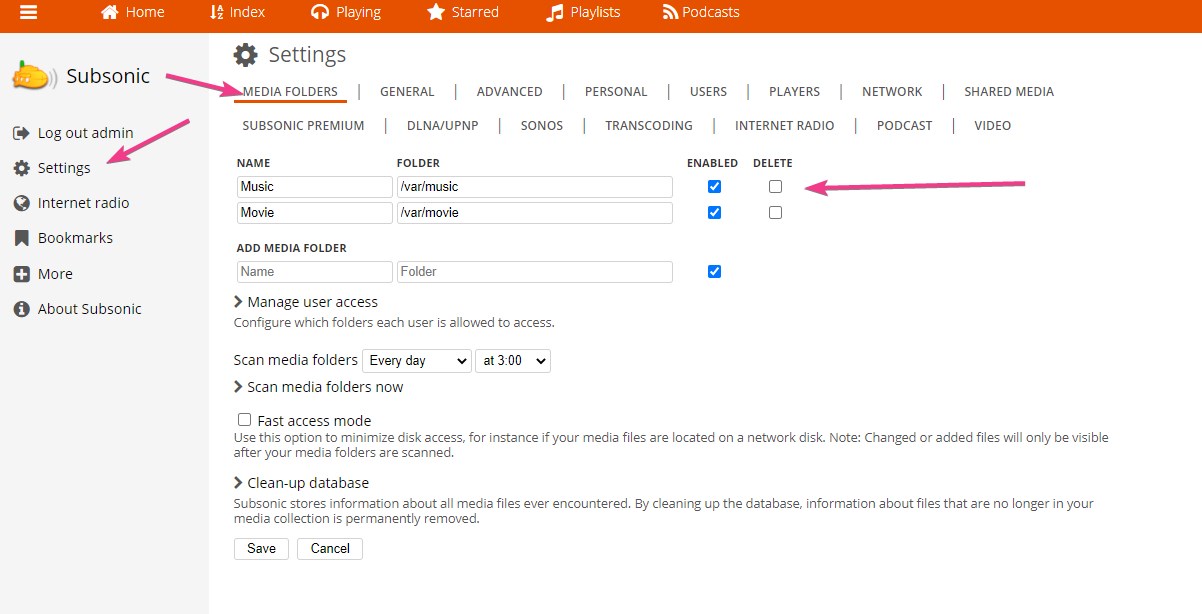
Click on the Settings and then the Music folder to set the folders for music and movies you have created.
That’s it, start enjoying your music streaming on PC, laptop, Android, and other devices. However, those who want to enable SSL support can follow the official guides.


The guide helped me, but I gotta admit it had several issues. One of them is creating the new user subsonic which I believe is unnecessary, it only created new problems, there are also a few syntax problems with the commands but no big issue. Even tho thanks for the guide.
It installs without complaint for me on Ubuntu 20.04.4 LTS but the web interface does not work. It returns ERROR 503 “Service Unavailable”. The subsonic log shows an error parsing some kind of XML resource for sonos. Does anybody know how to fix this?
836 [main] ERROR org.springframework.web.context.ContextLoader – Context initialization failed
org.springframework.beans.factory.BeanDefinitionStoreException: Unexpected exception parsing XML document from ServletContext resource [/WEB-INF/applicationContext-sonos.xml];