Tutorial for learning the commands and steps to install SonarQube on Ubuntu 22.04 LTS Jammy JellyFish for analyzing code quality.
If the code is to be analyzed statically and dynamically, several tool decisions have to be made. In the Java world, but also in the C# world, one is tempted to integrate tools such as PMD, Checkstyle, Findbugs, StyleCop, and FxCop, into the build system. This means that you have to be able to configure these tools. The presentation and thus the analysis of the measured metrics and violations of programming guidelines are sometimes difficult in such an ad-hoc operation.
A solution to the dilemma is provided by tools that wrap around analysis tools and offer a holistic view of static and dynamic analysis results. Some open source platforms can be used in heterogeneous environments, such as SISSy, ConQAT, and SonarQube.
SonarQube (formerly it was known as Sona) is an analysis tool that can be used in Java and C# projects to get a holistic view of static and dynamic analyses. As a result, developers do not need to have any knowledge of the configuration of the integrated quality assurance tools.
It can find the security vulnerabilities in more than 20 programming languages along with auto-analyzing code quality to detect code bugs and smells. It also offers reports on duplicated code, coding standards, unit tests, code coverage, code complexity, comments, bugs, and security vulnerabilities.
Steps to install SonarQube on Ubuntu 22.04 LTS Linux
Estimated reading time: 9 minutes
1. Update Ubuntu 22.04
Perform the system update command to install the latest available security application updates on your Ubuntu 22.04 Desktop or server The first thing we should do before installing any software on Linux using a command terminal is run of update command, thus run:
sudo apt update && sudo apt upgrade
Also, install:
sudo apt install curl gnupg software-properties-common apt-transport-https lsb-release
2. Install Java OpenJDK
Java is one of the requirements to install and set up SonarQube on Ubuntu 22.04 or 20.04 and its based operating systems.
sudo apt install openjdk-11-jdk
Increase the Virtual memory
sudo sysctl -w vm.max_map_count=524288
sudo sysctl -w fs.file-max=131072
ulimit -n 131072
ulimit -u 8192
Reboot your system once…
reboot
3. Create a user for Sonarqube
The latest version of Sonar cannot run under the root user, thus we will create a new user to access only Sonarqube installation.
Add user
sudo adduser --system --no-create-home --group --disabled-login sonarh2s
Note: you can change sonarh2s with whatever username and password you want to set.
4. Install PostgreSQL 13 on Ubuntu 22.04
The supported Database servers by SonarQube are PostgreSQL, Oracle Database, and Microsoft SQL server. Here we are installing and using open-source PostgreSQL. However, while writing this article the version provided by the Ubuntu 22.04 default repository of PostgreSQL was v14, whereas the supported one for SonarQube was version v13. Therefore, we manually need to add the Repository of PostgreSQL to download the supported version of it.
Add GPG key:
curl https://www.postgresql.org/media/keys/ACCC4CF8.asc | gpg --dearmor | sudo tee /etc/apt/trusted.gpg.d/apt.postgresql.org.gpg >/dev/null
Add repo:
echo "deb [arch=amd64] http://apt.postgresql.org/pub/repos/apt/ jammy-pgdg main" | sudo tee /etc/apt/sources.list.d/postgresql.list
Run system update
sudo apt update
Install PostgreSQL 13
sudo apt install postgresql-13
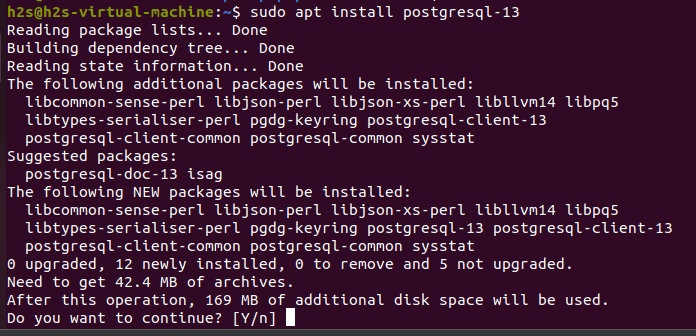
You can check the status of its service using
systemctl status postgresql --no-pager -l

5. Create a database for Sonar
1. Once the installation is completed, let’s create a PostgreSQL database for Sonarqube on Ubuntu 22.04 but before that set password:
sudo passwd postgres
2. Switch to postgres the user. Use the password you have set above.
su - postgres
3. Now, create a new user that will access the database for Sonarqube.
createuser sonaruser
Note: Change sonaruser in the above command with whatever you want to use.
4. Switch to the PostgreSQL shell.
psql
5. To secure a newly created user, set a password for the same using the below syntax:
ALTER USER sonaruser WITH ENCRYPTED password 'yourpassword';
Note: change the bold items with whatever you want to use.
6. Create a new database on PostgreSQL by running:
CREATE DATABASE sonardb OWNER sonaruser;
Note: You can use the DB name as per your choice and also don’t forget to replace the user in the above command with the one you have created.
7. Exit from the psql shell:
\q
8. Get back to your system user
exit
6. Download and Setup SonarQube on Ubuntu 22.04
While writing this article the latest version of the Sonarqube was v-9.0.1 available to download. However, you can directly visit the official website to get the latest version. You can also visit the download page and copy the link to download with wget command, as we have done here:
Note: Here we are downloading the free and open source edition, you can go for paid Developer or Enterprise editions as well.
wget https://binaries.sonarsource.com/Distribution/sonarqube/sonarqube-9.6.0.59041.zip
Note: If you are using a browser to download the SonarQube file then the first switch to the Downloads directory using cd Downloads and then follow the below steps. It is because whatever we download using the browser goes into that.
Extract and move to /opt the directory:
sudo apt -y install unzip
sudo unzip sonarqube-*.zip -d /opt
sudo mv /opt/sonarqube-* /opt/sonarqube
Set user permission: We have created a dedicated user for SonarQube, hence, give the extracted permission to that user.
sudo chown -R sonarh2s:sonarh2s /opt/sonarqube
7. Configure Database for SonarQube
1. Open the configuration file:
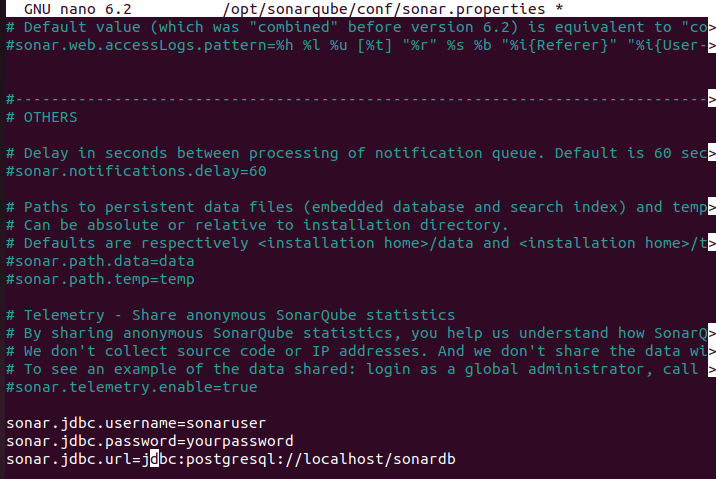
sudo nano /opt/sonarqube/conf/sonar.properties
2. Now, add the following lines:
Scroll to the end of the file; as shown in the screenshot, copy-paste the following lines. After that change the bold values:
sonar.jdbc.username=sonaruser
sonar.jdbc.password=yourpassword
sonar.jdbc.url=jdbc:postgresql://localhost/
sonardbsonar.web.javaAdditionalOpts=-server
Just replace the given values with what you have used while creating a database on Postgresql for Sonarqube.
sonaruser – is a database username
yourpassword – is the database password
sonardb– is the database name we have created
To save and exit the file- press Ctrl+X and then type- Y and hit the Enter key.
8. Create a Systemd service file
By default, there will be no service file for Sonarqube on Ubuntu 22.04 to start it in the background and with system boot. Hence, we have to create one manually. Here is the way:
sudo nano /etc/systemd/system/sonar.service
Copy-paste the following lines:
[Unit]
Description=SonarQube service
After=syslog.target network.target

[Service]
Type=forking
ExecStart=/opt/sonarqube/bin/linux-x86-64/sonar.sh start
ExecStop=/opt/sonarqube/bin/linux-x86-64/sonar.sh stop
LimitNOFILE=65536
LimitNPROC=4096
User=sonarh2s
Group=sonarh2s
Restart=on-failure

[Install]
WantedBy=multi-user.target
Note: Replace the value of User and Group with the username that you have created at the beginning of the article for Sonarqube.
Save the file- press Ctrl+X then type- Y and hit the Enter key.
Reload the daemon:
sudo systemctl daemon-reload
Then start and enable the service
sudo systemctl enable sonar
sudo systemctl start sonar
Now, check whether the create Sonarqueb service running or not
sudo systemctl status sonar

[optional] Alternatively, you can also use the below commands to start, stop, and check the status:
sudo -Hu sonarh2s /opt/sonarqube/bin/linux-x86-64/sonar.sh status
sudo -Hu sonarh2s /opt/sonarqube/bin/linux-x86-64/sonar.sh start
sudo -Hu sonarh2s /opt/sonarqube/bin/linux-x86-64/sonar.sh stop
To get the console output to know what is happening while starting the Sonarqube server you can use:
sudo -Hu sonar /opt/sonarqube/bin/linux-x86-64/sonar.sh console
This will help resolve some errors.
9. Allow Sonarqube port in Ubuntu 22.04 firewall
To access the web interface of Sonarqube running on Ubuntu 22.04 remotely you have to open its default 9000 port in your Ubuntu system’s firewall:
sudo ufw allow 9000/tcp
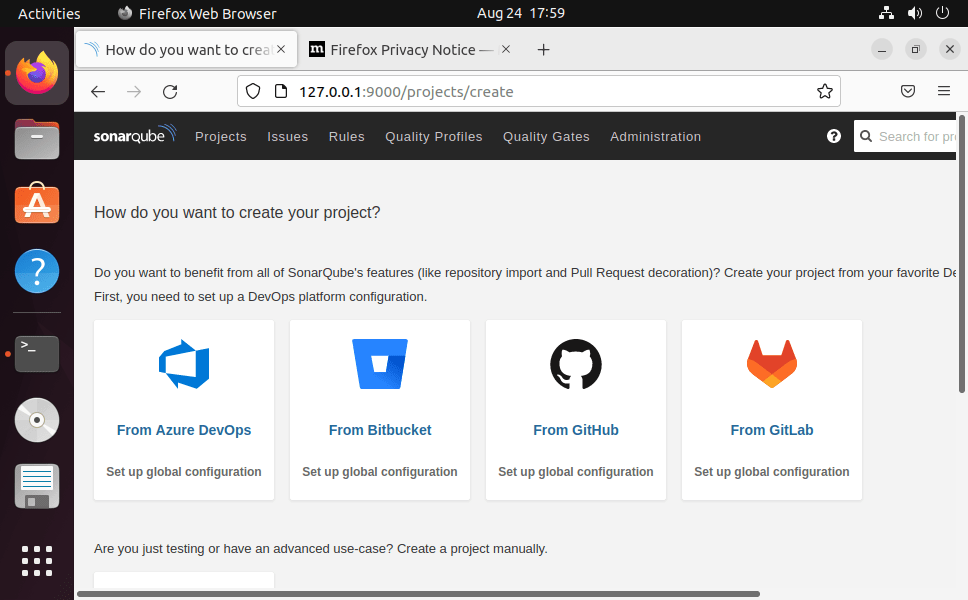
10. Access Web Interface
Finally, open any browser that can access the IP address or domain of the server where you have installed Sonarqube. And point it to-
http://server-ip-addres:9000
or
http://you-somain.com:9000
Note: Replace server-ip-addres with your server/desktop IP address or domain name.
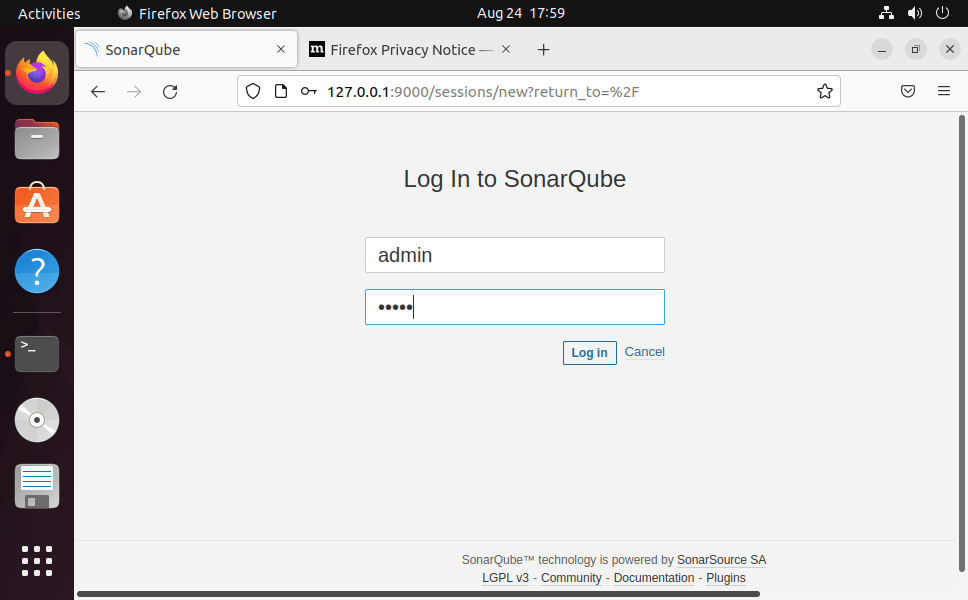
Log in with the default admin username
Once you see the login screen, use the default Sonarqube username and password that is admin.
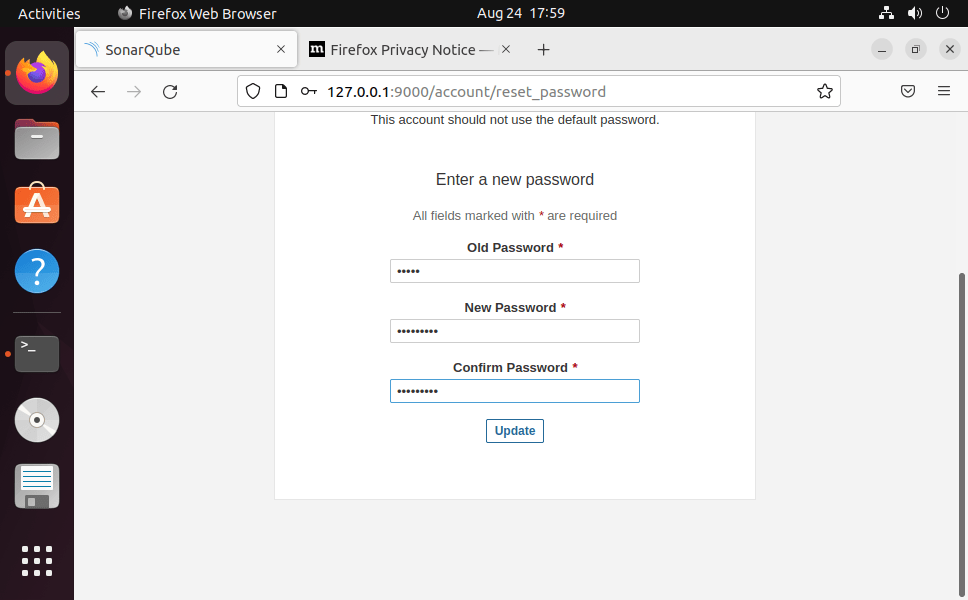
when it asks you to change the old password, do that.
FAQ
SonarQube (formerly it was known as Sona) is an analysis tool that can be used in Java and C# projects to get a holistic view of static and dynamic analyses. As a result, developers do not need to have any knowledge of the configuration of the integrated quality assurance tools.
It can find the security vulnerabilities in more than 20 programming languages along with auto-analyzing code quality to detect code bugs and smells. It also offers reports on duplicated code, coding standards, unit tests, code coverage, code complexity, comments, bugs, and security vulnerabilities.
Yes, the community Edition of the SonarQube is free and open source. Whereas the other three versions of it are paid: namely- Developer (Built for developers by developers), Enterprise (Designed to meet Enterprise Requirements), and Data Center (Designed for High Availability).
Yes, it is. This platform comes fully integrated with DevOps toolchains it comes with: built-in integration with most build tools, which enables in most cases a no configuration approach.
Yes, we can use the SonarQube pre-built Docker image to run it on Docker for testing our code using the GUI web interface of it.
Other Articles:
♦ Install PostgreSQL Server & Client on Ubuntu 22.04 LTS Jammy
♦ Use RDP on Linux mint to access Windows 11/10/7
♦ How to access Ubuntu or Mint via RDP from Windows 7/10/11 to
♦ Install Yandex Browser on Ubuntu 22.04 LTS
♦ Install PrestaShop on Ubuntu 22.04 Server


